Message from the Editor
Hello dear readers and friends!
Pleased to present you another great issue of BASIC Gaming, if I may be so immodest.
Once more we have huge news briefs covering just about everything I could find in the community being released or in development during the last two months, featuring local downloads were possible without making the ezine too bloaty.
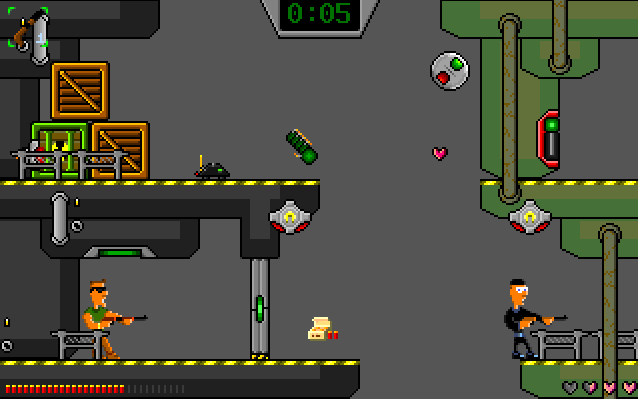
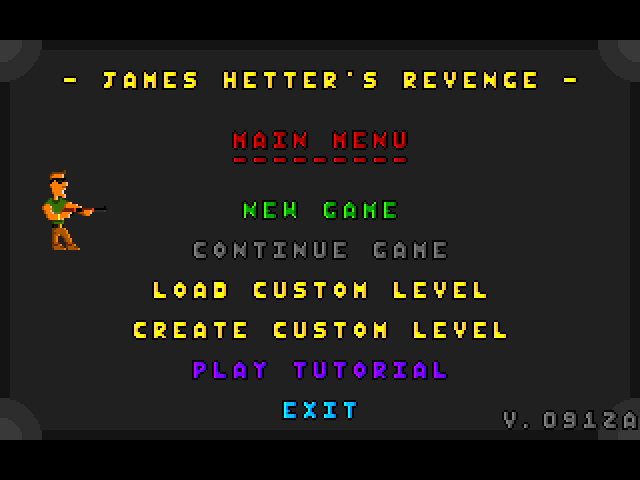
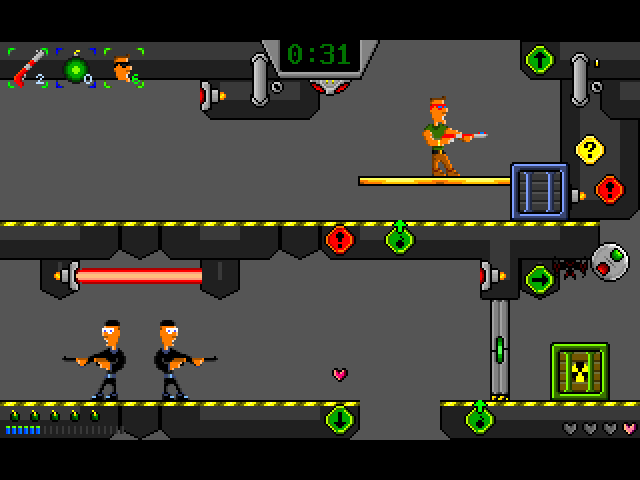
But beside this, in this issue Alexander Pritchard treated us with two interesting articles, relsoft with two tutorials, and I was motivated enough to compile one of my own on color manipulations of sprites, as well as review James Hetter's Revenge.
Once more I'm reminding everyone to consider contributing themselves as well, preferably in the form of tutorials. There are so many game-dev related topics (programming problems, libraries, ...) not covered with tutorials where YOU can contribute!
The community needs tutorials!
But, if it's out of your comfort zone or current sphere of interest, don't sweat. I appreciate any form of contribution to the game development in the community, from maintaining the compilers and library headers above all, reading this ezine, commenting/testing/playing other peoples’ work, to developing yourself. Just let me have something to write about and we'll do fine.
The future is bright. Always. :)
With love,
~ Lachie Dazdarian (lachie13@yahoo.com)
Alpha transparency, RGB to HSV conversions and more graphics manipulations in FB 
Written by Lachie Dazdarian (August, 2012)
Introduction
A while ago someone asked in my forum for help in manipulating colors of sprites loaded from PNG images, including those featuring alpha transparency. There were several problems to deal with, most of which were solved for me by more proficient programmers. Looking back at this code now I see it's quite a useful collection of routines to manipulate graphics loaded from PNG images featuring alpha transparency. So I took a fancy to turn this into a tutorial.
To load PNG images we'll use Yetifoot's PNG library (a.k.a. FBPNG), and I won't go into much details explaining it as it comes with a heap of examples and documentation.
What I will show you in this tutorial is how to turn a color sprite into grayscale (plus two more bonus filters at the end), as well as how to manipulate hue and saturation of your sprites, retaining their alpha transparency. HSV is another way to represent points in RGB color model using hue, saturation and value (lightness). It's simply a more intuitive representation of colors that allows you to manipulate the appearance of graphics more effectively. Read more on the wikipedia page on HSV.
The Tutorial
To run this code you need the previously mentioned PNG library, and you can download the last version here: fbpng_v3_2_q.tar.gz (1426 KB)
We'll also use these two sprites:


We don’t have to load PNG images specifically to apply these filters and manipulations, but this is simply to illustrate how you can use this code with sprites featuring alpha transparency.
First we'll include the necessary inc files to run the code, dimension two sprites, and define some variables used in our code.
#include once "fbpng.bi"
#include once "png_image.bi"

#include "fbgfx.bi"
Using FB

dim as any ptr sprite1, sprite2
dim as integer workpage, hue_set = 220, sat_set = 255
We'll invoke a 640x480 screen in 32bit color depth (of course) and enable alpha channel support for all drawing primitives with GFX_ALPHA_PRIMITIVES handle (only necessary for the purpose of the example program I'll code).
Screenres 640, 480, 32, , GFX_ALPHA_PRIMITIVES
Let's load two sprites using PNG library:
sprite1 = png_load( "lava.png", PNG_TARGET_DEFAULT)
sprite2 = png_load( "ball.png", PNG_TARGET_DEFAULT)
If loading into OpenGL window you'll use PNG_TARGET_OPENGL handle.
For the start, let's create a subroutine that switches sprites into grayscale mode.
sub grayscale (byref img as any ptr)

  'Makes "img" grayscale
  'Copyright (c) Dariusz "Darkhog" G. Jagielski

  dim as integer img_w, img_h, res, img_pitch
  dim as uinteger gray, col

  res = imageinfo (img, img_w, img_h,, img_pitch)
  if res = 1 then
	print #44,"Invalid image" 'replace 44 as file number you opened CONS with
	System(1337)
  end if

  dim as uinteger ptr Pixel = cast(any ptr,img+sizeof(fb.image)) ' read the pixel data of img (skip header)

  for CNT as integer = 0 to ((img_pitch shr 2)*img_h)-1
    	col = *Pixel ' read the first pixel from the image
    	gray = (col SHR 16) AND &hFF
    	gray += (col SHR 8) AND &hFF
    	gray = (gray+(col AND &hFF))/3
    	*Pixel = rgba(gray,gray,gray,(col shr 24)) ' change the current pixel RGBA values
    	Pixel += 1 ' switch to next pixel
  next CNT


end sub
Let's now see how we extract a specific color value (RGB) from a specific pixel. (col SHR 16) AND &hFF extracts the red value from a UINTEGER variable where the color is stored. How? As I said, our color is stored in a 32 bit UINTEGER, in this "format":
AAAAAAAA-RRRRRRRR-GGGGGGGG-BBBBBBBB (&hAARRGGBB)
For red, we shift bytes 16 places so the ones containing information on red color end up on the very end, and we get:
GGGGGGGG-BBBBBBBB-AAAAAAAA-RRRRRRRR
And with AND &hFF (which means AND &b11111111) we do this:
BBBBBBBB-GGGGGGGG-AAAAAAAA-RRRRRRRR AND 00000000-00000000-00000000-1111111 = 00000000-00000000-00000000-RRRRRRRR
Viola! Boolean magic! All that remains is red. So in the routine above we first extract red (first line of code with grey), then extract green and add it to red (second line of code with grey), and finally extract blue and add it to green and red, in the same time dividing with 3 to get the mean value (third line of code with grey).
But how do we loop through our pixels? Well, since PSET can't read alpha value we need to employ pointers to accomplish what we want. Not for this specific routine, but it is necessary for HUE and SAT manipulation, so we better introduce it right away. The following line stores the address of the first pixel of our image/sprite into pointer Pixel (+sizeof(fb.image) is used to skip the header of the image buffer):
dim as uinteger ptr Pixel = cast(any ptr,img+sizeof(fb.image))
To read the data from that address and store it in a variable we use the following line:
col = *Pixel
To advance to next pixel we use:
Pixel += 1
All this is placed in a loop that loops from 0 to the size of the image (number of pixels) minus 1. In our case it depends on the format of FB image buffer and equals (img_pitch shr 2)*img_h.
Once we set the grey value after reading the color values of the current pixel and before advancing to the next one, we place/write the new (grayscaled) color value back into the current pixel address with:
*Pixel = rgba(gray,gray,gray,(col shr 24))
Credits for the pointers code go to Mysoft.
To switch our sprite into grayscale mode we simply call the grayscale subroutine like this:
grayscale sprite_pointer
I'll show you now the routines to switch from RGB to HSV and back. Both were developed by Antoni Gual. First will be declared as a subroutine:
Sub RGB2HSV(ByRef hue As Integer,ByRef sat As Integer,ByRef value As Integer, ByVal myrgb As Integer)
    'by Antoni Gual, 2007
           Dim As Integer max=0,min=255,r,g,b,a
           r=(myRGB Shr 16) And &hff
           g=(myRGB Shr 8) And &hff
           b=myRGB And &hff
           a=myRGB shr 24
           If r>max Then max=r
           If rmax Then max=g
           If gmax Then max=b
           If b=b,0,360)
           ElseIf max=g then
              hue=60.*(b-r)/(max-min)+120
           Else
             hue=60.*(r-g)/(max-min)+240
           End if
End sub
As with the grayscale subroutine we extract from the UINTEGER color variable the red, green, blue and alpha values. If you check wikipedia page on HSV color model you can explore the formulas which make H, S and V respectively, and the background between them. You can observe that:
value = max(R,G,B)
saturation = (max - min)/max = 1 - min/max
hue = 60 * hue´
hue´ = (g-b)/(max-min) mod 6 if max = r
hue´ = (b-r)/(max-min) + 2 if max = g
hue´ = (r-g)/(max-min) + 4 if max = b
Applying these formulae properly we create the code that converts our RGB color values into HSV values, with H ranging from 0 to 359, and S and V ranging from 0 to 255. S is saturation. 0 is neutral grey, 255 is full color. V is value (lightness). 0 is black, 255 is maximum brightness.
A function for converting from HSV to RGB:
Function HSV2RGB(Byval hue As Integer, Byval sat As Integer,Byval value As Integer, Byval a As Integer )As Integer
 'by Antoni Gual, 2007

  If sat = 0 Then Return RGBA(value,value,value,a)

  hue  Mod = 360
  Dim As Single h1 = hue/60
  Dim As Integer i = Int(h1)
  Dim As Single f = frac(h1)
  Dim As Integer p = value * ( 255 - sat )/256
  Dim As Integer q = value * ( 255 -  f*sat)/256
  Dim As Integer t = value * ( 255 - ( 1. - f )*sat)/256

  Select Case As Const i
    Case 0: Return RGBA(value,t,p,a)
    Case 1: Return RGBA(q,value,p,a)
    Case 2: Return RGBA(p,value,t,a)
    Case 3: Return RGBA(p,q,value,a)
    Case 4: Return RGBA(t,p,value,a)
    Case 5: Return RGBA(value,p,q,a)
  End Select

End Function
We have 6 main colors:
RED(255,0,0)
YELLOW(255,255,0)
GREEN(0,255,0)
CYAN(0,255,255)
BLUE(0,0,255)
PURPLE(255,0,255)
So we divide hue into six parts. The integer part of h1 is the the first color that will be blended and the fractional part of h1 is the how much of the next main color will be blended. So if i is 0 and f is 0.5, it will start from RED(255,0,0) and proceed to 50% of the next on the group that is yellow(255,255,0). Refer to wikipedia for more insight into HSV to RGB conversion.
We'll create now two simple functions that will allow us to set the hue and saturation of a specific image/sprite in real time:
sub set_hue (byref img as any ptr, hue_value as integer)

dim as integer img_w, img_h, res, h, s, v, a, img_pitch
dim as uinteger col
dim as ubyte red, green, blue
res = imageinfo (img, img_w, img_h,, img_pitch)
if res = 1 then
	print #44,"Invalid image" 'replace 44 as file number you opened CONS with
	System(1337)
end if

dim as uinteger ptr Pixel = cast(any ptr,img+sizeof(fb.image))
  for CNT as integer = 0 to ((img_pitch shr 2)*img_h)-1
    	col = *Pixel
    	RGB2hsv(h,s,v,col)
	h = hue_value
    	*Pixel = HSV2RGB(h,s,v,(col shr 24))
    	Pixel += 1
  next CNT

end sub

sub set_sat (byref img as any ptr, sat_value as integer)

dim as integer img_w, img_h, res, h, s, v, a, img_pitch
dim as uinteger col
dim as ubyte red, green, blue
res = imageinfo (img, img_w, img_h,, img_pitch)
if res = 1 then
	print #44,"Invalid image" 'replace 44 as file number you opened CONS with
	System(1337)
end if

dim as uinteger ptr Pixel = cast(any ptr,img+sizeof(fb.image))
  for CNT as integer = 0 to ((img_pitch shr 2)*img_h)-1
    	col = *Pixel
    	RGB2hsv(h,s,v,col)
	s = sat_value
    	*Pixel = HSV2RGB(h,s,v,(col shr 24))
    	Pixel += 1
  next CNT

end sub
They function the same as the grayscale subroutine, we only write different stuff to the currently selected pixel address. We first convert to HSV, manipulate the desired value (H or S), and then convert it back to RGB.
Let's put them into action in our main loop.
Do

GETMOUSE mx,my,, mbutton
screenlock
screenset workpage, workpage xor 1

CLS

LINE (120,20)-(220,120), RGBA(255,255,255,255), BF
LINE (230,20)-(330,120), RGBA(255,0,0,255), BF

put( 0, 0 ), sprite1, ALPHA, 50
put( 0, 80 ), sprite1, ALPHA, 150
put( 0, 160 ), sprite1, ALPHA, 200
put( 0, 240 ), sprite1, ALPHA, 250

put( mx, my ), sprite2, ALPHA

If Multikey (SC_1) THEN
    hue_set = hue_set - 5
    If hue_set < 0 then hue_set = 0
    set_hue sprite2, hue_set
End If
If Multikey (SC_2) THEN
    hue_set = hue_set + 5
    If hue_set > 359 then hue_set = 359
    set_hue sprite2, hue_set
End If
If Multikey (SC_3) THEN
    sat_set = sat_set - 5
    If sat_set < 0 then sat_set = 0
    set_sat sprite2, sat_set
End If
If Multikey (SC_4) THEN
    sat_set = sat_set + 5
    If sat_set > 255 then sat_set = 255
    set_sat sprite2, sat_set
End If

LOCATE 50,1
PRINT "Change HUE with 1-2, SATURATION with 3-4"
PRINT "HUE: "+ STR$(hue_set)
PRINT "SATURATION: "+ STR$(sat_set)


workpage xor = 1
screenunlock

Sleep 25,1

Loop Until Multikey(SC_ESCAPE)
Now, the last code allows us to move the ball sprite around with the mouse and change its hue and saturation values with 1-4 keys.
The entire code so far: codewip1.txt
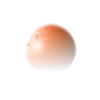
Some of the results of color manipulations:

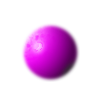

First image HUE 220/SAT 255, second image HUE 300/SAT 255, third image HUE ANY/SAT 0.
Now, for the very end, I'll create two more subroutines to manipulate sprites. It's some simple code to illustrate how you can use the here available methods to alter pixels in any sprite according to your needs and wishes. First, let's create a checkerboard effect, or in other words, exclude every second pixel in our sprite.
sub checkerboard (byref img as any ptr)

	' checkerboard effect by Lachie D., 2012.

	dim as integer img_w, img_h, res, img_pitch
	dim as uinteger col
	dim as integer r, g, b, a
	dim as integer checkb, row_eo
	res = imageinfo (img, img_w, img_h,, img_pitch)
	if res = 1 then
		print #44,"Invalid image" 'replace 44 as file number you opened CONS with
		System(1337)
	end if

  	dim as uinteger ptr Pixel = cast(any ptr,img+sizeof(fb.image)) ' read the pixel data of img (skip header)
  	for CNT as integer = 0 to ((img_pitch shr 2)*img_h)-1
    		col = *Pixel ' read the first pixel from the image
    		checkb = (checkb MOD 2) + 1
    		IF frac((CNT)/(img_pitch shr 2)) = 0 Then ' we change from odd to even row by
        		row_eo = (row_eo MOD 2) + 1           ' checking if the current pixel
   		 End if                                    ' address is the last in the row
    		r=(col Shr 16) And &hff
    		g=(col Shr 8) And &hff
   		 b=col And &hff
    		a=col shr 24
    		IF row_eo > 1 And checkb > 1 Then *Pixel = rgba(r,g,b,0) ' delete the current pixel, depending on checkb and row (even or odd)
    		IF row_eo = 1 And checkb = 1 Then *Pixel = rgba(r,g,b,0) ' delete the current pixel, depending on checkb and row (even or odd)
    		Pixel += 1 ' switch to next pixel
  	next CNT

end sub
The code should be self-explanatory.
The final subroutine I'll introduce will simply fade-out the sprites as we count the pixels, giving an effect of sprite disappearing toward the bottom.
sub fadeout_bottom (byref img as any ptr)

	' fadeout effect by Lachie D., 2012.

	dim as integer img_w, img_h, res, img_pitch
	dim as uinteger col
	dim as integer r, g, b, a
	res = imageinfo (img, img_w, img_h,, img_pitch)
	if res = 1 then
		print #44,"Invalid image" 'replace 44 as file number you opened CONS with
		System(1337)
	end if

  	dim as uinteger ptr Pixel = cast(any ptr,img+sizeof(fb.image)) ' read the pixel data of img (skip header)
  	for CNT as integer = 0 to ((img_pitch shr 2)*img_h)-1
   		 col = *Pixel ' read the first pixel from the image
   		 r=(col Shr 16) And &hff
   		 g=(col Shr 8) And &hff
   		 b=col And &hff
   		 a=(col shr 24)
    		 a = a - CNT/(img_pitch shr 2)*4 ' as we count pixels reduce ALPHA
    		 if a < 0 Then a = 0 ' when alpha is below 0, cap it to 0
    		 *Pixel = rgba(r,g,b,a)
    		 Pixel += 1 ' switch to next pixel
  	next CNT

end sub
Again, the code is self-explanatory. This is all to illustrate how creative you can be by manipulating the pixels of your sprites.
The effects of the last two subroutines applied on the ball sprite:

Experiment yourself! You can do anything!
Download the entire code with the graphics files: HSVRGBtut.zip
Hope you found this tutorial useful. Cheers!
A tutorial written by Lachie D. (lachie13@yahoo.com ; The Maker Of Stuff)
Platform Games 101 - A Jump and Run Game Article for the 6 Year Old in All of Us Part 1
Written by Richard Eric M. Lope (September, 2012)
TABLE OF CONTENTS
I. How to Jump
II. Finite State Machines
IIIA. Tile-Based Collisions (with Slopes?)
IIIB. Line-Based Collisions
IV. 3D/2.5D Rendering with Tile-Based Collisions
V. Voltes V (Object Management and Collision)
VI. Lucky 7 Game States, Sound and Input
VII. Sample Game
I. How to Jump
Hello there folks! It's been a while since I made an article for any online magazine. I decided to write an article about plarform games since there seems to be no jumping game dedicated tutorial in BASIC. That, and Lachie has been a very good friend of mine and there's that little DS homebrew I made that made few people ask how I did it (and also asked for the source).
This tutorial would be a series of article (just like my very old software 3D tutorial) that would tackle the basics of jumping to the advanced object management using Finite State Machines.
I will be making this tutorial on the basis of my past experiences making platform games (and I've made a lot of engines). So it's safe to assume that what I will be writing would be what I think is the best solution I know of.
Let's begin.
How do we Jump?
A. Jump Equation:
I would assume anyone who is trying to make a Mario clone would have the knowledge to move a pixel on the screen. Moving a pixel on the screen is just a matter of adding or subracting a value from a certain position.
x = x + dx
y = y + dy
Dx and Dy are the components of your velocity. These two would be the basis of movement in any game you make, be it a Mario clone or a Gradius clone.
Now jumping is a little bit more complex. No, we will not use actual physics for this, but I'll give you the relationship as we go on. Here are the things we need to make our object jump.
-
Gravity (a constant)
- Jumpheight (in Physics you call this Vi or initial velocity)
- Velocity (x-axis only since Gravity would take care of our Yvelocity)
The pseudo-formula for every frame:
x = x + velocity (Vi or dx)
y = dy + gravity * frame
You will notice that x moves lineary, but y moves geometrically. The relationship of this to physical nature is "projectile motion" where:
	x = Vi * t
	y = (-g*t^2)/2
where:
	dx = velocity(Vi)
	dy = -g * t
See the relatioship of our pseudo-formula to the actual forumula yet? Nope? Try substituting t to frame. Let t = frame and you'll see.
Of course since we are making a game and not a simulation, we didn't use the actual formula.
The simple pseudo-formula can be written:
For every frame:
- Add velocity to x
- Add gravity to dy
- Add Dy to y
	Dx = Speed						'' Set x velocity to speed
	Dy += GRAVITY 						'' pull the object downwards

	x += Dx							'' Move Horizontaly
	y += Dy							'' Move Vertically
This is what jumping is all about and here's a demo that shows you the graph of our jumping velocities. Note that I'm using Easy GL2D for rendering since I wan't to use hardware acceleration. See foonote for the links on how to use the lib.
jumpgraph.zip
And a demo showing it as a bouncing ball:
jumpbounce.zip
B. How to Jump with the keyboard
Now that you know the math behind "videogame jumps", it's time to make use of our keyboard to make that ball move and jump when we want it to. We want to move the ball left if we press LEFT and right if we press RIGHT then we want it to jump when we press SPACE.
Here's the code for our input:
	if( x < 0 ) then				'' Move the other way if we hit boundaries
		Speed = -Speed
	EndIf

	if( x > SCREEN_WIDTH ) then		'' Ditto
		Speed = -Speed
	EndIf

	'' Jump if we are pressing space
	if multikey(FB.SC_SPACE) then
		if( CanJump ) then			'' Only jump if we CanJump
			Dy = -JUMPHEIGHT		'' This makes us jump
			CanJump = false			'' We can't jump while Jumping
		end if
	EndIf

	Dx = Speed						'' Set x velocity to speed
	Dy += GRAVITY 						'' pull the object downwards

	x += Dx							'' Move Horizontaly
	y += Dy							'' Move Vertically
All this code does is set our velocity to (-) when we want to go left and vice-versa when we pressed RIGHT. Our Y position cannot be contrlled and is affected by gravity so no need to check for input. To jump we just set the initial value of Dy to -JUMPHEIGHT for our initial y-velocity. Then let our trusty formula do the work. You might be asking why -JUMPHEIGHT? Well, it is because standard 2D screens has y-reversed axis with (0,0) being the top-left corner of the screen. Blame it on our ancestors not me. ;*)
You might also be wondering about the CanJump variable. It's a variable to test whether we can jump again or not. You don't want to jump again while jumping right? So when can we jump? We can jump when we hit the floor.
	if( y + Dy > FLOOR_VALUE ) then '' we hit the floor
		y = FLOOR_VALUE				'' Snap to floor
		Dy = 0					'' stop moving downwards
		CanJump = TRUE				'' We can jump again
	EndIf
The above code checks our yposition + y-velocity against our arbitrary floor value. If it's over(meaning under the floor), we snap back up to floorvalue, set y-velocity to 0 and set "CanJump" to TRUE so that we can jump again.
Here's the demo:
jumpviakey.zip
However you will see that we are jumping continously as long as we are pressing the space button and Mario does not do that. How do we fix it? The fix is a very simple Multikey() test.
English:
	"If we hit floor and we are still holding the jumpKey, then we can't jump."
	"If we hit floor and we are not holding the jumpKey, then we can jump."
	if( y + Dy > FLOOR_VALUE ) then	'' we hit the floor
		y = FLOOR_VALUE						'' Snap to floor
		Dy = 0							'' stop moving downwards
		if( not multikey(FB.SC_SPACE) ) then CanJump = TRUE  	'' Only jump of we released Space
	EndIf
Demo:
jumpjumpkey.zip
But you may complian that, "Mario can jump lower or higher depending on how long I press the jumpkey." How can I do that? Easy, just stop jumping when you release the jump key. "Err.. How is that again?"
English for the 6 year-old:
	"If we are in the middle of a jump and we are going up but we stopped pressing the jumpkey,
	we stop Mario from jumping further. Instead we make him go down."
	'' Jump if we are pressing space
	if multikey(FB.SC_SPACE) then
		if( CanJump ) then			'' Only jump if we "CanJump"
			Dy = -JUMPHEIGHT		'' This makes us jump
			CanJump = FALSE			'' We can't jump while Jumping
			Jumping = TRUE			'' Set jump flag to true
		end if
	else						'' We stopped pressing space so...
		if( Jumping ) then  			'' Limit height if we are jumping
			if( Dy < 0 ) then		'' only limit height when we are "going up"
				Dy = 0			'' Stop going up
			EndIf
		EndIf
	EndIf
Demo:
jumplimitheight.zip
So I guess that's all for our Jumping article. Next time I'll make an article you'll love because it would make entity (Player, Enemies, GameEngine, etc.) management very easy. It's called Finite State Machines.
Bye for now.
~ Relminator (changed my nom de plume ;*) ) out.
Easy GL2D turorials:
http://back2basic.phatcode.net/?Issue_%232:Basic_2D_Rendering_in_OpenGL_using_Easy_GL2D%3A_Part_1
http://back2basic.phatcode.net/?Issue_%232:Basic_2D_Rendering_in_OpenGL_using_Easy_GL2D%3A_Part_2
Platform Games 101 - A Jump and Run Game Article for the 6 Year Old in All of Us Part 2
Written by Richard Eric M. Lope (September, 2012)
II. Finite State Machines
Introduction
Finite State Machines (FSM) is a technique I first heard from "The Artist Formerly Known As Nekrophidius/Nekrosoda(TAFKAN)". I don't know how he calls himself these days, but last time I heard he's Adosorken. ( Hmn... Nekrosoda = Adosorken then that means TAFKAN = NAKFAT? j/k). I heard about it when he made a cool-looking fighting game in QB using FSM! I guess 640kb was enough if you were using FSM. That was the thing that got me interested in FHM. Ooops, I mean FSM.
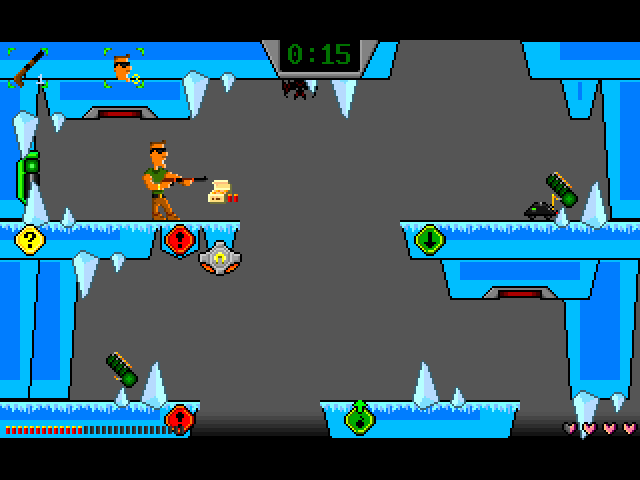
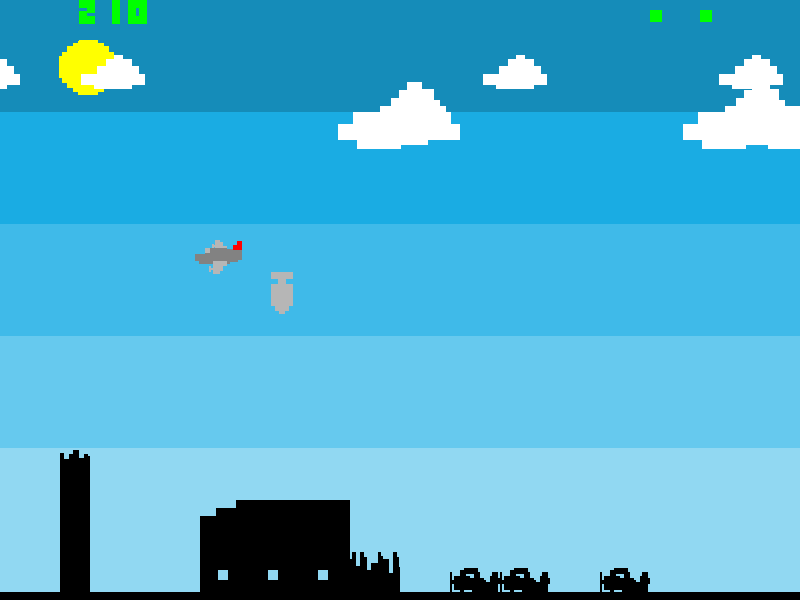
However, being so stubborn, I refused to make use of it for a while since I can do what I want using normal programming techniques. FSM's use only became apparent to me when I finished 2 Nintendo DS games. They are:
1. Space Impakto DS
2. Fuzed DS
Of course what I did worked. SI DS won a competition and Fuzed while just released got good reviews. But I could have used straight FSMs and made those games in half the time and half the effort.
Take this scenario when I prototyped my player class for Fuzed:
Player Actions: Idle, Run, Jump, CanGetHit
That's about it.
So I just added a few boolean members jumping and ishit. I was easy to code doing jumping and getting hit. Nothing a few if statement can't fix. The problem started when I "designed" the gameplay. I wanted a puzzle game that is like Sokoban, Solomons Key, MoaiKun and Mario combined.
Now the player actions are:
- Idle
- Run
- Jump
- Get hit
- Die
- Climb Ladders
- Attack
- Cast magic (2 types)
- Plant Bombs
- Push blocks
- Throw Blocks
All of which is done while being in a 3D world with lots of object interaction. I swear, I thought about using FSM for the actions my hero can do, but me being me (lazy and stubborn), I just somehow didn't. So while my player class works well (it can do everything I want it to do), the code is a maze of if then else, and (&&) or (||), etc., that trying to update it and adding another action type means there would be something that would make it break. Lesson, think of the future and use a technique you know better works for a particular system and not always rely on your programming skeeelz.
What exactly is FSM?
FSM has been used in a lot of high-profile games like Quake and Warcraft III for entity management. It is also used heavily in circuitry. FSM means that an entity/object, be it an enemy or player or game engine, has only ONE state at a given time. By "finite" it means that a complex entity like a player can be coded in such a way that complex behaviors can be segregated into smaller finite actions.
As programmers we usually decompose our program into subs and functions. FSMs work the same way. That is, instead of decomposing program logic, FSMs decompose entity behavior.
FSM have at least 3 directives (4 if you include Transition, but it's not necessary for our purposes):
- State
- Trigger/Event
- Action
State is just a value you give your entity like:
	JUMPING
	WALKING
	PLANT_BOMBS
	GET_BORED
Trigger are events that would make an entity "transition" from one state to another state like:
Player Presses RightKey
Action is what action to take for a particular state:
	When State = WALKING
	x += speed (Action)
Summing it up, an FSM in action is something like:
	State = IDLE (State)
	PlayerPresses JumpKey (Event)
	State = JUMP
	PlayerJumps (Action)
Some rules I made up:
1. An an entity can only do ONE action at a time. It can never walk while jumping it can never plant bombs while jumping, etc.
2. Each state can transition from one state to another and vice versa. So you can change state from JUMPING to WALKING or IDLE to JUMPING.
3. Some states cannot transition to other states. So you cannot Plant bombs when Jumping or Swim when Idle because Idle does not move you and the water tile is 15 pixels away.
4. States should never have multiple actions attached to them. In essence "1 State for 1 Action". So having a state that is jumping could only call ActionJumping().
5. State Functions can have multiple events inside them that checks which state to transition to. Say you are in Idle state and we know we can transition from:
	IDLE to JUMPING
	and
	IDLE to WALKING
The ActionIdle() attached to that state will have events to check for jumping and walking. ie.
	sub ActionIdle()
		if Right/Left Key is pressed
		   SetState(WALKING)
		end if
		if Jumpkey Key is pressed
		   SetState(JUMPING)
		end if

		'' Do idle logic
	end sub
Here's a little diagram to help you visualize the flow of logic:
	States: IDLE, WALKING, JUMPING

	IDLE 		-> Can transition to WALKING
				-> Can transition to JUMPING
	JUMPING		-> Can transition to WALKING
				-> Can transition to IDLE
	WALKING		-> Can transition to JUMPING
				-> Can transition to IDLE
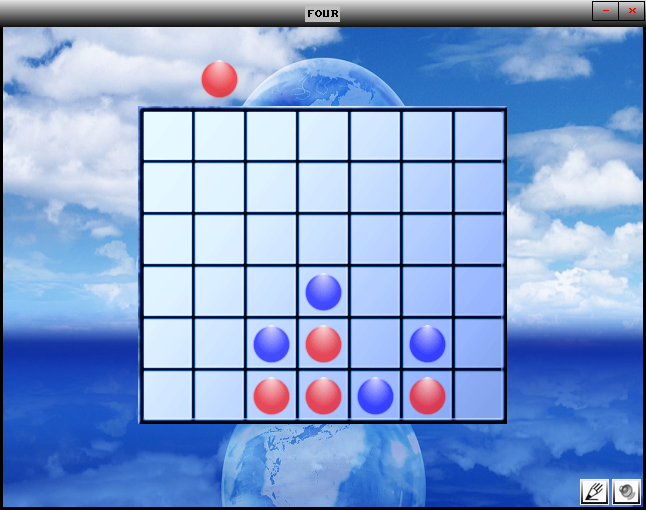
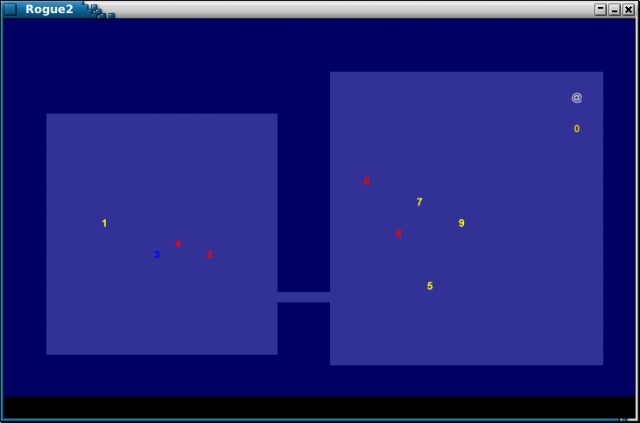
Here's the code (box is colored differently depending on its state):
FSMsimple.zip
Before trying to code our Hero (we shall call him "Gripe" ), we need to give him a minimum number of states. This would make coding it easier.
Gripe States:
	State				Can Transition to
	1. IDLE				2,3,4,5,6,7
	2. WALKING 			1,3,5,6,7
	3. JUMPING			1,2,7
	4. GET_BORED			2,3,7
	5. LIGHT_DYNAMITE		1,7
	6. PLANT_BOMB			1,7
	7. DIED				1,7
So if say we are Jumping, then we can only transition to IDLE, WALKING, or DIED. We cannot plant bombs or light a dynamite while jumping.
While most transitions are handled with events regarding keyboard input, I've also introduced different ways to handle events for transition to the next state. ie:
IDLE -> GET_BORED has a counter that if it gets to a certain amount, Gripe "gets bored" and blinks doing nothing.
PLANT_BOMB -> IDLE uses the sprite frame of Gripe while planting bombs. If the spriteframe is equal to maxframe then set state to IDLE.
How do we check what action to take depending on the hero's state then? By a simple Select Case statement (I'll be as language agnostic as possible here and implement the simplest methods). You can also use function pointers, but I don't want to muddle the article with eclectic methods. Yes I used function pointers to do FSM in C++. Also, there's a multitude of ways to implement FSM, this is just one, so try to implement it in a way that is most "natural" to your coding style.
	sub Player.Update()

	Counter += 1
	Animate()		'' Animate player

	'' Check to see the Player State and
	'' Update accordingly

	'' In my DS game I used function pointers
	'' But I have no idea how to get and call
	'' function pointers of class methods in FB
	'' so I used select case which is not too bad.
	Select Case State
		case IDLE:
			ActionIdle()
		case WALKING:
			StandingCounter = 0    '' Set bored counter to zero since we don't want to get bored while walking
			ActionWalking()
		case JUMPING:
			StandingCounter = 0
			ActionJumping()
		case FALLING:
			StandingCounter = 0
			ActionFalling()
		case BORED:
			StandingCounter = 0
			ActionBored()
		case LIGHT_DYNAMITE:
			StandingCounter = 0
			ActionLightDynamite()
		case PLANT_BOMB:
			StandingCounter = 0
			ActionPlantBomb()
		case DIED:
			StandingCounter = 0
			ActionDied()
	End Select

End Sub
StandingCounter is the counter that makes the hero bored. Noticed that I set it to 0 for every action except IDLE? That's because we can only get bored while standing for a while. I could have put those StandingCounter = 0 inside the Action*() subs itself, but I thought this way would be better understood.
Now Let's see an example Action*() sub:
	Sub Player.ActionJumping()

	'' You will notice that there is no way to plant bombs or dynamite within this sub
	'' This is the beauty of FSM. You can limit behaviors depending on your needs.
	'' I didn't want the player to plant bombs or dynamites while jumping or falling so
	'' I just didn't include a check here.

	dim as integer Walked = FALSE    '' a way to check if we moved left or right
									 '' Since Dx is single and EPSILON would not look
									 '' good in a tutorial

	Dx = 0  '' Set speed to 0
	'' We can move left or right when jumping so...

	'' If we pressed left then we walk negatively
	'' and we set the State to WALKING since we moved
	if multikey(FB.SC_LEFT) then
		Dx = -speed
		Walked = TRUE  			''Set walked to true for checking later
		Direction = DIR_LEFT
	EndIf

	'' See comments above
    if multikey(FB.SC_RIGHT) then
    	Dx = speed
    	Walked = TRUE
    	Direction = DIR_RIGHT
    EndIf

    '' We can die while jumping
    if multikey(FB.SC_C) then
    	State = DIED
    	Dy = -JUMPHEIGHT	'' Mario Style death
		ResolveAnimationParameters()
    EndIf


	'' Make the player fall down with GRAVITY
	Dy += GRAVITY

	x += Dx		'' Move player
	y += Dy		'' Ditto

	'' y = 400 is our arbitrary floor so set Dy = 0
	'' and snap the y position to 400 - Hei
	If( y + Hei > FLOOR_VALUE ) then
		Dy = 0
		y = FLOOR_VALUE - Hei
		CanJump = true	'' We hit floor so we can jump again

		'' Check if we walked or not
		if( Walked ) then
			State = WALKING	'' Set the State to WALKING when we hit the floor
			ResolveAnimationParameters()
		else
			State = IDLE	'' Ditto
			ResolveAnimationParameters()
		EndIf

	End If

	End Sub
Since we can't Plant Bombs or Light a Dynamite when we are Jumping, we don't handle events for them inside this Action(). We only check events for WALKING and IDLE since we can transition to those states from JUMPING.
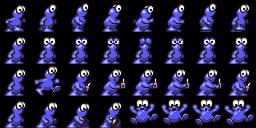
ResolveAnimationParameters() is just as sub that sets up starting animation parameters for each State. Yes, FSM can also be used to manage your animations. See gripe.bmp for details.
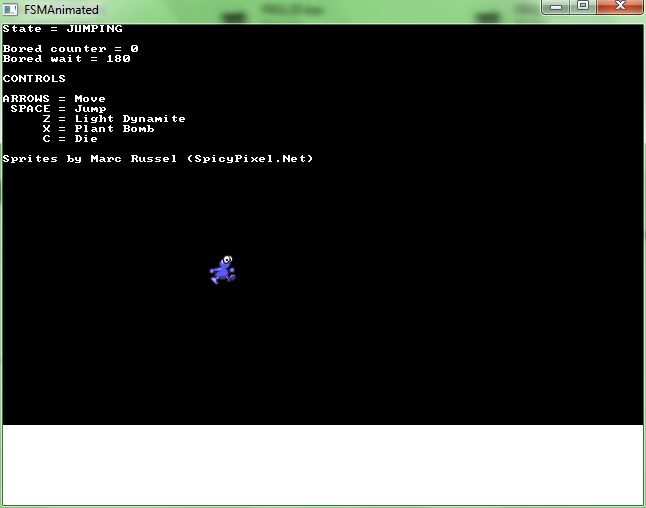
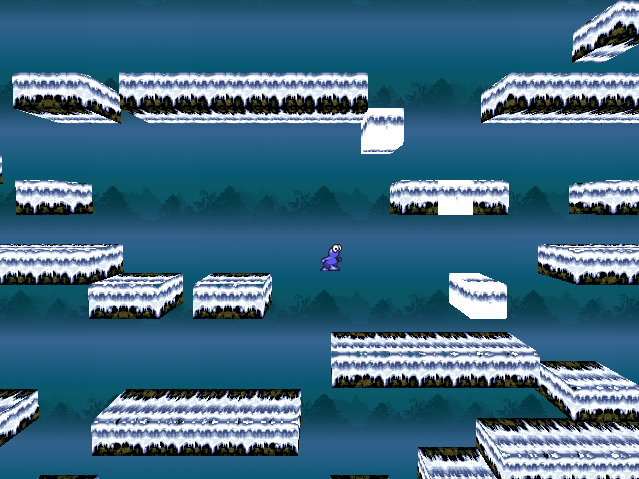
Here's the demo (try to play with it a bit to see the state machine in action):
FSManimated.zip
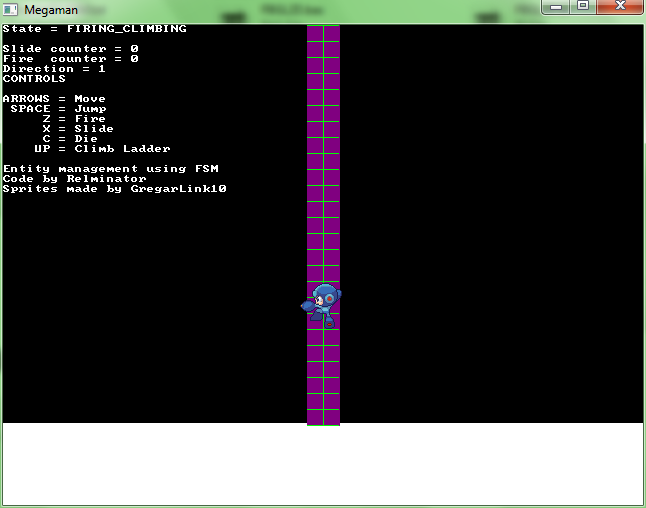
And the clincher...
A megaman demo being run by FSM that can do what megaman in Megaman Powered Up (PSP) can do. Would you believe I was able to code this in less than 2 hours?
FSMmegaman.zip
Now that you understand FSMs, it's easy to experiment with it and use a system of implementing it that suits your style. You can use Method Pointers, Listeners, Senders, etc. As they say, "Your code, your style". ;*)
Before I sign off, the next chapter would be about Tile-Based collisions (will probably take up geometric collisions too).
Here's a sneak preview:
FSManimatedmap.zip
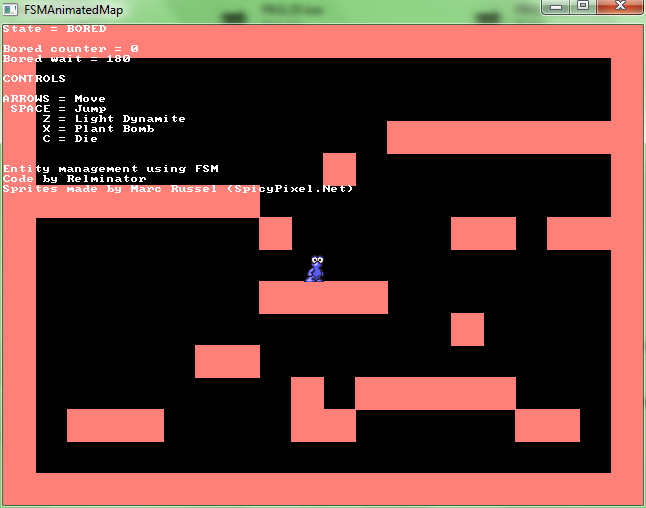
That's it for FSMs. FSMs are great, but they are not a panacea for all things. They have their pros and cons and it's up for you to decide when and where to use it. ;*)
~ by Relminator (Richard Eric M. Lope) - http://rel.phatcode.net


