Will reset screenmode to SCREEN 0, you have to call this before
you can call SCREEN 0.
Returns a string, the current videomode that is supported.
When string is empty then it has found no more supported vide
modes.
Paging will allow you to draw on the screen while its not visible yet.
If the current video mode supports more than 1 page, you can do dubble buffering.
By drawing everything on page 1 for instance, and at the end you view page 1,
then drawing all on page 0 and at the end set view page to 0 etc.
The Future Software Library has the following subs/functions for you handling paging:
SUB Future.LoadFONT (filename$)
--------------------------------
SUB Future.PRINT (X,Y, T$, F, B)
--------------------------------
X : X position
Y : Y position
T$ : string holding text to be printed
F : Text color
B : Text's background color
Will print on position X,Y text (holds T$). If you want to print numbers:
text$ = "Number:" + STR$(number)
It will use the current font. Read SetFont for more information about fonts.
Note:
When F or B are -1 then nothing will be drawn.
Example:
' Example Program PRINTME
' by Stefan Hendriks

'$INCLUDE: 'future.bi'
Set640x480 (8)  ' Just our good old SCREEN 13
Future.PRINT 0, 15, "Hello world! - very boring, but does the trick...", 7, -1
WHILE INKEY$ = "": WEND
ReSetScreen
Another example:
' Example Program PRINTCL
' Nice trick with PRINT
' by Stefan Hendriks

'$INCLUDE: 'future.bi'
DEFINT A-Z
set640x480 (8)  ' Just our good old SCREEN 13

text$ = "Our string people!"

future.PRINT 0, 0, "Cool trick with PRINT.", 7, -1
future.PRINT 0, 15, "At first you draw (using Future.LINE) 15 lines at the current length", 7, -1
future.PRINT 0, 31, "of your string, a character in this mode is standard 16X8 so the we ", 7, -1
future.PRINT 0, 47, "have LEN(string) * 8.", 7, -1
FOR i = 0 TO 15
Future.Line 0, 60 + i, 0 + LEN(text$) * 8 - 1, 60 + i, 16 + i, -1
NEXT i
WHILE INKEY$ = "": WEND
future.PRINT 0, 80, "As above, now, we print the string over that position and set", 7, -1
future.PRINT 0, 96, "the forground color to -1 and the background to 0", 7, -1
FOR i = 0 TO 15
Future.Line 0, 110 + i, 0 + LEN(text$) * 8 - 1, 110 + i, 16 + i, -1
NEXT i
WHILE INKEY$ = "": WEND
future.PRINT 0, 110, text$, -1, 0
future.PRINT 0, 200, "Cool eh?", 7, -1
WHILE INKEY$ = "": WEND
resetscreen
------------------
SUB SetFont (Mode)
------------------
Mode is the size of your font here, in pixels.
Mode can be:
0 - 8x8
1 - 8x16
2 - 8x14
In 320x200 mode, the font size is by default 8x8 (Mode = 0). Any other screen size will deliver
8x16 (Mode = 1) as default.
AFTER setting the screenmode, you can use this function.
Notes:
You can set the font to default (after loading one from a file) using this SUB
Example:
' Example Program FONT
' by Stefan Hendriks

'$INCLUDE: 'future.bi'
Set640x480 (8)  ' Just our good old SCREEN 13
Setfont 0
Future.PRINT 0, 15, "Font 0... 8x8", 7, -1
Setfont 1
Future.PRINT 0, 31, "Font 1... 8x16", 7, -1
Setfont 2
Future.PRINT 0, 47, "Font 2... 8x14", 7, -1
WHILE INKEY$ = "": WEND
ReSetScreen
-------------------------------
SUB Future.LoadFONT (filename$)
-------------------------------
This sub will load the FONT from a file, you can make with the FONT editor.
To get the default font back, use Setfont.
The rest of the article will be in the next issue of the QB Times!
This article was written by Stefan Hendriks of Future Software
Marcade goes bughuntin'
Have you loaded up yer shotgun, checked yer grenades and painted yer face black yet?! We're going
bughuntin' tonight.
One of the most important, most fun and most annoying parts of programming is debugging; finding and
removing bugs. It often gets too less attention by the average programmer, resulting in programs with the
stupidest bugs which take days to remove, and in the end it only turns out the plussign should have been the
minus sign.
Here I will tell you about some debugging ways I use myself, how I used to debug, how I debug nowadays,
because one thing you defenitely learn during your programming experiences, it is debugging.
..
Debugging is nothing more than checking for variables, if they have the contents they should have. When
you start programming a part of your program, like the part where your NPC (Non Player Character, a
sprite that walks independently of the player) is walking, you always start off thinking, what kind of
structure you will code in.
Will you first do a part where it randomly assigns an X and Y coord to where the NPC walks? Or will you
first make it check if it still is walking or not? Or first a random number deciding IF it will walk or not? Or
maybe it can jump too? And what if it will walk, will it walk pixel by pixel? Will it have other abilities to
walk?
Then you will decide what variables you need, and what EXACTLY is gonna be in them. This is
important. You cannot debug if you don't know what is in your variables, or what should be in your
variables. You need to know, that if your puppet is on the wrong spot of the screen, what variables to
check. That's why it's always handy to use variables with a name that kind of tells where they are going.
Personally, I always use 'X' and 'Y' for a current location of an object, 'XT' and 'YT' for a current target
destination of an object, 'Speed' of object movement, etc,etc.
When you determined that, dimensioned your variables and arrays (and the program still works, ALWAYS
try to run your program as soon as it should be able to run and continue, because it get's allot easier that
way which part of your code contains the bug) and start off programming the actual code, you need to keep
in mind it should be easy to check your variables.
If you actually see onscreen what your variables are doing, it is allot easier to determine what wend wrong.
..
What I do nowadays, as soon as I have a font routine (or just PRINT), I dimension an array called Debug,
like 16 words big. Then I create an event, when I press, for example 'D', the Debug array is shown
onscreen, all 16, vertically, and it is being updated all the time.
It's handy to put the code to put it onscreen in a separate sub, so you can call it anywhere when necessary.
Now, when you're coding your NPC code or whatever, you can put contents of your variables in several
Debug slots. This is allot easier than continually putting .. PRINT blah .. or PRINT blah everywhere. You
just do, for example, DEBUG(1) = X: DEBUG(2) = Y .. and when you press 'D' you see your X and Y
coords, live. Now you exactly can trace what went wrong or right when the NPC was moving.
..
..
You find a variable that is not acting the way it should, and you can't find the problem. What do you do
now? We almost all had this problem before. Some stupid variable always turns out to become some
number it SHOULD NOT become, but we can't find why it does that.
This requires allot of logical thinking to find the bug. First you do the above trick and look exactly at what
the variable is doing. For example, it should be adding 1 every second, but it's not, it's decreasing 1 every
second. Now you already know the bug is in connection with the 1 second timer, where it should add 1, so
you should look at that particular code. This was a very simplistic example, but there are allot more
complicated things like this which really requires some thought. It all depends on your coding.
The piece of code, you think your bug is in, you have to start using your mind. You look at the code, put a
number in every variable you see (IN YOUR MIND) and then you start processing your code in your mind,
see if it walks correct. If it does, do it again, with a different number.
You also can do it the other way around. You know which number ended up in the variable which
shouldn't be there, and you go backwards and see how it could turn into that variable.
This is all very annoying work, but the more you do it, the more you code, the faster it will go. You will
learn better to understand what your variables do in your programs.
Now, if you still can't find the bug. I assume by now you figured out which part of your code should
contain the bug. You just put the Debug sub I talked about above, on practically every line, and put a
SLEEP inbetween them. This way you can determine which LINE your bug is in, and now you really
should be able to fix it.
..
Some more advanced notes.
In the more complicated QB games nowadays, you see consoles coming up. Some people (like myself) are
building in a console, and make it possible to change or look at variables on an instant.
For example my console is like the INSTANT thing in the QB interpreter. I can add, subtract, print, or
assign any value to allot of variables in my program. I also practically always have that Debug array I
talked about.
Within my program I can test, test again, and play with any variables I like, determining very quickly the
behaviour of my program, when I change a variable.
It is also fun! To have a console, since you can like, do godlike things with your program. It is allot more
fun to play in a console than just do 'F1' for unlimited weapons.
Even more fun is, to make it able to load and save scripts and make it run in the console.
.
In this piece of writing I never mentioned QB interpreter's ability of watchpoints and debugging. You can
use those, to also check your variable, but the disadvantage is, it's slow and not really live. It interrupts
your program continually. I never use them and what I never use I don't describe. Maybe someone else can.
This piece was written on June 25th in the hot air of Cyprus where I'm on vacation right now.
This article was written by Marcade. (http://www.marcade.net)
ASM part 6 by abionnnn
"learn asm in 1 hour flat"
Lesson no.9 Putting it together
Now that you are equiped with the knowledge to make some routines, lets get
started on some real programming =P
.model medium,basic
.stack 100h
.code

PUBLIC vmode
vmode PROC
	mov ax,13h
	int 10h
	ret
vmode ENDP

END
What the above code did was make a routine called vmode which switched to
mode 13h. Compile it and Link it as a QuickLibrary and load it up in
QuickBASIC. Enter this code:
DEFINT A-Z
DECLARE SUB vmode

vmode
Running this code will call the asm routine that we defined before and
switches the video mode to mode 13h (320x200x256). This is an example of
a subroutine that is similar to one made in QB. Lets say we no longer
want it simply to be called, but we want it to actually return a value.
(i.e behave like a function) The below code shows how to do so:
.model medium,basic
.stack 100h
.code

PUBLIC func
func PROC
 mov ax,3
 retn
func ENDP

END
Now, the way QB retreives a returned value is via the AX register. Placing 3
in the AX register and returing to QB will return the value 3 if the above
routine is defined as a function that returns an INTEGER:
DEFINT A-Z		'defines all names from A to Z as Integers
DECLARE FUNCTION func

PRINT func
The above code would simply display the number 3. But now, this is rather
boring really. These routines have to give you the same stuff time and time
again ... or do they? =D
Now whenever you pass a variable to a function in QB it is placed on top of
the stack. That pushes down the return segment and offset that is given to
the routine. Lets look at the stack layout of a function we made before:
DECLARE SUB vmode
Offset Value
02 BASIC segment
00 BASIC offset <== Stack Pointer (SP)
Every time a function is called, the segment is pushed and then the offset.
This is so the code knows where to go back once control has been regianed
to QB. Lets say we modified vmode to become like so:
vmode PROC
 push ax
 mov ax,13h		<== lets say we are at this command.
 int 10h
 pop ax
 retn
vmode ENDP
If we are on the second line, the stack would look so this:
Offset Value
04 BASIC segment
02 BASIC offset
00 AX <== Stack Pointer (SP)
This is very important to realise because if not kept in mind, you might
access values you don't want.
Lesson no.10 Extended mov commands
There are many many many many combinations that the mov command can take in
its operators. We know that square [brackets] around an register/immedate
value causes the CPU to access what is at it's offset. Funnily enough, you
can also access what 2 (or any number in a matter of fact) bytes in front of
a register by doing this:
mov ax,[bx+02]
This can only be done with BX,BP,SI and DI which are all pointer registers.
Lets say we make a hypothetical function addone. In QB, this is how we
define addone:
DEFINT A-Z
DECLARE FUNCTION addone(BYVAL x)
This means that after calling addone the stack will look like this:
Offset Value
04 x
02 BASIC segment
00 BASIC offset
The arguments are always placed before the BASIC segment and offset. so if
theres a hypothetical function xaddbyy(BYVAL x,BYVAL y)
The stack would be:
Offset Value
06 x
04 y
02 BASIC segment
00 BASIC offset <== Stack pointer (SP)
The arguments are added ontop of each other (remeber the stack starts from
the bottom upwards). Let us code this xaddbyy function:
.model medium,basic
.stack 100h
.code

PUBLIC xaddbyy
xaddbyy PROC
	mov bx,sp	;moves SP into BX.
	mov ax,[bx+06]
	mov dx,[bx+04]
	add ax,dx
	retn 4		;return 4??? what does that mean? well, put simply QB pushes 2 integers
			;(x and y which are 16-bit thus 2*2=4 bytes) and leaves the routine to
			;handel the rest. When you go back to QB it does not bother removing what
			;you have'nt used. This would return the x and y and free up the stack.
			;Thus if you had a routine xaddyaddz (x,y,z) then you would retn 6.
xaddbyy ENDP

END
This would return x+y in ax. It's very simple really, and once you get the
concept the applications start following in. Next issue, we are looking at
some of these applications and how to apply it to your programs! That's all
for now, see you next time!
This article was written by abionnnn (abionnnn@geocities.com).
Multiplications
Warning : This is ment for advanced QB users or advanced C/C++ users wanting
to expand their knowelge and make their own libraries. QB Begineers beware,
this would be a frighting scare!
Level One:
It begins
Ever wonder how people can multiply in under 7 clocks? You can sometimes get
away in multiplying with MUL with accoward numbers, but for pure speed it's
time to learn an alternative. You've seen SHL and SHR right? Well, we all
know that all they do is Shift a registers bit by a number specified. yipee,
that's exactly what we need! SHL Shifts them to the left, while SHR shifts
them to the right. This is the Synatix:
SHL Reg,Value
You might be wondering what all this has to do with multiplaction, well if we shift all the bits of a number this is what happens:
	0	1	0	0	0	0	0	1
			         (65)
			============> Shift Left by 1 (SHL AX,1)

	1	0	0	0	0	0	1	0
				(130)
Hehe, you gota be slow not to know what that does! See how the number got
multiplied by 2? Ding ding ding! You've just found a way of quick
multiplication!
But how often do you need to multiply something by two? Not very, but you
can multiply by powers of 2 VERY easily. You see, every time you shift the
bits of a number to the left by 1 you multiply by 2, but what would happen
if you now shift in 2s or 3s or even 4s?
If your getting confused on what I'm going on about, here's another diagram
to clear things up!
	0	0	1	0	0	0	0	1
			         (33)
			============> Shift Left by 2 (SHL AX,2)

	1	0	0	0	0	1	0	0
				(132)
Wow we multiplyed by four, all by shifting the whole register by 2 bits to
the left. That's multiplication at it's best, because you've just done a
relevently difficult task in under 4 clocks!
But, you can multiply with other numbers too! Here's a table that shows you
what happens when you shift a register's numberto the left by x:
                 ___________________________________
		| X | 1 | 2 | 3 | 4 | 5 | 6 | 7 | 8 |
		|MUL| 2 | 4 | 8 | 16| 32| 64|128|256|
		|___|___|___|___|___|___|___|___|___|
So if we shift 20 to the left by 3 (SHL AX,3) you'll get 160 in AX. Wonderful.
\/\/\/\/\/\/\/\/\/\/\/\/\/\/\/\/\/\/\/\/\/\/\/\/\/\/\/\/\/\/\/\/\/\/\/\/\/\/\/
C/C++ programmers, you know the << and  >> commands? Well this is their ASM
equivalant! You usally see people using them like this for speed
				y=(a<<3)+(a<<2)
/\/\/\/\/\/\/\/\/\/\/\/\/\/\/\/\/\/\/\/\/\/\/\/\/\/\/\/\/\/\/\/\/\/\/\/\/\/\/\
Level Two:
Advanced Multiplication
Now, not all of us are lucky enough to need to multiply by 2 4 8 16 32 64 128 or 256.
You ussaly have to multiply by Base 10 relative numbers like 200. Now comes
the trick bit, to be or not to be! Ok, we'll start with something simple,
lets say multiplying by 6.
Before getting to the ASM bit, we'll start some theory work. Lets say y
is the outcome, and a is the input (a is AX, and y is what AX will be after
we finish off with it). Ok to multiply a by 6 we do this :
y=(a<<1)+(a<<2)
Hmmm ... well what it's saying up there is we will shift a to the left by 1,
and then get the orignal a back and shift it by two. This is easier than it
sounds.
(a is in AX,y is AX at the end)
MOV  BX,AX	;We'll save AX's value for later use.
SHL  AX,1	;Shift ax to the left by 1 (multiply by 2)
XCHG AX,BX	;Ok we'll swap (AX*2) with AX, so we can multiply the orignal again.
SHL  AX,2	;Now we'll shift ax to the left by 2 (multiply by 4)
ADD  AX,BX	;we'll add (AX*2)+(AX*4) giving us AX*6.
ok so we basicly did this : (AX*2)+(AX*4), in maths that would give us
AX+AX+AX+AX+AX+AX, which is ofcourse AX*6.
If you get it, read the source code below it does it a tad faster and with a
smaller code but does the exact same thing, if you did'nt email me
(abionnnn@geocities.com) and tell me what you don't get, so I can add it to
the new version of the tutorial.
(a is in AX)
SHL AX,1	;shift ax to the left by 1.
MOV BX,AX	;add (AX*2) to BX
SHL AX,1	;shift (ax*2) to the left by 1
ADD BX,AX	;add ((AX*2)*2) to BX
Smart is'nt it? If we multiply 2 by 2 what do we get? 4 and if we multiplied
it by 2 agian? we get 8. hmm ... 4+8=12=2*6. So (a*2)+(a*2*2)=a*6 hehehehe
get the point? good. = )
Logic
Warning : This is ment for advanced QB users or advanced C/C++ users wanting
to expand their knoweldge and make their own libraries. QB Begineers beware,
this would be a frighting scare!
Level One:
AND or NOT?
Logic gates are a very useful thing indeed. They can be used for anything
from encryption to Graphics programs. Indeed, some RISC processors back in
the ol' days relyed mostly on logical gates! Even now, your computer is
passing bits through logical gates to get the information you want (using
transistors ofcourse). But to tell the truth, you don't really need to know
this, I just thought that you might find it handy ... heh heh heh.
Lets start from the start, lets start with the basic concept of a logic gate.
A logic gate is alot like a transistor, given two bits it outputs one. I'll
start you off with a rather simple gate, the AND gate:
                  _
                 | \
  BIT1  ------- >|  \
                 |   \
                 |AND |----- > OUT
                 |   /
  BIT2  ------- >|  /
                 |_/
If you give AND 1 in BIT1 and 1 in BIT2, It will give 1 in OUT
If you give AND 0 in BIT1 and 1 in BIT2, It will give 0 in OUT
If you give AND 1 in BIT1 and 0 in BIT2, It will give 0 in OUT
If you give AND 0 in BIT1 and 0 in BIT2, It will give 0 in OUT
You can clearly see from the above information that AND will always output 0
unless both bits given to it are 1. That's where they get the name really = ).
Lets move back a bit and see this in a real life situation.
"If both my desktop computer AND my laptop are on then I'm going to have a
big bill to pay"
If neither machines are on (i.e 0 AND 0) then he will not pay a big bill
(0 AND 0 = 0)
If only one of the machines is on (i.e 0 AND 1, 1 AND 0) then he will not
pay a big bill (0 AND 1=0, 1 AND 0=0).
If both machines are on (i.e 1 AND 1) then he WILL pay a big bill, the poor
guy (1 AND 1=1)
Now, the use of one bit might be trivial but when dealing with computers you
can process multiple bits. That's why a computer can process more than one
bit at a time, infact as many bits as a register can handel. Here's and
example how:
BIT1    1	1	0	1	0	0	1	0
       AND     AND     AND     AND     AND     AND     AND     AND
BIT2	0	1	1	1	1	0	0	0
       ===========================================================
OUT	0	1	0	1	0	0	0	0
here's that up there in code:
mov ax,11010010b
and ax,01111000b
what will remain in ax? 01010000b, ofcourse! Now that we've finished and,
it's time to show some more gates.
Level Two:
More Gates
Right beside AND is it's cousin OR. OR and AND share quite a relationship,
but I'll tell you about that later (and if you've already done mathematical
redundants, I suggest skiping it =p). OR uses the same concept as AND in
this manner:
                  _
                 | \
  BIT1  ------- >|  \
                 |   \
                 | OR |----- > OUT
                 |   /
  BIT2  ------- >|  /
                 |_/
If you give OR 1 in BIT1 and 1 in BIT2, It will give 1 in OUT
If you give OR 0 in BIT1 and 1 in BIT2, It will give 1 in OUT
If you give OR 1 in BIT1 and 0 in BIT2, It will give 1 in OUT
If you give OR 0 in BIT1 and 0 in BIT2, It will give 0 in OUT
Puting this into a real life situation:
"If Wafn is on #qbcc or #maths then he's going to get no work done"
(hehehe plug = p)
If Wafn is only loged on to #qbcc then he will get no work done. (1 OR 0 = 1)
If Wafn is only loged on to #maths then he will also get no work done. (0 OR 1 = 1)
If Wafn is on both channels then he will still get no work done. (1 OR 1 = 1)
Finally, if Wafn is on neither channels then he will kick back and do some proper work. (0 OR 0 = 0)
Using this concept on a byte like the one above:
BIT1    1	1	0	1	0	0	1	0
        OR      OR      OR      OR      OR      OR      OR      OR
BIT2	0	1	1	1	1	0	0	0
       ===========================================================
OUT	1	1	1	1	1	0	1	0
agian in code this is written like so:
mov ax,11010010b
or ax,01111000b
And, as always, 11111010b is left in ax.
Now for the final two-bit logical gate we are going to discuss here.
The eXclusive-OR logical gate is probably one of the most useful of these.
While others may not behave like this normally, XOR will return the same
byte if it is passed through the gate twice! I'll show you this later but
for now the basic concept.
XOR will only return 1 if BIT1 does not equal BIT2.
                  _
                 | \
  BIT1  ------- >|  \
                 |   \
                 |XOR |----- > OUT
                 |   /
  BIT2  ------- >|  /
                 |_/
If you give XOR 1 in BIT1 and 1 in BIT2, It will give 0 in OUT
If you give XOR 0 in BIT1 and 1 in BIT2, It will give 1 in OUT
If you give XOR 1 in BIT1 and 0 in BIT2, It will give 1 in OUT
If you give XOR 0 in BIT1 and 0 in BIT2, It will give 0 in OUT
Ok, one last "real" life situation:
"If leroy is bored but not drunk, or if leroy is drunk but not bored nothing
interesting will happen in #qbcc"
If leroy was only bored nothing will happen in #qbcc (1 XOR 0=1)
If leroy only had too much to drink nothing will happen in #qbcc (0 XOR 1=1)
If leroy was both drunk and bored (ussally not a good combination =p)
then something interesting will happen in #qbcc (1 XOR 1=0)
If leroy was'nt drunk or bored then something interesting will happen in #qbcc (0 XOR 0=1)
This concept applied to the same bytes we used above:
BIT1    1	1	0	1	0	0	1	0
       XOR     XOR     XOR     XOR     XOR     XOR     XOR     XOR
BIT2    0	1	1	1	1	0	0	0
       ===========================================================
OUT	1	0	1	0	1	0	1	0
put into code:
mov ax,11010010b
xor ax,01111000b
thus, 10101010b is left in ax. But lets not stop there! There is something
speacil about this number, let me demostrate something. Lets take what's
left in ax, and XOR agian by BIT2.
BIT1	1	0	1	0	1	0	1	0
       XOR     XOR     XOR     XOR     XOR     XOR     XOR     XOR
BIT2    0	1	1	1	1	0	0	0
       ===========================================================
OUT	1	1	0	1	0	0	1	0
hehehehehehe, as you can see passing the product through the original BIT2
gives us back the original BIT1!
so a code like this:
mov ax,11010010b
xor ax,01111000b
xor ax,01111000b
will leave 11010010b in ax! One of the main uses of this is encryption,
but that's not the topic of this file so we'll leave that for later.
Level Three:
NOT.
Theres one more gate that really does'nt fit into the basics of AND, OR or
XOR. That would be the infamous NOT. NOT only requires one BIT, and there
are only two conditions that can be attained by this. This digram represents
NOT which is alot like a .... diode .... well not really. = p
... Just look at the diagram bewehehehehe:
                  _
                 | \
                 |  \
                 |   \
  BIT1  ------- >|NOT |----- > OUT
                 |   /
                 |  /
                 |_/
If you give NOT 1 in BIT1, It will give 0 in OUT
If you give NOT 0 in BIT1, It will give 1 in OUT
All NOT really does is invert a given bit. Here's another "real" life
situation:
"If Pasco is loged on don't ask for Pasco, but if Pasco is not loged on Ask
where Pasco is."
(this is going to sound as if it's an echo but hey ... NOT is weird =p)
So if Pasco is loged on, then a person wont ask if he's on or not (NOT 1=0)
However, if Pasco is loged off, then a person will ask if he's on (NOT 0=1)
Applying this concept ...
BIT1    1	1	0	1	0	0	1	0
       NOT     NOT     NOT     NOT     NOT     NOT     NOT     NOT
       ===========================================================
OUT	0	0	1	0	1	1	0	1
This can be put into code like so:
mov ax,11010010
not ax
You may have realised by now that NOT has the same properities as XOR, and
the invert of an invert byte is the original byte. = D
that is:
mov ax,11010010
not ax
not ax
Will leave 11010010b in AX. Not as useful in encryption because of it's
obviousness =)
Level Four:
Redundanments
Now I promise you, if you skip this bit you wont miss out on a thing.
It's just for completeness' sake! Infact, I still don't think there is a
use of this in programming, but hey it's pretty damn useful in maths. ; )
 ________________________
|     _____  _____       |
|    /     \/     \      |
|   |      ||      |     |
|   |      ||      |     |
|    \_____/\_____/  _ _ |
|       A      B     A B |
|________________________|
		    |____|
The above is called a Venn diagram. It's very useful, lets say that A was
Byte A and B was Byte B. The intersection of A and B (the part where they
meet) is A AND B. The combined area of A and B is A OR B. Now, Not A is the
surroding area which does not contain anything of A, similarly NOT B is the
surroding area which does not contain anything of B. A useful formula can be
gain by using the Venn diagram above.
A or B = A + B - A and B
and using algebra:
A and B = A + B - A or B
Lets see these in action:
lets say A=00110101b and B=00011001b. Using the algorithim before we can
tell that A and B equals:
A    	0	0	1	1	0	1	0	1
       AND     AND     AND     AND     AND     AND     AND     AND
B	0	0	0	1	1	0	0	1
       ===========================================================
OUT	0	0	0	1	0	0	0	1
thus using binary addition, subtraction A or B = 00110101b + 00011001b -
00010001b
like so:
A    	0	0	1	1	0	1	0	1
        +	+	+	+	+	+	+	+
B	0	0	0	1	1	0	0	1
       ===========================================================
A+B	0	1	0	0	1	1	1	0
	-	-	-	-	-	-	-	-
A and B 0	0	0	1	0	0	0	1
       ===========================================================
A or B	0	0	1	1	1	1	0	1
Using the normal algorithim we get the same answer:
A    	0	0	1	1	0	1	0	1
        OR      OR      OR      OR      OR      OR      OR      OR
B	0	0	0	1	1	0	0	1
       ===========================================================
OUT	0	0	1	1	1	1	0	1
If you can't figure out how the additions and calculations are done, try
converting the binary numbers to decimal and doing it, I'm sure you will
attain the same result.
What is the use of this? I have no clue, but it is interesting to know and
who knows, you might come up with a use for it (I sure as hell have not).
If you do, drop me a line, wont ya? = )
Note: nicks and channels contained in here are for displaying purposes only,
if I have used your nick and you don't want me to use it then tell me, and I
will remove it ... but then why would'nt you want it? = D
This article has been written by abionnnn (abionnnn@geocities.com)
RPGs UNRAVELLED
Hi! I attempted to write a series on making RPGs before but I didn't
get any further than the first article because my English wasn't that
good at the time and I hadn't that much free time and I wasn't really
experienced in RPGS but I'll try to make this series much better than my
first article was then :)
CHAPTER 1: PLANNING
Planning is very important to create a good RPG because if you don't
know what you want to make you can't make it :) Let me explain a bit
if you want to make a top down RPG with a tile scrolling engine you
need to plan the following things before you start: the size of the
tiles, how the engine scrolls (tile-by-tile, pixel-by-pixel, etc), do
you want free camera movement (more on that later), etc. It's very
important that you know these things before you start because when
you know this at the beginning you don't have to think about it when
you're programming, letting you focus at your programming and not at
the planning.
When I play things I usually open a new file in Notepad (or acctually
MS-DOS EDIT) and write a bunch of stuff I want in my program in there
but you can also get out a notebook and write all your stuff on there.
Don't write your stuff at loose scraps of paper because you're gonna
lose them (Jeez... I sound like a schoolteacher here), it's OK to write
them on a scrap but insert them into your file/notebook ASAP. I lost many
good ideas due to the fact that I didn't write them down or that I wrote
'em down but lost them.
Things you can plan are, general things like; is the game going to be
VGA or SVGA, is it going to use a library (which?) or not, what are
the file formats like (BLOAD, JSprite, All tile/maps/etc. stored in one file?)
, (as I said earlier) tile-engine; the size of the tiles, how the engine
scrolls (tile-by-tile, pixel-by-pixel, etc), do you want free camera movement,
game features like day and night, weather effects (rain, snow, thunder), NPCs
(walking, talking etc.), what are the shops going to be like? Can you
barter with the shopkeeper or does he have a fixed price, will everything
cost the same everywhere? Maps! Will there be a world map? Will you have
maps that blend into eachother? And what about Magic? Is there magic in the
game? How does the character learns to use magic? What kinds of magic are there?
I could go on and on and on but actually you should be thinking up things
you need to plan!
These are just examples of things you can (need to) plan. But I left out
one of the most important things of an RPG, the story! Before you start
writing your RPG you need to decide about the story. First you need
to decide how many characters you need just 1? Or maybe 3 or 20? How many
characters can be in your party? You need to take this into account when
writing your RPG. Also you need to have a general idea of what's the story
going to be. You can enhance the story as you program or you can do the
story when you're finished programming and then implent it into your engine.
Well I think that's enough for this chapter! Onto the next one!!
CHAPTER 2: THE STORY
The story is one of the most important parts of an RPG. The story is what
keeps people playing your RPG. It must be both original and interesting.
It needs twists and turns and a lot of surprises. This chapter is about
writing a story, thinking up characters and what you can and cannot do
in a story.
The first thing you need to do when writing a story is decide the setting.
In which period of time is the story taking place, medieval, present day or
the future? Will there be non-realistic things (like dragons in medieval or
aliens in present day or future)?
When you've decided what setting you want you can think up a general story.
Lets say we have a hero whose parents are murdered, he wants to avenge them
so he searches for the bad guy who killed them. Allong the way he finds out
what the bad guy really is up to: TAKING OVER THE WORLD!!! This is a story
you can place in almost any time period and both non-realistic and realistic:
Medieval, non-realistic: The bad guy is a powerful wizard, who wants to take
over the world using his goblin army. Our hero learns to use magic from an
old monk at some monastary which he uses to defeat the bad guy.
Medieval, realistic: The bad guy is a powerful lord, who wants to take
over the world using his army of plundering knights. Our hero is trained
by a good knight (maybe he can be murdered too, makes our hero even more
angry), after he has trained enough or after the knight dies he goes to the
bad guy and challanges him to a duel, which he wins of course!
Present day, non-realistic: The bad guy is Saddam Hussein who attacks the USA
with biochemical weapons and nukes. He manages to completely destory the USA
(I know you Americans don't like this story, but hey!). Now that the USA
is out of the way he can conquer the rest of the world. Our hero is one of
the few survivors and swears to avenge every one American that has been killed.
He infiltrates Saddam's army and get higher and higher in the army until he
is one of Saddam's most trusted generals. In this position he assasinates Saddam.
Present day, realistic: The Soviets have been working on a powerful new weapon
that can destroy a whole army in only on blast. Our hero is a poor farmers
son whose village is destoryed as a test of the new weapon. He joins a
underground rebellion against the government and kills the bad guy in an
assasination.
Future, non-realistic: The bad guy is an alien who wants to take over the
world and then the rest of the universe (The World is Not Enough, eh? :-) ). Anyway,
our hero thinks he's a human (he looks like one) but during the course of the
story he finds out that he really is an alien with mysterious powers, which
he uses to defeat our bad guy alien.
I'm not going to make a Future, realistic plot simply because we don't know
what will be realistic in the future and what not. So basically you cannot
make a realistic game in the future.
Of course these aren't the most original stories but it does show you how
a simple concept of taking over the world can be adapted to many different
settings. Did you know that actually most RPGs have a story based on
some bad guy wanting to take over the world? Let me give a some examples:
Final Fantasy 3: Kefka wants to take over the world, Secret of Mana: The Emperor
and Thanatos want to take over the world using the Mana Fortress (OK, not really
but sort of) and Final Fantasy 7: The Shinra Corp. destroying the world (I haven't
played this game in whole myself (Yes, I haven't lived, I know) but that's basically
what happens, if not feel free to correct me). While this concept is so
un-original you can make the story that it is interesting, I like the present-day
realist story that I made earlier, as far as I know it hasn't been done before.
Of course, you need to add a lot of incidents to the story, maybe our hero
falls in love with the daughter of a high-ranking officer or he is captured
and needs to escape a his cell within 5 minutes or else he's executed.
These are just some ideas but you really should try to have some original
ideas to make your story interesting. You can borrow a good concept from another
game but change it so that it still is original. Lets take Chrono Trigger, an
excellent RPG by the RPG masters of Square, you travel across time to complete
your quest. You could for instance take the time travelling concept and have
a story that there are 5 magic wands scattered across time. If all 5 wands
fall into the wrong hands the world is doomed (taking over the world again :-) )
Our hero has to collect all 5 wands to prevent this from happening. You have
the time travelling but you've adapted to your own story.
NOTE: Some people are just better at story writing than others, just like some
people are good in Maths and some are good in Spanish. If you really can't
write stories well, you'd better find someone who can write stories for you
because a story IS one of the most important parts of an RPG.
That's it for this issue. In the next issue I'll continue this chapter. The
rest of this chapter will basically be about thinking up characters and
what you can and cannot do in a story. I hope you enjoyed my article and
feel free to e-mail me with any comments or suggestions at nwep@qb45.com.
Dynamic data structures, part 1
Welcome! In this tutorial we will be discussing dynamic data structures.
We'll take an in-depth look at the theory behind the various data structures,
of what use they are to the programmer, and how to implement them in BASIC.
Please note that despite the fact that QB Times is a QuickBASIC magazine, the
example programs within this tutorial have been written such that they will
be able to run on ANY implementation of BASIC! However, please note that
indentations have been used with the code, which is not supported by certain
older BASIC implementations. This is simple to correct, however.
The most important dynamic data structures are:
(a) The stack.
(b) The queue.
(c) The linked list.
(d) The tree.
The trouble with describing these data structures is that if you've never
wanted to use one it is difficult to see how they could be useful. However,
if you don't know that they exist then there are some programs that are
very difficult to write, unless you re-invent the wheel.
The stack:
The best known and simplest of all the dynamic data types is the stack. A
stack is an area of storage that can be accessed through just two operations,
push and pull. Push stores an item on the stack and pull retrieves an item
from the stack. The more formal name for a stack, 'Last In First Out' of LIFO
stack, gives a clue to the order in which a sequence of items pushed on the
stack will be recalled by pull operations. The best way to think of a stack
is to imagine each item pushed onto the stack being placed on the top of a
pile (stack) of all the earlier items pushed onto the stack. A pull operation,
therefore, always removes the top-most item. Thus the last item to be pushed
onto the stack is the first one to be retrieved.
As an example of a stack and of the sort of thing that a stack can be used
for, consider the problem of reversing a sequence of letters. The solution
using a stack is:
1. PUSH the first letter to the top of the stack   ->  A
2. PUSH the second letter to the top of the stack  ->  B
                                                       A
3. PUSH the third letter to the top of the stack   ->  C
                                                       B
                                                       A
then
4. PULL the stack to get C from the top of the stack  ->  B
                                                          A
5. PULL the stack to get B from the top of the stack  ->  A
6. PULL the stack to get A from the top of the stack  ->  empty
Notice the order that the letters went onto the stack, ABC, and how they came
out, CBA. Thus, they have been reversed as required. Also notice that the
entire reversal procedure was automatic in that there was no need explicitly
to keep track of the order that the items came in.
A stack is easy to implement in BASIC using a one-dimensional array and a
single variable. The array is used to hold the items on the stack and the
variable is used as a pointer to the current top of the stack. For example,
to reverse three numbers in much the same way that the three letters were
reversed is easy:
10  DIM S(10)
20  LET P = 1
30  FOR I = 1 TO 3
40    INPUT N
50    LET S(I) = N
60    LET P = P + 1
70  NEXT I
80  FOR I = 1 TO 3
90    LET P = P - 1
100   LET N = S(P)
110   PRINT N
120 NEXT I
Line 10 sets up the array to be used as the stack. Line 20 sets the variable
P to 'point to' the top of the stack. In this case, the top of the stack
corresponds to the first free location in the array. Lines 50 and 60 form
the push operation. The number is stored in S(P) and then the pointer is
incremented to point to the next free location. Lines 90 and 100 form the pull
operation and this should be easy to understand as it is much like the push
operation.
For the above example, and future examples, please take careful note of the
OPTION BASE setting.
There is another way to implement a stack that is very useful when the data
to be manipulated consists of single characters. Adding a character to a
string.
S$ = C$ + S$
is very much like pushing a character onto a stack. Think of the 'front' of
the string S$ as the front of the stack: then adding the character in C$ to
the front of the string is like pushing it onto the top of the stack. You
should be able to work out that to pull a character off the stack all you
have to do is remove the first character. That is:
C$ = LEFT$(S$, 1)
S$ = RIGHT$(S$, LEN(S$) - 1)
The first instruction places the first character of the S$ in C$ and the
second removes the first character from from S$. Using these two ideas we
can write a program that reverses a sequence of letters:
10 S$ = ""                           'initialise stack
20 INPUT A$
30 FOR I = 1 TO LEN(A$)
40   S$ = MIS$(A$, i, 1) + S$        'push each character
50 NEXT I                            '    onto stack
60 FOR I = 1 TO LEN(A$)
70   PRINT LEFT$(S$, 1)              'pull each character
80   S$ = RIGHT$(S$, LEN(S$) - 1)    '    off stack
90 NEXT I
That's all there is to implementing stacks and apart from worrying about
pulling data off the stack when there isn't any more, and pushing more
items on the stack than the size of the array allows, there is nothing else
to do. The most common application of stacks is in language processing, eg.
compilers, etc. However, this probably due to the fact that programmers that
write compilers tend to know about stacks! In general, a stack is useful
whenever the order in which things have to be treated is different from the
order in which they arrive.
Queues:
Once you have understood the idea behind a stack, then a queue is just one
step further on. The data structure called a queue mimics exactly the normal
behaviour of people queuing. A queue has a first person and a last person.
People join the queue at the rear and leave the queue from the front. In the
data structure calles a queue the addition of a data item also happens to the
rear and retrieving a data item also happens from the front.
The easiest way to implement a queue in BASIC is to use two pointers in place
of the stacks's one. The first pointer indicates the front of the queue and
the second pointer indicates the end of the queue. In addition to these two
pointers we can associate two new operations with every queue - JOIN and
LEAVE. If F is the pointer to the front of the queue and R is the rear, then
the two operations in BASIC are as follows:
JOIN
      Q(R) = DATA
      R = R + 1

LEAVE
      DATA = Q(F)
      F = F + 1
Thus the front of the queue moves relentlessly up the array. The trouble is,
so does the rear! In order to stop the array having to be enormous you have
to employ the extra trick of making the queue circular. If either of the
pointers go past the top of the array they are reset to point to the beginning
of the array. The two operations now become:
JOIN
      Q(R) = DATA
      R = R + 1
      IF R > top of array THEN R = 1

LEAVE
      DATA = Q(F)
      F = F + 1
      IF F > top of array THEN F = 1
The queue starts off empty and the two pointers point to the same place. This
can be used to detect when the queue is empty. If, after removing an item,
the pointers point at the same element of the array, then the queue is empty.
However, if this happens after an item has been added this means that the
queue is full. The best way to find out how queues work is to try a dry run
of a queue on paper.
There is a way of implementing queues using strings that is very similar to
the idea os using strings to implement a stack. To join a string queue the
character should be added to the left-hand side and characters leaving the
queue are taken from the right. So,
JOIN
  S$ = C$ + S$

LEAVE
  C$ = RIGHT$(S$, 1)
  S$ = LEFT$(S$, LEN(S$) - 1)
The main use of queues is in real time control and operating systems where
things happen at a rate that the computer cannot deal with. Each thing is
therefore placed in the queue and dealt with later in the same order that it
arrived.
And that concludes part one in this series! I hope you enjoyed it! Next month
we will be discussing the linked list and the tree.
Happy coding in QB!!! ^_^
This article has been written by Matthew River Knight of Dark Legends Software (http://www.darklegends.com)
'Doom' 3D Engine techniques
This document is submitted subject to certain conditions:
- This Document is not in any way related to Id Software, and is
not meant to be representive of their techniques : it is based
upon my own investigations of a realtime 3d engine that produces
a screen display similar to 'Doom' by Id software.
- I take no responsibility for any damange to data or computer equipment
caused by attempts to implement these algorithms.
- Although I have made every attempt to ensure that this document is error
free i take no responsability for any errors it may contain.
- Anyone is free to use this information as they wish, however I would
appreciate being credited if the information has been useful.
- I take no responsability for the spelling or grammar.
(My written english is none too good...so I won't take offence
at any corrections: I am a programmer not a writer...)
Right now that that little lot is out of the way I will start this
document proper....
1: Definition of Terms
Throughout this document I will be making use of many graphical terms
using my understanding of them as they apply to this algorithm. I will
explain all the terms below. Feel free to skip this part....
Texture:
A texture for the purpose of this is a square image.
U and V:
U and V are the equivelants of x and y but are in texture space.
ie They are the the two axies of the two dimensional texture.
Screen:
For my purposes 'screen' is the window we wish to fill: it doesn't
have to be the whole screen.
Affine Mapping:
A affine mapping is a texture map where the texture is sampled
in a linear fashion in both U and V.
Biquadratic Mapping:
A biquadratic mapping is a mapping where the texture is sampled
along a curve in both U and V that approximates the perspective transform.
This gives almost proper forshortening.
Projective Mapping:
A projective mapping is a mapping where a changing homogenous
coordinated is added to the texture coordinateds to give (U,V,W) and
a division is performed at every pixel. This is the mathematically and
visual correct for of texture mapping for the square to quadrilateral
mappings we are using.
(As an aside it is possible to do a projective mapping without
the divide (or 3 multiplies) but that is totally unrelated to the matter
in hand...)
Ray Casting:
Ray Casting in this context is back-firing 'rays' along a two
dimensional map. The rays do however follow heights... more on that later
Sprite:
A Sprite is a bitmap that is either a monster or an object. To
put it another way it is anything that is not made out of wall or
floor sectins.
Sprite Scaling:
By this I mean scaling a bitmap in either x or y or both.
Right... Now thats over with onto the foundation:
2: Two Dimensional Ray Casting Techniques
In order to make this accessible to anyone I will start by
explaining 2d raycasting as used in Wolfenstein 3d style games.
2.1: Wolfenstien 3D Style Techniques...
Wolfenstein 3d was a game that rocked the world (well me anyway!).
It used a technique where you fire a ray accross a 2d grid based map to
find all its walls and objects. The walls were then drawn vertically
using sprite scaling techniques to simulate texture mapping.
The tracing accross the map looked something like this;
        =============================================
        =   =   =   =   =   =  /=   =   =   =   =   =
        =   =   =   =   =   = / =   =   =   =   =   =
        =   =   =   =   =   =/  =   =   =   =   =   =
        ====================/========================
        =   =   =   =   =  /=   =   =   =   =   =   =
        =   =   =   =   = / =   =   =   =   =   =   =
        =   =   =   =   =/  =   =   =   =   =   =   =
        ================/============================
        =   =   =   =  /#   =   =   =   =   =   =   =
        =   =   =   = / #   =   =   =   =   =   =   =
        =   =   =   =/  #   =   =   =   =   =   =   =
        ============/===#########====================
        =   =   =  /=   =   =   #   =   =   =   =   =
        =   =   = / =   =   =   #   =   =   =   =   =
        =   =   =/  =   =   =   #   =   =   =   =   =
        ========/===============#====================
        =   =  /=   =   =   =   #   =   =   =   =   =
        =   = P =   =   =   =   #   =   =   =   =   =
        =   =  \=   =   =   =   #   =   =   =   =   =
        ========\===============#====================
        =   =   =\  =   =   =   #   =   =   =   =   =
        =   =   = \ =   =   =   #   =   =   =   =   =
        =   =   =  \=   =   =   #   =   =   =   =   =
        ============\=======#####====================
        =   =   =   =\  =   #   =   =   =   =   =   =
        =   =   =   = \ =   #   =   =   =   =   =   =
        =   =   =   =  \=   #   =   =   =   =   =   =
        ================\===#========================
        =   =   =   =   =\  #   =   =   =   =   =   =
        =   =   =   =   = \ #   =   =   =   =   =   =
        =   =   =   =   =  \#   =   =   =   =   =   =
        =============================================

        (#'s are walls, = is the grid....)
This is just a case of firing a ray for each vertical
line on the screen. This ray is traced accross the map to
see where it crosses a grid boundry. Where it crosses a
boundry you cjeck to see if there is a wall there we see how
far away it it and draw a scaled vertical line from the texture
on screen. The line we draw is selected from the texture by
seeing where the line has intersected on the side of the square it
hit.
This is repeated with a ray for each vertical line on the
screen that we wish to display.
This is a very quick explaination of how it works missing
out how the sprites are handled. If you want a more detailed
explaination then I suggest getting acksrc.zip from
ftp.funet.fi in /pub/msdos/games/programming
This is someone's source for a Wolfenstien engine written
in Borland C and Assembly language on the Pc.
Its is not the fastest or best but has good documentation
and solves similiar sprite probelms, distance probelms and has
some much better explaination of the tracing technique tahn I have
put here. I recommend to everyone interested taht you get a copy
and have a thorough play around with it.
(Even if you don't have a Pc: Everything but the drawing and video
mode setting is done in 'C' so it should not be too hard to port
....)
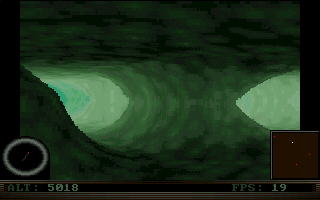
2.2 Ray Casting in the Doom Environment
When you look at a screen from Doom you see floors, steps
walls and lots of other trappings.
You look out of windows and accross courtyards and you
say WOW! what a great 3d game!!
Then you fire your gun a baddie who's in line with you but
above you and bang! he's a corpse.
Then you climb up to the level where the corpse is and look
out the window to where you were and you say Gosh! a 3d game!!
Hmmm....
Stop gawping at the graphics for a minute and look at the map
screen. Nice line vectors. But isn't the map a bit simple???
Notice how depite colours showing you that there are different
heights. Then notice that despite the fact that there is NEVER a
place where you can exist on two different levels. Smelling a little
2d yet???
Look where there are bridges (or sort of bridges) : managed to
see under them yet??
The whole point to this is that Doom is a 2D games just like
its ancestor Wolfenstein but it has rather more advanced raycasting
which does a very nice job of fooling the player into thinking its a
3d game that shifting loads of polygons and back-culling, depth
sorting etc...
Right the explaination of how you turn a 2d map into the 3d
doom screen is complex so if you are having difficulty try reading
it a few times and if all else fails mail me....
2.3 What is actually done!
Right to start with the raycasting is started in the same
way as Wolfenstien. That is find out where the player is in the 2d
map and get a ray setup for the first vertical line on the screen.
Now we have an extra stage from the Wolfenstein I described
whcih involves a data srtucture that we will use later to actually
draw the screen.
In this data structure we start the ray off as at the bottom
of the screen. This is shown in the diagram below;
        =================================
        =                               =
        =                               =
        =                               =
        =                               =
        =                               =
        =                               =
        =                               =
        =                               =
        =                               =
        =                               =
        =                               =
        =                               =
        =                               =
        =                               =
        =                               =
        =                               =
        =*                              =
        =================================
Where the '=' show the boundry of the screen and '*' is the virtual
position of the ray.
Note: the Data structure is really two structures:
One which is a set of list for each vertical 'scanline' and
One which is a corresponding list for horizontal scanlines.
Now we start tracing the ray. We skip accross the 2d map until
we hit something interesting. By something interesting I mean something
that is an actual wall or florr section edge.
Right we have hit the edge of either a floor or wall section.
We have several things to do know. These are;
If it was a wall we hit:
- Find out how 'high' of screen this section of wall should be
due to the distance it is accross the 2d map.
- Find out at what 'virtual height' it is: This is so that we can see
where in the vertical scanline in comes for testing where to insert
it and for clipping it.
- Test in our structure to see if you draw it or not.
(This is done so that you can look through windows : how this works
will become apparent later.)
- If any of the wall segment is visible then we find out where along
the texture we have hit it and write into the structure the area of
the screen it takes up as well as the texture, the point where we
have hit the texture and the size it should be on screen. (This is
so that we can draw it correctly even if the whole span is not on
screen.
If it was a floor section that we hit:
- Find out where on the vertical line we are working the floor section
that the ray has hit is. (We know the height of the the floor in the
virtual map (2d) and we know the height of the player and the distance
of the floor square from the player so it is easy).
As a side effect of this we now know the U,V value where the ray has
hit the floor square.
- Trace Accross the floor square till we hit the far edge of the floor
square : we then workout where this is on the vertical scanline using
the same technique as above. We now know the vertical span of the
floor section, and where on the span it is.
- We check to see if the span is visible on the vertical span.
If it is or part of it is used then we mark that part of the vertical
scanline as used.
We also have to make use of the horizontal buffer I mentioned. We
insert into this in 2 places. The first is the x coordinate of where
we hit the floor square into the y line where we where on the screen.
Phew got that bit?? We also insert here the U,V value which we knew
from the tracing. (I told you we'd need it later....)
As you can see there's a little more to hiting a floor segment than
a wall segment. Also note that a you exit a floor segment you may also hit
a wall segment.
Tracing the individual ray is continued until we hit a special kind
of wall. This wall is marked as a wall that connects to the ceiling.
This is one place to stop tracing this ray. However we can stop tracing early
if we have found enough to fill the whole vertical scanline then we can stop
whenevr we have done this.
Next come a trick. I said we were tracing along a 2d map. Well I
lied a bit. There are (In my implementation at least..) TWO 2d maps. One is
basically from the floor along including all the 'floor' walls and everything
up to and including the walls that join onto the ceiling. The other map
is basically the ceiling (with anything coming down from the ceiling on it
if you are doing this: this makes life a little more complex as I'll explain
below..)
Now when we have traced along the bottom map and hit a wall that
connects to the ceiling then we go back and trace along the ceiling from
the start to fill in the gaps. There is a problem with this however.
The problem is when you have things like a monolith or something else built
out of walls jutting down from the ceiling. you have to decide whether to
draw it or draw whatever was already in the scanline structure. This means
either storing extra information in the buffer ie z coordinates or tracing
along both the ceiling and floor at the same time.... for most people I would
suggest just not having anything jutting down from the ceiling.
Also you could trace backwards instead of starting a new ray. This
would be fasterfor many cases as you wouldn't be tracing through lots
of floor squares that aren't on screen. By tracing backwards you can keep
going up the vertical scanline and you know that you are on the screen. As
soon as something goes off the top of the screen you can handle that and then
stop tracing.
Phew. has everyone got that???
Now we just go back and fire rays up the rest of the vertical
scanlines. Easy!!???
At the end of this lot we have the necessary data in the two buffers
to go back and draw the screen background.
(There is one more thing done while tracing but I'll explain that later...)
Oh... one other thing... you have may want to change the raycasting
a bit to subdivide the map... it helps with speed.
And don't forget the added complexity that walls aren't all at
90 degrees to each other...
3: Drawing the walls and Why it works!!
If you are familiar with Wolfenstein then please still read this
as it is esential background to understanding the floor routine.
As all of you probably know the walls are drawn by scaling the line
of the texture to the correct size for the screen. The information in the
vertical buffer makes this easy. What you probably don't know is why this
creates texture mapping that is good enough to fool us.
The wall function is a Affine texture mapping. (well almost)
Now affine texture mappings look abysmal unless you do quite a lot of
subdivision (The amount needed varies according to the angle the projected
square is at.). So why does the Doom technique work??
Well when we traced the rays we found out exactly where along the
side of the square we hit we were in relation to the width of the texture.
This means that the top and bottom pixels of the scaled wall piece are
calculated correctly. This means that we have effecively subdivided the
texture along vertical scanlines and as the effective subdidvisons are
calculated exactly with proper forshortening as a result of the tracing.
So the ray casting has made the texture mapping easy for us.
(We have enough subdivision by this scanline effect as the wall
only rotates about one axis and we have proper foreshortening.)
This knowlege helps us understand how to do the floors and why
that works.
We can now draw all the wall segments by just looking at the buffer
and drawing the parts marked as walls.(Skiping where we put in the bits used
by the floor/ceiling bits: we draw them later.)
4: Drawing the Floor/Ceiling and why it works!
If you have grasped why the walls work then you have just about
won for the floors.
We have the information needed to draw the floors from the horizontal
buffer.
All we have to do is look at the horizontal spans in the buffer
and draw them in all.
Each of these spans has 2 end coordinates for which we have
exact texture coorinates. This tells us which line across the texture
we have to step along to do an Affine or linear mapping.
This is shown below;
        =================================
        =                               =
        =                               =
        =                               =
        =                               = U1,V1 (exit)
        =                              **
        =                           *** =
        =                        ***    =
        =                     ***       =
        =                  ***          =
        =               ***             =
        =            ***                =
        =         ***                   =
        =       **                      =
        =     **                        =
        =   **                          =
        = **                            =
  U0,V0 **                              =
(entry) =                               =
        =                               =
        =                               =
        =                               =
        =                               =
        =                               =
        =                               =
        =================================
(apologies for the wonky line: it should be straight!!)
Now...as the end coordinates are correct and the axis along
which forshortening takes place is not involved (this is a fudge)
we can step linearly along this line across the texture to approximate
the mapping. (This is far easier than a proper texture map).
This is effectivly a wall lying on its side which works as the
texture coordinates at the ends of the span have been calculated correctly.
This is a benefit of the raycasting we used to find everything.
Easy huh??
5: Sprites
The Sprites are really quite easy to do. The basic technique is the
same as used in Wolfenstein 3d.
This is done as follows:
When you enter a 'square' on the floor map you test to see if there are
any sprites in the square. If there are you flag that sprite as visible
and add it to a list of visible sprites.
When you have finished tracing and drawing the walls and floor you
depth sort the sprites and draw them from the back to the front. (painters
algorithm). The only complication in drawing them is that you have to check
buffer that has the walls in, in order to clip the sprites correctly.
(If you're interested in Doom you can occasionally see large
explosions (ie BFG) slip partially behind a wall segment.)
On possibly faster way of handling the sprites would be to mark
them like wall segments as you find them in the buffer. The only (ONLY!)
complication to this approach is that sprites can have holes in them. By
this I mean things like the gap between an arm and a leg which should be
the background colour.
6: Lighting and Depth Cueing
Lighting and Depth Cueing fits nicely in with the way that we have
prepared the screen ready for drawing.
All we have to do is see how far away we are when we found either
the floor or wall section and set the light level according to the distance.
The other thing that is applied is a light level. This is taken from
the map at the edges where you have hit something. As the map is 2D it is
easy to manage lighting, flickering etc.
For things like pools of light on the floor all you have to do
is subdivide that patch of floor so that you can set the bit under the
skylight to a lighter colour. Its also very easy to frig this for the
lighting goggles.
7: Controlling the Baddies
This is pretty easy: all you have to think about is moving and
reacting on a 2d map. the only complications are things like the monsters
looking through windows and seeing a player but this all degenerates into
a simple 2d problem. Things like deciding whether the player has been hit or
has he/she hit a monster is just another case of firing a ray. (Or do it
another way...)
8: Where next???
Thats all folks... hopefully a useful and intersting insight into
my Doom engine works.
As to the question where next... well I already have some enhancements
to my Doom enigine and others are in the works...
Some of what you may eventually see are:
Proper lighting (I have done this already...its easier than you
think)
Non-Vertical walls (i.e. Aliens style corridors...)
Orgranic Walls (i.e. Curved like the Aliens nest...)
Fractal Landscapes (This one is still very much a theory but how
about being able to go outside and walk up and down
hills etc??)
If there are bits people are really shaky about I may post a new
version of this... but I cannot get into implimentation issues as all
implementation work is under copyright...
By the way if anyone out there implements this I'd love to here
how you get on...
Anyone got any comments or any other interesting algorithms???
Brian 'Neuromancer' Marshall (Email: brianm@vissci.demon.co.uk )
'When do graphics not look like graphics? :when we get it RIGHT.'
Microsoft Library (.LIB) Format
Summary:
This article describes the components of the Microsoft Library Format
(for .LIB files created by the LIB.EXE Library Manager). The Microsoft
Library Format is consistent between compatible Microsoft languages.
While future library utilities will remain backward- compatible with
the older library formats, the actual library format itself is subject
to change. This information is taken from Chapter 5 of the "Microsoft
C Developer's Toolkit Reference," which contains more in-depth
information on the Microsoft Library Format.
This information applies to Microsoft QuickBasic versions 4.0, 4.0b,
and 4.5 for MS-DOS, to Microsoft Basic Compiler versions 6.0 and 6.0b
for MS-DOS, and to Microsoft Basic Professional Development System
(PDS) versions 7.0 and 7.1 for MS-DOS.
More Information:
Library Header Record
Object code library .LIB files under MS-DOS always contain blocks of
data in multiples of 512 bytes. The first record in the library is a
library header. This record is structured the same as a Microsoft
object-module-format (MS OMF) record. That is, the first byte of the
record identifies the record's type, and the next two bytes specify
the number of bytes remaining in the record. Note that the length
field is byte-swapped (in other words, the low-order byte precedes the
high-order byte). The record type for this library header is F0 hex
(240 decimal).
Modules in a library always start at the beginning of a page. Page
size is determined by adding three (one for the record type byte and
two for the record length field itself) to the value in the record
length field; thus the library header record always occupies exactly
one page. Legal values for page size are given by the range of 2
through the n, where n is a value from 4 through 15.
The four bytes immediately following the length field are a byte-
swapped long integer specifying the byte offset within the library of
the first block of the dictionary. The next two bytes are a byte-
swapped word field that specifies the number of blocks in the
dictionary. (Note: The Library Manager, LIB.EXE for MS-DOS, cannot
create a library whose dictionary requires more than 251 512-byte
pages.)
The next byte contains flags describing the library. One current flag
definition is "0x01 = case sensitive". This applies to both regular
and extended dictionaries. All other values are reserved for future
use and should be 0. The remaining bytes in the library header record
are not significant. This record deviates from the typical Microsoft
OMF record in that the last byte is not used as a checksum on the rest
of the record.
Object Modules
The first object module in the library immediately follows the header.
The first object module is followed in turn by all other object
modules in the library. Each module is in Microsoft OMF. Individual
modules are aligned so that they start at the beginning of a new page.
If, as is commonly the case, a module does not occupy a number of
bytes that is exactly a multiple of the page size, then its last block
is padded with as many null bytes as are required to fill it. This
special format is covered in detail in the "C Developer's Toolkit
Reference."
Dictionary Blocks
The remaining blocks in the library compose the dictionary. The number
of blocks in the dictionary is given in the library header. Dictionary
length is in 512-byte blocks. Detailed information on the exact
content and format of the dictionary are contained in the "C
Developer's Toolkit Reference."
Extended Dictionary
The extended dictionary is optional and indicates dependencies between
modules in the library. Versions of LIB.EXE earlier than version 3.09
do not create an extended dictionary. The extended dictionary is
placed at the end of the library. Again, see the "C Developer's
Toolkit Reference" for details on the structure of the Extended
Dictionary.
Around the World review
Last time I reviewed a TMB "The Making Brothers" game I ripped it to
shreds, thankfully, they have been learning from their mistakes. I was
particularly more impressed with their intro which now has decently
shaded characters which are pleasing on the eye. The drawings are all
in TMB's particular style.
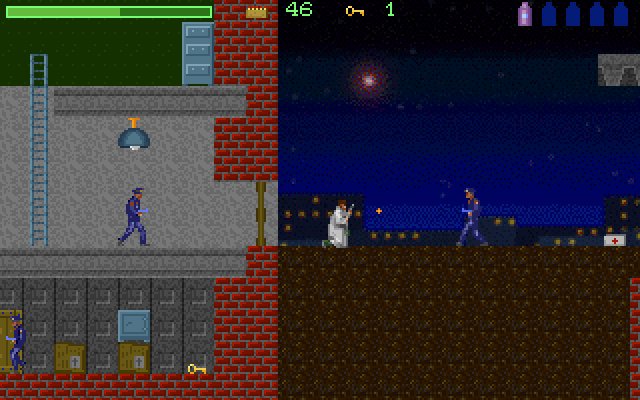
In the game, the terrain and the backgrounds all look average for your
normal platformer game. None of the scenery looks out of place and it
all blends together nicely. When moving your character about, you can
shoot little throwing star things. You can increase the distance they
are thrown by keeping the button pressed down for longer times before
releasing.
Another good point is the information places in the game. You can walk
over them and get information about things around you or controls.
The collision detection is one failure in this game unfortunately.
Going down hills tends to make you float down, as the detection is
obviously not pixel based detection.
Layers also would have to be fixed to make this game perfect, but you
can live without it. For example if you kill a "baddie" behind a bush
in the scenery he will stay behind the bush in his death sequence
while floating downwards, then appear in front of the ground that the
bush is sitting on before floating downwards, which shows an ugly join
between the bush and the ground.
TMB have also come up with a way to make the game more "realistic". As
you go into a cave type area, the screen will darken. Unfortunately,
all the screen darkens, which can make your character and obstacles
hard to see at times. You may find yourself squinting at the screen
to see things properly.
All in all I would say this is one of TMB's best projects to date and
they are certainly learning new techniques all the time. Hopefully
this trend will continue and some truely classic games will be made
by them in the future. Unfortunately this game is not quite at the
CLASSIC stage, but it is getting to a decent and respectable level
for a small group of QB coders.
I would give this game 6.5 out of 10 overall. As you know, a really
high score from me is hard to get! :)
TMB productions - http://www.crosswinds.net/~tmb/
Gza_wu (Christopher Neill) - FACE3 Productions - WWW.FACE3.COM
Credits
| Editors | Regular Writers | Submissions |
Jorden
Nightwolf
|
Nethergoth
abionnnn
gza_wu
Dae Breaker
Maz
Maxx
Matthew River Knight
|
Marcade
Brian Marshall
|
 people have read this issue!
Link to us
Wanna link to the the QB Times? Use this button:

Code:
<A HREF="http://www.qbtimes.com"
TARGET="_blank"><IMG SRC="http://qb45.com/qbtimes/images/small.jpg" WIDTH="88"
HEIGHT="31" BORDER="0"></A>
Submit your news by email, or you can
post on the Discussion Board!
Everything in this issue is copyright of their writers, nothing may be taken without explicit written permission from Nightwolf or Jorden
© Copyright 2000, Marinus Israel & Jorden Chamid