QB Express
Issue #13 ~ August 19, 2005
"A magazine by the QB community, for the QB community!"
In This Issue
Contributors
- Pete (Editor)
- MystikShadows
- Rattrapmax6
- Na_th_an
- Josiah Tobin
- Torahteen
- Jacob Palm
- Deleter
- The Awakened
- Moneo
- Seb McClouth
- mennonite
- Wallace
- Z!re
- Joseph Burke
- Cha0s
- Nathan1993
- Brad Milison
- Regular Columns
- Articles & Editorials
- Tutorials
From The Editor's Desk
Written by Pete
Here we are again: Lucky issue #13!
After last month's gigantic one year anniversary hoopla, I thought that QB Express #13 would really be scratching the bottom of the barrel for submissions. But when all is said and done, I think we scratched together a pretty solid issue, especially on the Tutorials front. We've got ten great tutorials coming at you this month, as well as the news and another dozen or so articles/editorials to enjoy.
A few things you might notice about this issue:
1) I opted to change the default font from "Palatino Linotype" to Arial. If you guys don't like the font change, let me know and I'll change it back or come up with a new font altogether. (Headings are still in the old font, since it looks more dignified for that type of thing.)
2) Internet Explorer display problems have been solved. Now code boxes have indenting, and I've double-checked to make sure that rogue <center> tags don't destroy the layout for half the zine.
3) Now there is an "Official QB Express Article Requests" thread. More on that in the Letters to the Editor section.
4) There is a hidden "Blue's Clue" somewhere in the issue. The first person to redeem it will win a fabulous prize!
Anyhow, I'm a very busy man, and I'm sure you're all itching to get to the issue, so I'll end this letter right here. Enjoy Issue #13, and be sure to submit stuff for next month's issue!
Submit To QB Express
You all know the drill. This magazine can't exist without people SUBMITTING articles, editorials, tutorials, reviews, news and feedback. This is not just a solo effort by me... it's a group effort by people throughout the QB community. If you have anything to submit, or have time to write something, DO IT!
If you want to write about something, but can't think of a topic, or need inspiration, check out the "Official QB Express Article Requests" thread! There have been quite a few articles requested -- and even if none of them strikes your fancy, we can help you come up with something that you would like to write about. If you're interested in getting your own monthly column or just want to write an article or two, by all means, do it! Anything that is submitted will be included!
I also want feedback and letters to the editor regarding this magazine. I want suggestions and critiques. What do you like? What don't you like? What could be done better? Let me know!
All submissions and feedback can be sent to pberg1@gmail.com. You can also PM me on the Pete's QB Site or QBasic News message forums. If QB Express is going to continue to be so good, YOU need to contribute!
-Pete
Letters
Letter From MystikShadows
Hi Pete,
What a way to close the first year of my favorite magazine :-). Absolutely great issue no two ways about that. And you deserve a candle for doing that interview with Nek in my book. Like I always say, there's only one place to get the truth about somebody, you gotta ask the person itself. Lachie said it best QB Express would just be a list of not always related contents if it wasn't for the big editing job you do, your part is what makes QB Express what it is, our submissions are just there to fill in the blanks and keep the reader reading :-). It's a team effort and when the team really unites into a combined effort, well that's when QB Express really shines :-). The good thing about this is the team is getting used to each of it's member.
It's Almost like we could be creating a real team. Hmmm take that as a suggestion. As you know contents and editing are becoming more and more of a chore and rightfully so if we want to continuously give the right contents. I believe maybe a group of 3 or 4 people tops should be in place to help you out. Not researchers or reviewers and such I think that kind if article is getting to be quite self sufficient. But I'm talking about 3 or 4 people that are there just to make sense of all the contents being submitted (not refusing or deciding not to publish something that's submitted) because QB Express is about publishing what's being submitted but basically making it fit together. As an example, say I wrote my 2nd part to me database design series (euh I did already) someone of those 3 to 4 people) might want to boost someone else or myself to write an interconnected topic like perhaps report generation or something like "how to really get the information you need versus the information you want" and at east try some effort to see if such an article could be written for the same issue :-) you see? Same thing for games or any other article project. this way if those 3 or 4 people would have been there they might have made more sense of all the QBasicNews shutdown news and comments just by thinking about something you might have overlooked or something :-). Just to help out a bit :-). I'd volunteer if this suggestion makes it through. :-).
Oh and of course the letters to the editors are partly there for that but what do you think about adding a "What I'd like to see in QB Express" section? Lately I see alot of letters asking to see something and I think if such a section was there people would use it :-).
As for the contents of the magazine, everything in there is to be commended.
The awards were given to their rightful owners (and I'm proud to be the
contributor that gives you the least trouble ;-) goes with being the number
1 fan and contributor ;-). I think you have enough to do on your part of
the magazine that I don't want you to worry about the little details like
formatting the articles you receive :-). At least from me ;-). I really
enjoyed Na_th_an's 6th part of his series in there along with his 2nd
chapter to his Scrolling paralax series. It's no wonder Quest for Opa Opa
is so good :-) look at all the knowledge that went into it :-). I agree
with Lachie's evaluation of issue 11 ;-) so I'm not gonna repeat any of it
here. Na_th_an's IF tutorial was very informative no two ways about it I
learned all of my IF knowledge from him alone :-) Thanks Na_th_an you got a
fan ;-) and now you got me into paralax scrolling platforms ;-). Rel's
series on 3D is what covered the other side of gaming :-). And Matt2jones
with his music series (you got a fan too matt) I just like the way he
explains his music concepts, makes me understand quickly and consisely.
Can't want for the next part of that. Nek's Interview very much speaks for
itself. I'm glad it was there, I'm glad you wanted to make that interview
to give the other side of the story and I'm glad Nek accepted to share it
with us. I think this time ratttrapmax6's horse humor outdid itself again.
This one was well developped (and I could read it all clearly, thank you
ratt ;-)).
I most definitaly have to commend Dumbledore's Effort in his wx-c usage in
FreeBasic. As you know FreeBasic is multi platform (DOS/Windows/Linux etc)
and as such I fully encourage all tutors about multi platform support GUI
engines and others. This really helps FreeBasic stay what it is as far as
multiplatform goes and I think Dumbledore has a knack to bring the C
Encrypted code that can be found in wx-c to a very clear FreeBasic
transcription. he's gifted in that area and really enjoyed and most
definitaly learned from his 2 part (so far) series on the subject :-). Not
everyone can make people understand this kind of thing easily so I hold a
candle up for Dumbledore because he's doing an awesome job and making things
clear in such a complicated infasructure that is wx-c. Good going :-). And
let's not forget Moneo's Useful QBasic/QuickBasic Algorithms contribution.
We need more of those algorithms, they sure are an important part of any
programming language. So to Moneo, Thanks for thise algorithms and I for one
hope to see plenty more in the very near future.
All this serves only one purpose for this number one fan and that's to
anticipate what will be present in the next issue. that's the one thing I
can say is QB Express definitaly has everything that's needed to just keep
us coming back for more :-). I look at the main section with the links to
all the contents and every time I find myself saying "Yes, can't wait to
read that." more than once in each issue :-). Can't wait to see what lucky
number 13 is gonna bring us :-).
Like I said, there's plenty of boring subjects still left to write about.
It's a dirty but somebody's gotta do it ;-). and if I can make that boring
side interesting enough to be read by people that wouldn't normally read
boring stuff well hey, mission accomplished. they might be boring but they
are important for all types of development projects, games included :-). So
fear not, there's plenty more coming up from yours truely :-).
Until next issue, I know you'll hear from me ;-). (now how bad is that that
I can say that upfront like this? LOL).
MystikShadows
Stephane Richard
Thanks for all the suggestions!
I like your idea about getting people to write "interconnected" / related articles. I'll keep that in mind when people ask me to help them think of a topic. I tried to do something along those lines when I had several requests for GUI-related articles, and in the past few months we've seen a lot of great GUI-related content. And that was with only minor prodding on my part. With a more concentrated effort, we could see some pretty awesome "themed" issues of QB Express in the future!
Also, your idea about a "What I'd like to see in QB Express" section was great too. So great, in fact, that I implemented it a few days after you sent me this letter: The Official QB Express Article Requests Thread. It's been a great success so far. If anyone wants to suggest an article to be written for QB Express, or to find a topic to write about, this is the place to go. I highly suggest you check it out, whether you're on the requesting or request-fulfilling end.
As for your *other* suggestion...I'm not so hot about it. I would be very hesitant to institute the 3-4 person panel to help me put together the magazine each month, because I have a feeling it would just make things harder to manage. It would surely make everything a lot *more* complicated than it is now. It would mean that three or four people would be responding to emails and telling people different things, and I'd also have to work out some sort of system where the content for each issue is shared and gathered together online for everyone to see. Plus, I always run the chance of recruiting a deadbeat, which as I've experienced in the past with this kind of thing, happens quite frequently. (You know the saying: If you want something done right, you have to do it yourself. :-) ) Anyhow, I don't think QB Express is big enough at the moment to warrant more than one editor / contact person.
What I'd really like are news reporters and regular monthly columnists. For example, if there were a "Blast From The Past" editor or a "Competitions" editor, who always wrote the same column every month, I would be ecstatic. Some people have begun to do this type of thing -- Lachie Dazdarian with his "Searching For The Unknown", anarky with "Where Are They Now?" article, and all the people who have written tutorial series (like yourself, Na_th_an, and many others). More of those would be great. :)
And then there's the single most time consuming section of QB Express, the News Briefs. I often spend more time on that one section than all the rest of my sections combined. The way people could help me the most is to help me out with that section. Lachie says it's "the backbone" of QB Express, and I agree...but I really hate doing it. :-) So if anyone out there wants to write completed news briefs and send them in, that would be extremely helpful. What Jacob Palm is doing with the GUI news is great.
Anyhow, Thanks for the letter and all the great feedback!
-Pete
Letter From Joseph Burke
Hey Pete,
Just wanted to congratulate you on your 12th issue of qbexpress. By a
number of measures, you have done a seriously good job over the past
year, especially with regards to encouraging participation, and
gathering news. I imagine that it must be difficult to get people to
consistently contribute to such a project, so you deserve special
congratulations for this.
Well done,
Joseph
P.S.
Thanks for mentioning that my article got a big reaction. Virtually no
one in the qbasic community completely understood it, but it is nice
to know it had an impact.
Thanks a lot for the kind words. Putting together an issue of QB Express every month is quite a drain, and takes a lot of time, but I think it's well worth it. My goal is to keep on doing QB Express until people stop writing. As long as fresh line of submissions keep coming in the door each month, I'll keep on pumping out issues!
-Pete
Have a letter for the editor? Send all your rants, raves, ideas, comments and questions to pberg1@gmail.com.
Express Poll
Every issue, QB Express holds a poll to see what QBers are thinking. The poll is located on the front page of Pete's QBasic Site, so that's where you go to vote. Make sure your voice is heard!
What browser are you using right now?
| Browser | Votes | Percent | Graph |
| Internet Explorer | 30 | 36% |  |
| FireFox | 39 | 47% | |
| Netscape | 2 | 2.4% | |
| Opera | 3 | 3.6% | |
| Safari | 2 | 2.4% | |
| Other | 7 | 8.4% | |
| 76 Total Votes |
After last issue was released, the debate over QB Express's browser compatibility issues came up again. Most people complained about the FireFox bug that displays random gray boxes over areas of the issue with code boxes, and others complained about some Internet Explorer display errors, like the lack of indented code, and the browser's propensity to center everything if one CENTER tag is left open somewhere at the beginning of the issue.
As a FireFox user, this discussion made me realize that I had been ignoring the needs of nearly half of my readers by not fixing the IE display errors (which turned out to be a very easy fix). I may not be able to fix the gray boxes in FireFox, but I definitely can make sure that every other browser gets to see QB Express as it was intended. After these CSS updates, Internet Explorer displays QB Express the best of all of the browsers I have tested...that is, until the FF gray boxes bug is fixed.
And in case you're wondering -- The Mozilla Foundation knows about the gray boxes problem. Last month, I submitted an extensive bug report at BugZilla. You can check it out at: this address. Maybe if you sign up for a Bugzilla account and confirm that you can reproduce the bug on your system, it will make Mozilla take care of it even sooner!
News Briefs
News from all around the QB community, about the latest games, site updates, program releases and more!
Site News
- QBXL Audio Edition 7
-
Last month, the venerable SJ Zero released the brand new QBXL Audio Edition 7, which covers such Qmunity topics as Z!re, The Griffon
Legend, FB XBox Compiling, Spotted Cheetah, Qbasic.com....and then a whole lot of unrelated stuff
about U.S. Politics (ie: Bush bashing). It has some funny moments and is definitely worth a listen. After all, at 8
minutes long, "there's probably something good in there somewhere."
- ASCII World Releases FreeBasic Toolbox
-
In the past couple of months, ASCII World has created the basis of what is to become the most
complete and useful FreeBasic collection of subroutines and other things to help make FreeBasic
even easier than it is today. As such you can expect to find the following:
- An exhaustive list of usefule subs and functions: Such things as string manipulation, date
calculations, and Screen I/O routines to help the creation of flexible applications and games
easier.
- A set of Gaming Extensions: These are also a set of useful functions and subs but these are
specialized in game creation projects. A full fledge scripting engine called (Scriptualysis) is
being implemented, subs for centering of text, Credit Scrolling Subroutines, Easier and short
ways to print text on screen, basic Data Input and so on are all part of the Gaming Extensions of
the Toolbox.
- A full fledge Text User Interface Application FrameWork: This library is still to be done
but promises a full mouse and keyboard standard User Interface for applications and games. This
will provide the basis to create applications using standard pulldown menu systems, standard
dialogs, File editing, formatted input/output routines, screen windowing and buffering and the
likes. All in the goal to provide a standard set of tools for a highly elaborate Text User
Interface.
As you can imagine, a project of this size will need all the help it can get. So we hope we
got your curiosity good enough to get you wanting to help out in this project. the FreeBasic
Toolbox is hosted on sourceforge at http://www.sourceforge.net/projects/fbtoolb
ox/
Thank you all for your time and attention
-The ASCII World Development Team
(This News brief submitted by MystikShadows.)
- FBTK Downloads Section Beefs Up
-
The FBTK guys have been busy adding to their Downloads section. Here's the news item, verbatim, because I'm
lazy:
After a massive uploading spree, Paz and I have raised the download count of files her at fbtk
to 183. Expect the number to keep rising as we try to add more files to the files database. Keep
upload games, tuts, graphics demos and anything else you want so that we can keep growing. I
don't know how we compare to other freebasic sites right now in files, but I'd have to say we're
up there.
Also, two new categories added today, random qb stuff and magazines. Every issue of QB express
has been posted in zip format and 4-7 QXBL audio editions have been hosted (no more complaining
jocke).
Also in the compilers section, many copies of fbc have been upload as we now have .07 - .13
windows, .10 - .13 linux and .11 - .13 dos uploaded. If people have versions we haven't uploaded,
we would be very grateful if you'd load those up so that we can have as many versions as
possible. The same goes for FBIDE.
The FBTK Downloads section is here: http://fbtk.net/phpBB2/ezdloads.php
- AAP Official Projects Squad Revamps
-
In celebration of the AAP Official Projects Squad's "just over one (1) year" anniversary, Adigun A. Polack has treated the site to some major updates. They include:
- The Frantic Journey pages have finally updated with the current progress of the game in FB!
- A whopping 19 FB demos have been added to the FreeBasic GFX Demo Central for a massive total of at least 71 of them!!
- The deadline of the FreeBASIC Ultimate Demo Compo has now been extended �till September 30, 2005!
- One new FB program of mine and my own tutorial about implementing Windows icons to FreeBASIC programs have also been added!
The website also boasts a brand new look. Go check it out: http://dhost.hopto.org/aapproj/
Project News
- FreeBasic Compiler v0.14b Released
V1ctor has once again treated us to a new version of FB. The new version includes "improvements such as full debugging support, function overloading and pointer type-casting." I'd say more, but you all know what FreeBasic is, and probably already all have v0.14b. If not, get it at: FreeBasic.net
- Mambazo Ports RPGine RPG Engine
-
Mambazo, a veteran of the
Qmunity, has ported his QB / Future Library RPG engine to FreeBasic, for your role-playing
pleasure. This full-featured engine includes "fully customizable graphics, maps, and the
scripting allows for diverse plots." This is a practically complete RPG framework, just
itching for someone to plug in the graphics and story. If you're interested in making an RPG,
but don't want to spend your time re-inventing the wheel, I suggest you check out the RPGine
engine. View the announcement
thread, or just download the
engine.
- FieldView Updates
Z!re's ridiculously ambitious massively multiplayer online RPG (MMORPG), FieldView, has made some
progress in the past month. Some new concept art has been posted on Plantasy Studios (the official site), and a
new encryption/decryption algorithm challenge has been started. The FieldView crew is also
looking for voice actors, a sound editor, a music composer and a pixel artist to help with the
development. I don't know how much coding has gotten done for FieldView, but at least it's going
somewhere.
- Rattrapmax6 Makes Us Bounce!
-
Rattrapmax6 released a fun FB
minigame called Bounce!, similar to many Flash games which are available all over the
Internet. (Apparently this one is similar to a game at NeoPets, but Rattrapmax6 says: "mine
has a lil diff rules, probaly better physics, and looks better.." Download Bounce!
here: bounce.zip
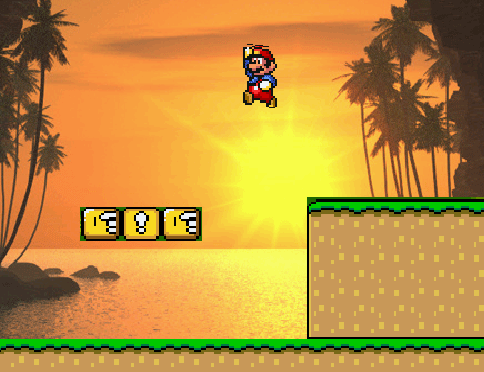
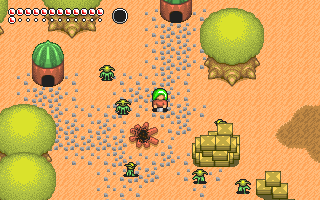
- Albuk's Quest Remake In The Works
-
CutterSlade, the maker of former Gaming Golds entry Albuk's Quest, plans on remaking
the game in FB. Albuk's Quest was a fun platformer / side scroller, and we can expect the same
from the upcoming FB version. To get us interested in the Albuk's Quest remake, CutterSlade
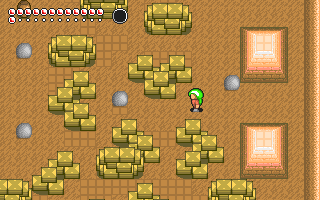
has released a single-screen
platform demo using Mario graphics (see the screenshot). You can download the demo at this address.
- VonGodric Shows Off FBIde 0.5
-
Interested in a sneak peak at the newest version of VonGodric's popular FreeBasic IDE? Then look no further! He has posted a series of enticing screenshots at this post on the FreeBasic.net forums.
New features slated to be in FBIde 0.5 include:
- Full debugging support
- to enable/disbale the sub/function only view ( Yes to hide all other as in QB's IDE )
- Add function/sub Tree view
- Bookmarks
- Full project support -project templates, settings, ...
- Advanced global ( in all files, project, ... )search
- Support for automatic upper/lower/mixed case for the keywords.
- Write real FB syntax parser for scintilla ( so far I'v been using modified VB's parser )
- Support for single instance of FBIde ( instead of opening new IDE for every file that is loaded outside of teh FBIde )
- Documentation
- Help support, costomisible Help menu
- File history
- Support and SDK for plug-ins, but that's a bit utopic right now... or not?
There's no doubt that the best FB IDE in town is gonna get even better with the new release! Check out the official site for more details, or to get previous versions.
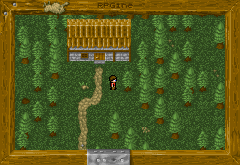
- Wizardry-Style Maze Game In The Works
-
Stevens522 posted this screenshot of a nifty
Wizardry: Proving Grounds clone for FreeBasic. The engine is translated from an old
Delphi source file, and therefore has a very authentic retro look.
Eventually, Stevens522 plans
to add enemy encounters and develop this engine into a full-fledged game. There's no playable
demo yet, but hopefully we'll see one soon.
I, for one, am excited. We haven't seen a Wizardry-style game in the QB scene since, well, Legend of Lith II. It's definitely due time for a fresh take on this genre.
- Pong in 63 Lines
-
This month, someone in IRC challenged Xerol to do Pong in 50 lines and 10 minutes. It took him 63 lines and 22 minutes, but he got it finished! Check it out here or here.
But wait...there's more! Xerol's also making another Pong game. Here's the word from the man himself:
I'm working on a more fully-featured
version in under 100 lines right now. (What other features does pong need? Not really anything
crucial, but a Title Screen, some sort of score limit/victory condition, and a high score table
might work. Considering I've got 37 lines left to work with, this could be a challenge!)
These "extreme efficiency" coding challenges are really interesting to me. I'd really like to see someone fulfill this IRC guy's challenge: Pong in 50 lines and ten minutes. I'm sure it can be done. If anyone ends up accomplishing this, be sure to send QB Express a copy! Until then, you can enjoy Xerol's 63 line / 22 minute version, and shortly, his enhanced 100-line version. :-)
- S.H.E. Demonstration
-
Deleter and TheBlueKeyboard are working on a gory isometric shooter called S.H.E., and they recently posted a giant-sized 1024x768 screenshot of the game's latest build. If you're in the mood for seeing a lot of digital isometric blood and a menacing robot, check out this thread.
- "Excape From Windows" World for Wetspot 2 Breaks Out
-
Angelo Mottola's perennial QB classic has just gotten new life, with Rattrapmax6's new "Worlds of Wetspot" creation, Excape From Windows.  Rattrap's fan world, created with the level editor included with the original Wetspot 2 release (way back in 1998), features five levels with a Windows theme. The maps are made up of floppy disks and gray Windows-esque boxes, and are chock-full of Wetspot 2's memorable enemies.
What's most interesting about this release is just how timeless the the Wetspot 2 gameplay is. It's just as fun now as it was back in 1998. There's no wonder that Wetspot 2 is widely considered the greatest QB game ever made.
And as further testament to Wetspot's greatness, check out last month's Gallery. Adigun A. Polack is creating a FB port / "Remix" of the original Wetspot game, which I'm sure will be welcomed by the Qmunity when it's released. Now if only someone would do a Wetspot 2 port so we can play Rattrapmax6's new map in 32-bit FB goodness...
- SonicX Version 10 Released, Next Version Will Be In FB
-
Every time I hear about a new update to SonicX, I'm amazed. Joseph Burke has been working on this QB Sonic for over seven years, since 1998, and he's still at it. In a community where most projects don't last for more than a month, that's an amazing accomplishment. The latest version of SonicX (build 10) is a huge improvement over all the past editions. Here's a look at some of the new features:
- Has Sound. This includes sound fX and Background music. I had to hack
ds4qb2 to pieces to get it to work at a resonable speed. Midi music is
supplied via Nekrophidious's harmony slave port to qb.
- Much faster engine with quicker loading times.
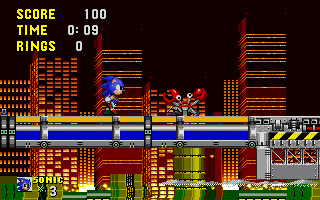
- Customisable water layers. The colour can be adjusted to anything by
a level designer.
- Customisable moving objects.
- Each object can have a basic script attached to it. So in the game, a
ring has a script attached to it, and the script is run every time the
ring is touched. This script can tell the game to delete the ring
animation at that point and add 1 to the ring counter.
- Contains enemies. As this is a preview, not all the enemies are finished. At least
four different enemies have been fully created and scripted.
- Has a much more stable Level editor and graphics editor.
- Sonic can lose rings, and pick up lost rings.
- Underwater physics are fully implemented. Sonic needs air bubbles to
breathe, or will drown.
- Collision detection is a bit smoother.
- Players now have the choice of playing Sonic or Tails.
- The level editor now sports a BASIC IDE for writing basic scripts in SonicX.
Joe also announced that version 10 will be the final QB version of SonicX. He has opted to port the entire project to FreeBasic before continuing development, so that a wider userbase can enjoy his game.
To get the latest version of SonicX, visit QBasic Central!
- Costa GUI v0.8.0 Released
-
Jacob Palm has released a new version of Costa, his QB GUI. "It has many new features, including themes and multiuser support. No accessories are included (didn't wanna include half-finished tools), but it's still a fully functional GUI." You can download Costa here: http://www.jacobpalm.dk/archive/Costa080.zip
- QB Object (GUI Library) Rebuild
-
Here's a press release Todd Seuss of Data Components posted at several places around the Qmunity this past week about his new GUI library:
Hi everyone!
I would like to announce that the library called "QB Object" has been released for development of programs and software requiring a nice GUI and ease of programming.
The library turns simplified code from the user into advanced graphics and controls. A program that might take an hour to develop a GUI for will take much less time with this GUI.
Instructions are included as well as examples and tutorials.
The original library written by AMP Software cost $50 and the demo only had the QLB for running and not compiling. However, the QB Object Rebuild by Data Components Software Development is FREE and has the library to compile your programs. Programs made with QB Object are virtually small and relatively fast.
Here is the URL to the library: http://kldp.net/frs/download.php/2666/qbobject.zip .
Have fun and please give me feedback at todd@datacomponents.moved.in .
Thanks,
Todd Suess
- Wallace Software Inspires Us..
-

...with a new Inspiration demo, that is! Wallace posted the new beta version of his first person shooter engine on his website (Wallace Software) on August 10th. Now that the engine is being developed in FreeBasic, it has sped up significantly and now boasts many more features, like multiple guns, flashlights and the ability to turn lights on and off, and more. The engine is still missing proper collision detection and there were no enemies in the demo, but they should be coming soon. Wallace has posted some very interesting comments about Inspiration's enemy artificial intelligence code on his site, and he also contributed a great tutorial on the subject to QB Express this month. I'm really looking forward to the point when Inspiration is turned from an engine demo into a full-featured game!
- Stratego Clone Build 30
-
Nemesis recently posted a demo version of his take on the classic board game Stratego. Programmed entirely in QB4.5, this game still lacks AI and lacks polish, but it was pretty fun, and held my attention. The controls are intuitive, and it's easy to get into. Of course, since the computer opponent lacks any sort of intelligence, it was an easy slaughter...but once some (any) AI routines are incorporated, this will be a great game!
- Rokkuman Makes Cobra Way Awesomer!
-
Rokkuman has released a very preliminary demo of the FreeBasic version of his fighting game Cobra, which he began in QB over two years ago. The game is being completely remade from scratch, and will feature giant-sized hand-drawn fighter sprites. Here's a quote from Rokkuman on the new graphics:
As of now, the game currently has sprites with multiple height and width dimensions (with Koby's current stance sprite averaging at 113x152), completely scripted attacks, and movements, so that I can add little details like footsteps to walking animations, sound, stages made of images, and layered, fighter on fighter collision detection, waaaaaaaaaaaaaaaay better keyhandling, a nicer character selectscreen, and animations that are pretty much unlimited in terms of length. Attacks and stuff currently haven't been made however, but it'll be awesome, trust me.
Also, the characters themselves are going to go under some redesigns, now that I have more than a 30x30 space to work with. The Koby in this demo looks pretty much the same way he did in Cobra, but his sprite will probably get worked over.  His design will probably stay somewhat basic, and he won't be decked out in chains and stickers or something, just for the sake of him having them, but... look at him... yeesh.
In fact, here's a comparison, Koby from the old Cobra, and Koby from the new Cobra:
As you can see, Koby is nearly FIVE TIMES his original size, meaning this game will be FIVE TIMES as awesome, only it won't be five, it'll be more, like 750432hghg037250tg423t07327 or something.
The Cobra demo lacks attacks still, but if jumping around Street-Fighter-style is your thing, then I suggest you check it out. Dialup users beware: the demo weighs in at 11MB because of the music used in the demo. Click here to download the Cobra Demo.
- Syn9's Latest Masterpiece: A Simple 3D RPG Style Engine
-
I tell you, everytime Syn9 codes anything, it's pure gold. His new 3D engine, which renders 3D graphics made in Blender (www.blender.org), produces absolutely beautiful results. It may be just a one-screen walkaround engine demo, but it really has that kind of professional polish that we so rarely see in QB/FB releases. Check out this screenshot (click to enlarge):
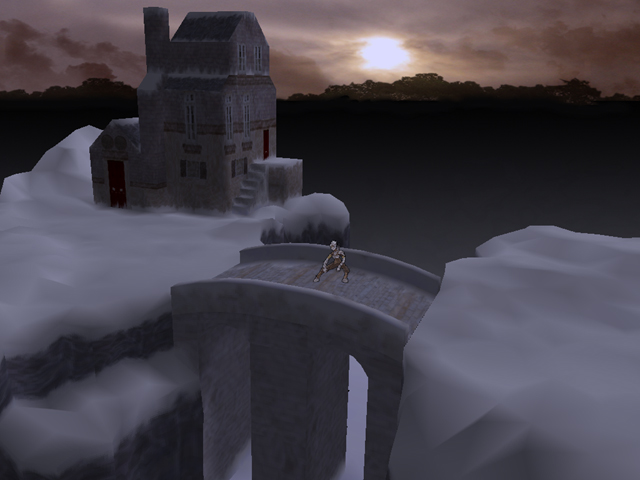
Hopefully Syn9 (1) develops this engine into a full game, and (2) writes a tutorial series for QB Express on how he does it. In either case, we would all be eternally grateful.
You can download the demo here: http://syn9.thingie.net/crap/gltest2/test2.rar
Competition News
- Drawing AI Challenge Winner
-
Z!re's Drawing AI Challenge, where entrants were challenged to "Make an AI [program] that produces some sort of drawings/art.." just wrapped up, with some interesting results. There were about half a dozen entries, all using some type of randomized graphics technique to create some very beautiful and colorful artwork. In the end, though, Z!re declared the winner to be rdc, whose "RDCPainta" program generated this image (click to view it full size):
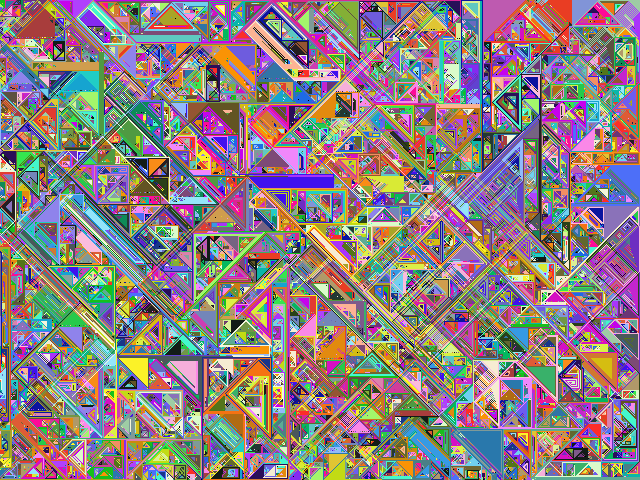
You can check out the forum thread for this compo here. Also, Z!re has started a new Encryption / Decryption challenge for her FieldView RPG, which has gotten quite a bit of attention. Check that compo out here.
- Timezone Calculator Challenge
-
Moneo has been running a successful competition on the Pete's QB Site / QBasic News forums, which challenges coders to create a simple program that calculates world timezones and validates user input. You can find the official threads here: QBasic News / Pete's QB Site. This competition has become a valuable learning experience for entrants, because with each successive entry, Moneo points out important calculation or input validation flaws and pushed coders to improve their algorithms. Read through the threads -- you'll probably learn something!
Have QB / FB news to share? Send your news briefs to pberg1@gmail.com!
Gallery:
Lynn's Legacy
Written by Pete
A simple job for a simple mercenary... The task was easy, and the pay was better than any job she'd taken on in the past. Ten thousand gold, paid upon completion. And now, she was almost there-- the mainland was in sight.
An escort mission. Lynn Heltra could not even recall the last time she'd taken on one of these, but the pay was just too good. Although she sometimes wondered what exactly was contained in the small crate strapped to one of the Wyvern Rays in the tiny airborne caravan... then...
Chaos. Random sounds and noises mingled with otherworldly voices and strange messages-- Fire burning all around her as she falls from her Wyvern Ray, now consumed in flame from the explosion.
Whatever was in that crate must've gone off too soon...
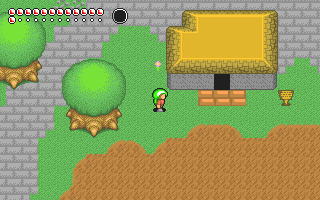
So begins Lynn's Legacy, a stylish and quite ambitious FB action RPG in the works by Josiah Tobin and Cha0s. Started in QuickBasic, and in development for at least two years (check out the preview in QB On Acid #11 from January 2004), this game has come very far since its humble beginnings back in 2003. And believe me, it's going places.
 I recently had the opportunity to try out the latest engine demo of Lynn's Legacy, and I was very impressed. Josiah's distinctive cartoonish graphics and witty writing style set this game apart from the conventional medieval-themed RPGs you see in the Qmunity, and Cha0s's smooth, polished engine makes gameplay intuitive and fun. Although the game is still in the early stages and much of the gameplay and story is still undeveloped, Lynn's Legacy has a lot of novel ideas and exciting innovations in store for the finished version. Read on, and I'm sure you'll become just as excited as I am for Lynn's Legacy!
Description/Features:
Josiah gave me some very interesting tidbits about this Zelda-esque action RPG's gameplay, which I shall now pass on to you:
"In Lynn's Legacy, you play the role of Lynn Heltra, a mercenary who was mysteriously blown out of the sky on an escort mission. 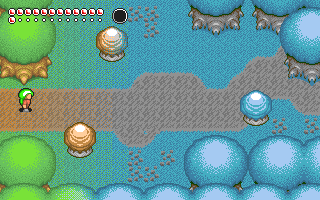 Struggling to regain seemingly random fragments of her memory that have apparently gone missing since the accident, she is driven also by a strange, blind spectre who calls himself Moth."
"The game is spread across four main areas and eight full-length dungeons, their designs increasing in complexity as the game progresses. There are several different weapons, from a hastily-acquired green sapling to a massive and deadly gear-shaped ball 'n chain. Throughout the course of the game you also acquire useable items, just some of which are the Flare Powder (melts ice and destroys weak rocks), Bridge Box (lets you cross gaps and chasms), and Alchemic Regenerator."
"One unique feature of the game is the 'adrenaline meter', which rises each time you strike a foe but drops almost as fast. Getting it to the top in time is a challenge, but if pulled off, does double damage to the enemy."
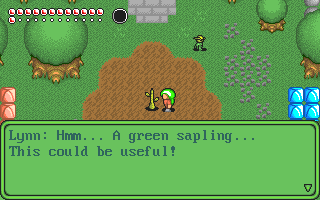
In the demo that I tried, I got to explore two preliminary areas that Josiah has designed. The first was a forest / town area, which looks like it will be the first area of the game. Early on, I found the first weapon: a green sapling, which I used to dispense the many small green enemies inhabited the area. At one point there were seven or eight on the screen at one time and the engine ran without a hitch. As of right now, the enemies do not attack an just kind of mull about, minding their own business, waiting to be whipped to death. Hopefully they'll become a bit more threatening by the final release.

The forest area also has entrances blocked off by piles of red and blue blocks, which apparently must be destroyed by a fire / water counter-item. Lynn's Legacy seems like it will have a Zelda-like overworld where blocked entrances to new areas will tease you for much of the game, but you won't be able to access them until much later when you find the appropriate items to brake down the barriers. Judging just by the preliminary level design, I could tell that a lot of thought was put into creating interesting places to tuck away items and secret entrances that would maximize your ability to explore the environment.
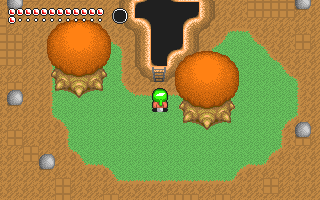
The second area in the demo was a GIGANTIC desert, with lots of very cool temple-like buildings and maze-like rock ledges. The sheer size of this map really showed off the power of Cha0s's engine. The desert area was particularly interesting in that although it consists of just one "flat" tile map, there were three distinct 'levels' that you could explore. You could go on top of buildings, on the main ground level, and down to the lower-ground area, and the whole time it was perfectly obvious where you were standing, and where in relation to you all the other 'levels' of the ground were. This is quite a testament to Josiah's skill as a pixel artist, since a lot of tile sets simply don't convey heights in a believable manner.

Overall, Lynn's Legacy was one of the most impressive walk-around RPG demos I've had the privilege of playing. Now let's hope that it will be developed past an impressive engine demo...
Progress/Development
...Luckily, it sounds like Josiah and Cha0s are making great headway. Here's the word from Josiah:

Currently progress is fairly steady. The graphics, music, and manuscript/dialogue are all 100% complete, and maps are now the main focus. The 'new' engine is up and running for the most part, though of course there are many additions to be made.
The release date cannot be estimated... such a deadline would only make the final product seem rushed. (while we were trying to beat The Griffon Legend for a release date awhile ago, that obviously turned out to be impossible. However, we now have some nice competition, heh)
Although the release date is still up in the air, we're all hoping that it comes sooner than later. Judging by what I've seen so far, there's no doubt that Lynn's Legacy is gonna rock the FB scene when it arrives!
Have an upcoming game you'd like featured in The Gallery? Email me!
Why Do People Make GUI's?
Written by Jacob Palm
This is not really an article, it's just some of the active GUI programmers who shares their reasons to do GUI programming.
Brandon Cornell (Fun500 and Pheonix)
I make Fun500 for 2 reasons:
- The Main Reason: Enjoyment
- The Second Reason: I hope it becomes a PC cometitor someday LOL !!
Pheonix I make for the same reasons. Even though the progect is very slow!!
MystikShadows (ErgonOS)
The main reason why I'm making a GUI is because I for one am tired of the the way Windows, Linux KDE, you name them tend to make you work. I take it this way, if I am sitting at my computer, what do I want to do? do I want to open a word processor to write an article or do I want to write an article using a word processor. That's the main difference between ErgonOS and the likes of windows. There's many different ways to endup with a document in a word processor, and ErgonOS is my way to accomplish a task such as that one.
When windows first started, I wasn't too keen about it (yes I've dealt with windows 1.0 all the way to windows XP I use Windows because the industry still wants it and to be competitive in my career choice you have to code for the OS or GUI that's hot in demand :-) especially if you plan to sell your product in any way. But if I had no commercial reason to use windows, it wouldn't be on my hard drive. Linux is an alternative to this but when you look at X Windows, Gnome, KDE, Motif and lesstif (the free alternative to Motif) and the others, they all are based on the way windows work. So for me, I'm sticking to windows because it's still more popular than Linux and more software are made for it. I do plan to make a dual boot soon though ;-) with Linux just in case.
But as far as GUI is concerned, everything is application and icon based. And when you think about that concept, it's the best way to waste resources. Because all applications have to supply all parts of their applications. In my case, each type of document will load just the resources it needs in order to perform their tasks and nothing else. And since each document will work on a stack based resource handling, ridding the system of an application's resources will be as easy as ending a sub and killing it's local variables.
To me, this is a better way to work with your files. The GUI will supply the Global resources, like Hardware access, clipboard, printer drivers (yes I plan on making my own ;-). and the application will only need to supply what they need from those resources to do their job.
There, that's my vision and reason for making my own GUI :-)
ysft12
When I develop a GUI, I learn alot of new things. There are different programs and routines you have to make. Its also fun because you get to work with graphics and stuff.
I have created some GUIs in the past. GUI programming got me so interested, that it will probably hard to stop GUI programming.
To be really interested in GUI programming, all you have to do is start creating your own GUIs!
Steve (Linster OS)
If Windows made it with 1.01 and that was extremly simple, then i thought i could make something simlar to it but better. And that I always wanted to sell a desktop enviroment with my own branding just like Microgoof did.
Todd Suess (Millennium OS)
The reason why I work on M-OS is because I think it is a unique GUI from most. I noticed M-OS when I was in 6th Grade. I noticed QBF OS, also written by the previous author of M-OS. However, QBF OS had no code with it, and M-OS was open source. M-OS was similar in design to QBF OS but had a completely different interface. I liked M-OS since it looked a lot like Windows, and I was fascinated with its speed and compliance. A couple glitches appeared, but overall, it was unique and user friendly. In 7th Grade, I used it in a science fair to demonstrate how programming works. Some people saw it and thought it was Linux, but I told them that it was a friendly DOS GUI called Millennium OS. In 8th Grade, I noticed many GUI reviews websites were going offline, and that QBasic GUIs were starting to disappear from the web. I thought, "Why don't I work on my own GUI to contribute to the QBasic community?" I started work on M-OS in the beginning of March 2004 and finally launched a website on July 2004. I work on M-OS since it is a unique GUI, and the author is very fascinated by my work on his experimental GUI for QBasic. I know M-OS will never meet the competition of GUIs today or OSes, but I enjoy working on it since I learn new ideas and tricks when coding it. My goal is to make M-OS as user friendly and as advanced as QBasic's limits.
Jacob Palm (Costa)
Of course I'll also tell you my own reasons for making my GUI.
The reason I make my GUI is mostly for the fun of it, but there's more to it than that. I have an old laptop with MS-DOS 6, and I thought it could be an interresting idea to make a GUI myself. I started 4 years ago, and I'm not done yet (I doubt I'll ever be, there's always things to optimize, features to add and such). I also learn a lot about computers when I make my GUI.
I also make my own GUI because I'm tired of Windows, I've been running Windows since 1994 so a little change wouldn't hurt.
After I saw Linux some years ago I thought that maybe I could make a GUI, too. I searched for GUI's on the internet and trembled over http://mcchome.hypermart.net/ which, at the time, was the biggest GUI review site around. I looked at a lot of the GUI's, and decided to use QBasic for my GUI. So I started out right away. Suddenly HyperMart closed http://mcchome.hypermart.net/, and all the reviews disappeared. That's when I decided to make my own GUI review site, though it took me some years to get a site up and running.
Well, to sum it up: I make my GUI because I think it's fun, and because I need a GUI for some MS-DOS computer I have and don't want to run Windows or Linux.
Visit Jacob Palm's GUI Site: JacobPalm.dk
Rant: Reality In Games
Written by Deleter
Before I go any further, I wish for to know that this rant was inspired by the article by SJ Zero entitled "The Hidden World of Game Development". In this article, he explained that complication in games is unnecessary. Instead of making it the most complicated you can, he says to make it the simplest you can. Basically, it's not what's under the hood what counts, but how much fun it is in the end.
A lot of the complication in games comes from trying to make it more realistic For example physics engines and real time dynamic lighting calculations are extremely CPU intensive and difficult code wise. Sure you could compute the wishes of every NPC in your game real time and carry them out to be more realistic. You can have one hit kills all the time, since that is reality. Obviously, complete reality isn�t what people want in their games. After all, if you want reality, you can simply turn off the box, put on your coat and walk outside. Granted, you couldn�t be a criminal mastermind if you did, nor the commander of the Roman legionaries, nor the emperor of space. But if you want these things, chances are you aren�t looking for reality anyway.
If you do want 100% reality in doing something, you won�t find it in a game. Rather, you want a simulation. While simulations can be games, nothing in their definition mandates that they must be a game, nor does anything in a game�s definition demand that it has to be a simulation. Therefore, don�t confuse the two when you are programming. You don�t need 100% accurate physics, you don�t need intelligent NPC�s living realistic lives, and you definitely don�t need the headache of figuring it out when its only going to lead to the heartache of people not playing it since its not fun.
So, now it seems we ought to skip reality completely and replace her with her sister fantasy. Well, not quite. After all, a world where the player can�t die since he was never alive, where people float or exist only as abstract ideas, or the player finds himself in a non-existent void of extreme duplicity will only serve to give your player a headache. In light of this, we should evaluate the presence of reality in a game. What purpose does it serve, if too much is a bad thing, but not enough is equally bad?
The answer to this is that reality is, partially, the players hold on your game. Reality defines the player�s ability to grasp, understand, and interact with your world. The keyboard, mouse, gamepad, and joystick are all the physical components the player needs; reality is the game concept of these devices. Reality goes far beyond physics, lighting and the like. The idea of your player as a physical essence amongst other physical essences in a larger essence of being (as much as it makes your head hurt) is part of reality in its base form. The idea of actions and reactions is a component of reality.
Now before I get so abstract that I lose complete focus, how does this apply to games? Reality needs to be balanced with the rest of your game. While not enough reality in your game can lead to your player not being able to grasp the concepts behind your game, too much ruins the content of your game.
What does this mean? It means that you have to put enough reality in your game so that the player understands and feels your world. Use enough reality so that he can interact with the game and understand its reactions, without putting so much that the player gets preoccupied with the reality instead of playing the game.
If you have so inconvenienced yourself as have read my article on simulating ecosystems, please forget what was in that when working on your game. The idea behind it, while decent as far as simulating goes, would prove horrible for most games. For example, in a shooter, you don�t care that your enemy was taking object A to point B because of boss C who he is working for because of wife D who needs to support children E. The only thing your player sees is an enemy with an object, therefore all your game needs to have in place is�you guessed it�an enemy with an object. If you are trying to make a totally random and in-depth RPG, it might be advantageous to have some complicated AI system like that at work, but its entirely unnecessary and in most (99.9% of the time) circumstances, will detract from your game. Not only will the heavy equations and such in your game eat the FPS like crazy, but your player is likely to find himself in a complicated mire of logic that will only cause him to hit the X and never click on your exe again (nor the shortcut you placed conveniently on his desktop).
To sum it up, you need balance. That enemy I just killed didn�t need to have a life purpose, daily purpose, current task, list of friends, wife, children, home, and the like. But my gun did need to fire bullets, he did need to die, we both needed to exist, and he needed at least crude tactics so the player felt like he was in a real world. If your game play supports it, a complicated physics engine may indeed add to your game, but be mindful of how complicated it needs to be to serve whatever purpose you are putting it in there for. For the less obvious elements of reality that you are installing in your game, know why you are putting them in there, and that way you can implement them enough, without overdoing them. You don�t need to explain why there is a world, a player, and a goal, but at least a one-word answer as to why you need everything else might save you the trouble of implementing too much reality into your game (or not enough).
That pretty much sums it all up, thanks for reading. Hopefully next time I�ll find something a bit more original to rant about, instead of leaching off my peers. Hats off to SJ for his excellent article named above, without it, I probably would never have written this. I would also have used a very complicated, sophisticated, pretty realistic, and completely and utterly unnecessary AI module for my upcoming game, Sub Human Evolution, which at its latest version before I abandoned it had taken over 800 lines of code.
In this rant (if you are reading it off my homepage) I changed the colors to try and make it more readable (as opposed to bright green on black). Tell me what you think of this change, and tell me a better combiniation if this one still isn�t good enough. As always, send these comments and any others on my article to barbarian_roleplayer@yahoo.com Thanks again for reading!
Visit Deleter's site: Barbarian Roleplayer QB / FB Rants
My Life as a Programmer
Written by The Awakened
I have always been fascinated with computers. There is a certain magic, to me, of how an incomprehensible series of two different voltages passing across semiconducting material and through a vast sum of IC's and other tiny parts, can create such an expansive "world", where you're only limited by your creativity and willingness to learn. There's a feeling just from having the MSDOS screen stare back at you with a simple "C:\ >_", maybe it comes from watching movies like The Matrix, but it's just always been there. So naturally, it was easy for me to get into programming at a younger age.
My first foray into the wacky world of programming  , was with HTML. After I had seen the Microsoft Frontpage and Homestead Sitebuilder (making sites about Dragonball Z and Pokemon, heh), I wanted to know how I could make web pages "by hand." Even though I wasn't very good at it and I couldn't remember half the tags, it definatly planted the seed for my later days as a programmer.
In the summer before I went into grade 7 (year 2000), I was at a family reunion, chatting with some relatives. Eventually, the subject of computers came up, and before long, one of them mentioned that they knew how to program. I was blown away. I asked what programming languages he used. He mentioned a few, but the one that stuck in my mind was QBasic. A few days after I got home from the reunion, I was sitting at my computer, and remembered "QBasic". I stuck that in the search engine, and the first site that came up was good old QBasic.com. After finding QBasic off my Windows CD, reading the first tutorial, doing some typing followed by a push of the wonderful F5 key, I had a black screen staring back at me, that read "Hello, World!... Press any key to continue." I was floored. I kept reading the confusing tutorials (sorry, but I just don't think Mallard's tutorials are all that great for a beginner, heh), and managed to get some basic skills, including moving a sprite across the screen (I couldn't figure out why two sprites wouldn't animate at the same time, heheh).
I went to the old QBasic.com pretty much every day after that, making guessing games with QB, going into the (mostly empty) chatroom, and downloading other people's programs, wondering "how in the world did they do that?!?" The funny thing is, I never thought to go searching for other QBasic sites, until one day, the thought hit me "there's gotta be hundreds of them!"
The first site I came across after the dead Qbasic.com site was, interestingly, Pete's QBasic Site. I enjoyed the tutorials, as well as the challenges! I still have an unfinished bank program in my old programming folder. And I recently used a couple of the challenges when I decided to get back into progging.
Thinking I knew what I was doing, I began programming a simulation game based on a group of people marooned on an island. The game didn't get very far, as I was using DATA statements for graphics in Screen 7, didn't know how to manipulate the palette, and generally didn't know what I was doing. I was using 9x9 graphics, heheh. And if you've ever seen Tsugumo's pixel tutorial, where he says "yes here I have a grass tile, change the color, there's water, change the colors, WHOO! WE GOT DIRT!" well, that is exactly what I did.
And what do you do when your giant simulation game doesn't work? You start an even bigger game. In this case, it was my epic RPG... Quest for the Sacred Realm... the typical "legend has it that, if you travel to The Sacred Realm, you can restore peace to the world... but let's not think about that, we have three random people in a sleepy town who are going on a completely different journey, but will end up entwined with The War of Time anyway" cheesy plot. There were a few good ideas, plotwise, and really, I could probably still salvage it if I ever decided to use the plot ideas, but for now, I'm just gonna stay away from it. Codewise, it was definatly the beginning of my structured code, even though it could have been a lot more efficient... the source file itself is bigger than my current game's engine, which does wayyyy more. Graphics wise, I finally got into standard VGA 13h mode, but I still didn't have a very good idea of good graphics. If only Tsu's tutorial had been up back then, heh.
As well, around this time, (probably about January 2001) I found Darkness Ethereal. I was pretty amazed at Mysterious Song, and The Secret of Cooey games. I also got into metal from DarkDread's recommendations of My Dying Bride and eventually In Flames. Some of the songs definatly take me back to those days. The DarkBoard marked the first forum I ever joined, and it was great to be able to communicate with other coders and ask questions and whatnot.
Eventually, I ditched "Quest for the Sacred Realm" and decided to stop coding for a while. I found another coder, named ironyFist, who wanted to do a project, and he needed an artist/musician/support programmer for a game, so I replied on the DarkBoard and we decided to do a game called "Darkness Ethereal: The RPG". Seriously. We were like 12 and 13 at the time, but we would finish it! (bzzz). I had Tsu's pixel tutorial at this point, the the graphics still kinda sucked, heh.
The funny thing was, even after we called it quits, I never saw a line of code from the guy. Oh well.
So by about October 2001, I was starting from scratch. I hung out on the DarkBoard some more, chatted on the DE chatroom, and I think this was around the time when the older RPGDX was up. That was cool. I remember Nek having a sweet tutorial on good plot design on that website, but I've never been able to find it since.
In the winter of 01/02, DarkDread was talking about doing an RPG competition. I was very interested in this, and I signed up immedietly. I decided to do a game (working title was Journey Home) where the main character was mysteriously transported away from his homeland up to a snowy world, and had to find his way back home. It didn't really go anywhere (I couldn't code a friggin map editor, heh), and I was stumped for a few months. Then I had an idea of a game where a group of soldiers were captured and thrown into the hellish prison known as "Subterra". The competition lasted like 8 months, so nobody really cared to finish anything and that was the end of the compo. However, the engine was okay, and I continued work on it for a bit, but naturally, the apathy kicked in and that was the end of working on it.
I continued hanging out on the RPGDX boards, but really, I didn't do a helluva lot. I had some plans for some smaller games, but I left the scene in late winter of 2003.
A few years passed by. Every so often, I'd peek into my old QB folder or go to the RPGDX boards and sigh.
But during spring of 2005, a chain of events sort of weaved together that ultimately brought me back to the scene. I was bored one night, so I grabbed a random book off the shelf; it was a book on C. I read through some of it. Some other nights, I would read through my old plans I had for Quest for the Sacred Realm, Journey Home, and Subterra. One time, I was jamming with my band, and the drummer said "hey, play that one riff, the Subterranean something" and I was like "oh yeah... the boss battle theme". One night, as I was mowing the lawn, I was thinking about coding and everything, and thought "ya know, I should do some MOD music, and rejoin the community. No code, no art, just music for now."
And then school was out and perhaps my mind needed something to keep it occupied. I downloaded the Python scripter (no idea why I did that), ditched it, and on July 3, 2005, I searched through my good old Subterra engine and commented all the code, trying to make sense of it all. I couldn't believe when I was done. I'd figured the code out. Which is what was stopping me in the first place from finishing it. You know how it goes. You leave some code for a while, come back to it, and you havn't written down how it works.
I wrote down everything I wanted to change and add to the engine, came up with a better plot, and read an immense amount of tutorials. 6 hours straight, reading nothing but x86 assembly up till 3:00 in the morning can get to you.  But I soaked it up. I'm much smarter than when I first coded the engine. And now I'm determined to finish it. It seemed like a daunting task, but I've already changed my map editor and engine to support 2 layers... and I can't believe what a clean edit it was. An hour and a half tops, and that's at lazy speed.
Lately, I've been reading a lot about assembly, C++, and Java... but I have no plans of leaving the Qmunnity. Not so soon after rejoining!
So thanks if you've read this entire thing. I enjoyed reminising about the past, and I got to dig through a lot of my old folders.
Peace!
-The Awakened
You can contact The Awakened through this link.
Qbinux Update
Written by Seb McClouth
Welcome back, glad your interested in another Linux-clone fake OS. If you haven�t read my first article on Qbinux, I�d strongly advice to do this so you have a little idea what it is. You can find it here: http://www.petesqbsite.com/sections/express/Issue11/index.html#projects
First, let me fill ya in a bit on some secrets
Some people might have read it on the forum. The computer I use to program Qbinux is with, is a museum piece. It�s an old IBM Thinkpad 755c (laptop), with an Intel 486 DX4 (a.k.a. Overdrive) processor, 20 mb ram and a 800 MB harddrive. The harddrive let me surprised because it was supposed to only have 340 MB. Anyways, when I got it, it was running windows 95.
I upgraded it to Windows 98.
When I introduced Internet to my own place, I bought a crosslink cable, and tried to hook it up to the internet. Which failed, made me update to win98SE. And after messing with my network I finally got the connection between my laptop and windows working. And I so I had internet on my laptop.
After about a year I decided to remove windows, since I never used the internet on it any more. And then Dos came around the corner, and QB4.5 following it�s trial.
This setup gave me the opportunity to continue develop Qbinux.
Why this platform? It�s that I don�t have a 386 with 16 MB, because that would be the best thing. Linux was developed as an 386-platform OS. That�s why I figured that my old laptop would serve as the best develop-station. And also because I can place it on my lap, while I watch TV.
One other thing. My first UI (UserInteface) was a copy of Windows 3.1. No big deal. Yeah, I know. I completely coded it ASCII. It didn�t work with a mouse and was one of my first programs.
Why a second article on this topic?
Several reasons:
- people wanted me to write another article
- it is always good to stay tuned
- I felt like it
- That about sums it up
Where are we now?
We currently have Qbinux core version 0.0.5. It will be released right after publication of this article. You can request a demo of it at Balai_Goyan@yahoo.com.
I�m working on the Novix implentation. Actually it�s in implenting Linux in Novix. For that reason I kept the core name of Novix. Within a few months I will have Novix and Qbinux working side by side. Currently it will only be some nam/text changes in Novix.
Besides that, I�m developing a setup program which allows users to install qbinux on their pc. The setup program is based upon the Red Hat install program, because it is in ASCII-coding and an easy to use GUI.
The demo will contain the setup, and demo version of Qbash.
What does the qbinux-core at present time?
- Detect onboard base and extended memory
- Detect video-adapter and detect svga
- Check for a pointing device (seems to work for both PS/2 and com1, but you need to have a mouse driver loaded)
- Detect the amount of floppy drives onboard
- Detect the amount of hard drives, their partition-table, their size.
What has happened between this and my first article?
The core has been rewritten several times, and was updated with new function. A few days ago I finally got the lay-out how I wanted it.
Several people have contributed really helpful source and information.
A few people I�d like to thank through here:
- Pete for his site/forum
- Z!re for NOVIX
- Moneo for his Timezone calculator challenge
- Antoni for his help on several date/time functions
- MysticShadows and Wyndo for their help on some Linux code.
- And ofcourse all the other who helped/will help along the way
Newest addition to Qbinux
- Setup
It�s nearly finished. You�ll see it when you request the demo, �cause Qbinux and Qbash will be installed with it.
Setup has it�s on input-handler, since it uses special keys like: up, down, tab, F12. In the current version you cannot yet choose your language, I hope to fix this in the near future. Same thing on the keyboard layout.
- Qbash
I�m currently still working on it. You�ll get a demo of it, with the qbinux demo. This code is, just as the core-code, strongly based upon Linux. This is one of the most stressfull things since it�s also writing from scratch. Thanks to Ronald Brad Murphy I had some insight on commandline programming.
- Log
Slightly adjusted routines from Novix, which are really helpful. In future release these will be updated for more logs. This means that in Linux ways, that we have a config file which contains all the needed links to the log files and their locations.
- Novix
 Yes, as you have read, I�m working on the implentation of Novix. Also using it as a mayor base source for further development of Qbinux. The adjusted boot-screen you can see here:
Additional to the Novix implentation I have gotten access to some graphics. This means that Setup will have the ability to choose at the bootprompt for a regular (text) setup, and a graphic setup. Currently asking for the graphic setup, will only give the graphic boot. In setup you will be giving the choice if you want a graphic boot or text boot. To give a peek on the code how to do this:
IF LCASE$(COMMAND$) = �text� THEN
Txt.Main
ELSEIF LCASE$(COMMAND$) = �graphic� THEN
�Gx.Main �For future release
ELSE
Txt.Main �If nothing was prompted, run textmode.
END IF
Ofcourse will this be adjusted in future release.
In future release their will be access to the root-account through the command su. This to be able to mount other device in Novix.
- Matrix
Someone asked for some Matrix-goodies. After the demo-release I will continue to further develop Qbash and ofcoure the Novix-implentation, but also make a Matrix version. I already have a Matrix bootscreen:

- Functions and Subs
There are Subs and Function included which date from other Forums I used to visit.
One of these Function was written by QbasicKing at www.tek-tips.com which has helped lot�s of times. It is used to find the starting x% for the title on a window.
FUNTION Centre% (x%, x2%, text$)
Centre% = x% + ((x2% - x%) � LEN (text$) /2
END FUNCTION
It�s probably buggy because I altered it. He had build it to use it with Gprint.
End (for now)
I know, I know, it�s a long article and Qbinux still needs work. There�s a lot of remarks in Qbinux which state �For future release, and I try to work on them.
Till next time.
If you have any suggestions or comments, mail me at Balai_Goyan@yahoo.com
Grtz
Seb
Read more about Qbinux in this forum thread.
Pointless Points:
STOP THE MADNESS!!!
Written by Nathan1993
Thats right, I am back and kicking with some more pointless points, only that have a fight with myself at the end for stealing a title that I didn't realize until I sent this email, so if you could include this little text that I'm typing here to your description at the beginning of the article, that would kick ass, but show the whole thing... or something will happen to you ;-)
-Nathan1993
Well, that got your attention, ehh? So, you want the madness to stop too, then read this. I just want to cover some things that are ohh too common in the Qmunity, and need to stop. Of these include websites, programs, and just stupidity� and hate me for this or love me for it, I do not care. Just remember: I can block any of your email addresses, and I know how to hack.
Anyway, my first point is that trying to make some new websites is kinda pointless now. Its good that you wanna help, but can�t you do it in some other way? Instead of creating that website with 1 or 2 tricks that noone knows, instead submit it to some big sites (www.qbasicnews.com, www.petesqbsite.com, www.freebasic.com just to name a few) instead of making people search for it. Face it, its gonna die!
Its all fine and dandy, but instead of making that site make that kick-ass tutorial on how to hack QB games and how to do some other crap like that. Even if you are never going to use it, it is nice to be able to say �I know how to program on the XBOX!!!!1111shift-oneoneone!1!!1 1m l1k3 s0000 1337!!!� Im kidding, but still, its cool to say �Screw you, hippies!� in an x-box lan party then start playing some game people have never heard of and you know the god-mode cheat.
Another point is that you need to stop making programs only to abandon them in 1 week. Instead of saying �someone help me on this program� say �Hey, I am making an RPG engine that is going pretty well, but I stink at graphics! Can someone please help?� Odds are, if you show them a good plan, good engine, enthusiasm and some determination, they will help.
Stop asking us for every little problem you have! Like Seb McClouth, you can tell he has a lot of problems programming, but he also tries hard, is completely baffled, or searches beforehand to try to find out his problems. Other people just post a program and are basically like �Fix this!� without telling us the problem, and being a bitch about it. It needs to stop.
Another thing is to stop with the misleading titles, Nathan1993! You say �Pointless Points� when really your points do have a point! To some, this is quality stuff, while to others, this just makes them hate you! That�s not pointless, it rules! I�d rather see a title �Some good points� than a completely meaningless clever title, even if it is the second time you used this title! And just because your ex-girlfriend likes that title doesn�t change anything you dirty bastard!
Contact Nathan1993 through this link.
My QuickBasic Debuts
Written by Stéphane Richard (Mystikshadows)
WHEN IT ALL BEGAN:
In 1975, I went to the library, I was 7 at the time and I wanted to go get some comic books to read. The main
book ile was blocked by other kids probably wanting to go get some comics too so I contoured that ile to get to
where the comic books were. To do so, I went throught the computer books section. A TV with alot of buttons is what
I thought to myself back then. But it cought my attention. When you're 7, you're basically just starting to hearn
mathematics at it's very basic level, but still something cought my eye about those machines. I read the term computer
picked up a best seller programming book about the TRS-80 Model I computer and I got hooked on programming right there
and then.
That's when I learned my first programming language, a primitive basic dialect that really didn't offer much. Nonetheless
it offered enough to get my hooked for 30 years now. I ended up reading every single computer book there was at the time on
any computer and any programming language they had at the library. by the time I was 10, I was getting pretty good at BASIC,
Pascal USCD, Logo (turtle graphics), and some primitive databases that existed at the time. When I learned Pascal, I started
wondering why BASIC needed line numbers to execute itself properly. But I didn't pay too much attention to it and just continued
reading computer books. I moved every now and then and had the chance to always have libraries with books I didn't read yet
so I wasn't complaining about all the moving I did. SO I read, and learned everything I could everywhere I went. I also learned
about a language called MIRA which was quite unique in it's time. It created the first 3D Computer animation I ever saw
that was called "Dream Flight" and definitally got me even more hooked on learning to program so I could make one of those
myself.
WHERE DOES QBASIC/QUICKBASIC FIT IN:
10 years (count them, 10 years) had passed since my first computer book, I was programming many things back then, I did a stock market
simulator (at the age of 16) and always used that to add features and functionalities. Back in 1985, the long awaited release of MS-DOS 5.0
was forthcoming and I couldn't wait to finally get a new OS to play with. Every computer magazine were talking about the arrival of a BASIC
language that finally didn't need line numbers (I remember that today, but back then, I didn't really care about the feature, until I had a chance
to experience it first hand. First thing I did was take my stock market program I did in GW-BASIC and load it into QBasic. Then I hit F6 and was
glad to see it start. Backwards compatibility, what a joy indeed. Then I when through the painstaking experience to go line by line and remove the
line numbers and tried to run it again. Needless to say, all my gotos and gosubs went right out the window. So I sat down and looked at the
online help file. and learned about Subs and functions. So I took my Gosubs put everything into a Sub, went back and did it again
for all the gosubs I had (even back then I wasn't too keep on using GOTO, GOSUB was the messiest I wanted to get in my recipe for
spaghetti a la BASIC. That was a good thing when I changed my program to using subs instead of GOSUBs. When I was done, I hit that
now classic F5 button to execute it and to my surprised it worked.
My first non financial Game I played was called outpost, you had a grid, and you had enemies coming at your from every angle and you had to choose
the right kind of weapon for the right kind of enemy. I liked that game quite a lot and so I decided to create one of my own so that I could add a few
ideas of my own. It took a while, but I learned all of my QBasic programming from making that game alone. I enjoyed every single minute of it and
right then and there decided that QBasic was going to be my language of choice for my personal projects. So I started getting ideas for new
projects (games and others). By the way, I'm sure you've noticed by now that I always liked to play with numbers. It's a bit because when I started
learning programming, the books I read didn't really talk about games, the talked about business development. And I liked what programming
could do for numbers.
AND THEN THERE WAS THE COMPILER:
When I started in QBasic, I loved the language right away. But of course, I also knew C++ and Pascal and liked the fact that those languages could create
EXEs so I didn't have to give the sources away everytime I wanted someone to play a game I made. Shortly after I learned QBasic, I found out about the existence
of a QBasic compiler. Imagine my joy when I new there was a way to create EXE out of my QBasic programs. $299.95 was the price to get my bas files
into exe forms. Ouch no? A big price to pay. But I really wanted it. So I saved up (for half a year) and finally managed to get
QuickBasic 4.5. Once I got used to the little discrepencies of QBasic to QuickBasic (even back then I didn't get why they didn't keep the language exactly the same,
it didn't make sense to me that you had to change the language in order to make it compilable). But after about a month, I was used to those differences and started
producing exe left and right at will.
I started making tools and utilities that I started to distribute to local small companies. I did a cash register program (when I was 19) that the convenience store liked
and decided to use permanently. In not so many words, this was my first taste of contractual QuickBasic development and I liked it. This guy at the convenience store was a
friend of the family so I didn't charge him anything for it. Who knows, maybe he's still using it today. While we lived there, everytime he needed something added, he'd
call me and I'd start getting busy throwing in what he wanted added. It was fun to do this kind of thing and so I wasn't planning on stopping this for nothing.
THE PDS AND VB-DOS IT WAS ABOUT TIME:
As I continued to add things to this cash register, no need to say that the program got bigger and bigger and reached a point where I couldn't add anything without getting the
dreaded "Insufficient memory" error. I broke the cash register into programs that I wanted to chain together. but when I executed that the first time, it was so slow that I almost
thought about rewriting it in Pascal or something. The PDS came out however and they bragged about it being able to make bigger programs with the use of overlays. For the sake of
the cash register program, I decided that I would get the PDS because it was the quickest solution to my current problem.
After about 3 weeks of moving modules around and deciding which part of the program should go in overlays. I finally made all the changes that the convenience store wanted
and went there to install everything and make sure it worked as expected.
The PDS was a great tool to use. You really could make bigger applications or games with it and you could see, back then, bigger applications emerging all over the place. To me, that
meant that horizons would broaden dramatically and very different types of games and application could see the light of day because of this. I wanted to make a TUI back then, one that would
resemble somewhat Borland's Turbovision library that existed at the time. However, the PDS had beaten me to it, it already had a set of libraries
to create windows and menues and dialogs so I wanted to learn how do use that in my programs. Well time went by and I always kept putting that off. Not too long after that, I was hearing sayings
and rumors about VB-DOS. I got a copy of it from a friend and got a glimpse of how to create forms with it. I found it so easy that I said to myself, instead of learning how to do things in the PDS,
I would just use VB-DOS instead and buy my legal copy if I should decide to sell anything I make out of it. So I was programming sophisticated applications with VB-DOS's TUI designers and forms and
always had fun doing that ever since. Still today, I find myself opening VB-DOS and just having fun with using it.
AND THERE YOU HAVE IT:
This is my own personal QBasic story. Alot of things happened in my quest to a programming career as you can see. Much more than that happened with the other languages I used at the time and still use today.
Programming has always been a big part of my life. I just love sitting down and creating something I hope others can use. I especially love doing research and development (as in trying to make something that
just hasn't been thought of before. Those of you that might think that everything has been invented in the computer software
industry better byte your tongue more than once. Because still today, we are the level of making the computer do what we humans
don't want to do. We really haven't yet begun to really truely create with computers.
I decided to write this piece of my personal history because I wanted to give you a glimpse of my programming life. But most of all, I wanted to justify, in some weird way, why I write so many
tutorials about subjects that are so serious, and so not game like. My own history has thrown me into business development from very early in my programming life and well, what can I say, I've loved
it probably as much as most of the Qmunity loves making Games, or GUI developers love making GUIs. But now, I decided that at home, I would push my learnings to beyond the commercial software industry
and dive right into game, 3D and other related programming topics. so who knows, maybe one of my game experiments might make it in a review
on one of the upcoming QB Express issues. Only the future will tell.
MystikShadows
Stéphane Richard
srichard@adaworld.com
QB Magazines
Written by Brad Milison
If someone ever asks me what I think about QB magazines, I usually give the same answer. �Well, I sure don�t know much about every other position, but the quarterback certainly does do a lot for his team. He should get some separate recognition.�
Quarterbacks are mainly responsible for one thing in football: passing the actual ball to players on the field. I�m pretty sure quarterbacks are usually white. I don�t know why this is, but I�ve heard many jokes about this fact. Perhaps white people don�t have that extra primal edge like other people do.
I think the ideal QB magazine should feature a different quarterback from each level of football every month. For example, you can have quarterbacks from pro teams, college teams, and if more depth is wanted, even quarterbacks from high school teams showing a lot of potential. This would be a good scouting-type idea for all. The more recognition a young up-and-comer could get, the better. Perhaps the magazine could show quarterbacks living their everyday lifestyle, kind of like other magazines featuring celebrities at home. This would show that not all quarterbacks are as tough as they may appear to be on the field. How much more personal can it get when a fan sees their favorite quarterback at home reading the paper? I mean, it could certainly get the message across to kids that these guys are real, not just meatheads full of steroids and other fun drugs (not saying drugs are fun, simply that to each his own). However, there should be a line not to cross when showing quarterbacks at home. Gardening or cleaning windows could instigate name calling on the field. It�s easy to picture a quarterback getting ready to start the play and getting distracted. �Blue 42,� he would say and perhaps an opponent might say, �Hey, why don�t you focus on the game and not the latest types of tulips you�ve planted?� Boy would that be a bad idea. Especially if the opponent assumed the flowers in the magazine were tulips when really they were dahlias.
Overall, I say quarterbacks should take their recognition in honor. Let�s just hope the QB magazines aren�t too popular, because pretty soon people will be saying, �Well, where are the linebacker magazines? Or what about the blocker magazines?� Soon enough players will be on strike until they�re also featured in a monthly magazine. But for now, press on with the quarterback magazines because some kids need real heroes and where else to look but America�s favorite past time (well, I guess that�s baseball, but football is probably on the list somewhere).
Sometimes Pete wonders whether having a completely "open" magazine is really the best choice. :-)
eg0 0v3rl0ad...
(a poem about coding)
Written by mennonite
10 it's great that you're having fun, but, you're doing it wrong.
20 your hobby won't measure up to mine.
30 it just so happens that there is one way to do this.
40 i know, i've done it every other way, and they all suck.
50 i've been doing this for forty years,
60 i know half the languages, and the others don't matter.
70 trust me, you don't want to write that the way you're doing it,
90 it'll blow up your machine, it'll destroy the ozone layer, it'll create a black hole.
100 this is why people don't respect BASIC.
110 don't walk, run, don't debug, repair, rewrite, don't have fun that way.
120 your hobby won't measure up to mine.
130 do it this way. do it the only way.
140 do it my way.
150 SYSTEM: END
Visit mennonite's QB site (Chooo!!!!)
Monthly Awards
Written by Pete
Every month, QB Express hands out two awards to recognize QB or FB coders and websites that have done exceptional work in the last month. They are not awarded for work done in the past, only for work that has been released since the last issue of the magazine. We will bring you these awards on a monthly basis to help give credit where credit is due.
Site of the Month
AAP Official Projects Squad
http://dhost.hopto.org/aapproj/
Webmaster: Adigun Azikiwe Polack
Adigun Azikiwe Polack is famous around the Qmunity for his flashy graphics, flashy writing style, flashy text formatting and flashy QB/FB game demos. When you see something created by Adigun, you know it's his. The AAP Official Projects Squad website is no exception. I've never seen another site so intricately decorated in my entire life.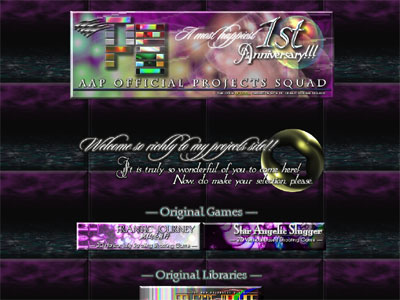 Some find the design charming, some would call it "excessive", others would call it "seizure-inducing" -- but one thing's for sure: it is so distinctively an AAP creation, that nobody else on the planet could ever make the same website.
But once you get past the initial awe of Adigun's web design, you'll find a truly great QB/FB site. The AAP Official Projects Squad is not only dedicated to AAP's personal coding exploits, like Frantic Journey, Star Angelic Slugger and his FB 8-bit Palette Machine -- it is also home to the FreeBasic Ultimate Demo Compo, the QB/FB Tutorials Guild and -- most importantly -- the FreeBasic GFX Demo Central. That section alone is worth the visit, and it's why I've opted to award the AAP Projects Squad "Site of the Month" for August.
Adigun's FB GFX Demo Central is a collection of 71 FreeBasic graphics demos, chronicling the entire existence of FB, from V1ctor's very first graphics demo (TinyPTC static test), to demos that came out just a few days ago. Each one of them is accompanied with a detailed description, and most importantly, screenshots. The earlier entries are focused on purely visual graphical displays, but the more recent additions include game engine demos and graphics-related applications.
Although this may not be the biggest collection of FB programs around (FBTK holds that crown), I would say that Adigun's page offers the downloads in the most straightforward and user-friendly manner of any FB site. Screenshots really are essential on downloads pages if you are distributing graphics demos, and since the majority of all FB programs released to date are graphics demos, Adigun's web design is right on the ball. His descriptions are also very well done.
Scrolling through this page is like reading a FreeBasic history book. You can actually spot the moments when new features were added to FB, or pioneering FB coders tried implementing new techniques into their programs. The evolution of V1ctor's compiler is clearly visible... just watch as the type of demos change from simple static and plasma demos to renderings of beautiful 3D landscapes. What this community has accomplished in the nine months since FreeBasic v0.1 was released is incredible -- and Adigun Azikiwe Polack site shows it to us in living color.

Anyhow, for the major updates Adigun has done to the AAP Official Projects Squad in the past month (including a complete redesign, an update to the Frantic Journey page, and adding 19 new FB demos to the FB GFX Demo Central), he is hereby awarded the QB Express "Site of the Month" award!
Programmer of the Month
Rattrapmax6
(a.k.a. Kevin / x.t.r. GRAPHICS)
http://members.aol.com/rattrapmax6/xtrgraphics.html
If I had to pick one person in the Qmunity who has improved his programming skills the most in the past year, I would undoubtedly say Rattrapmax6. Just last year, Rattrapmax6 was a beginning QB programmer, whose most significant project was the simplistic QB game Robo Raider. Jut a few short months later, Rattrap is making programs like ASCII Scrolling Map Maker, a 3D helicopter program and tons of OpenGL graphics demos in FB. He has also easily become one of the most active members of the QB Scene. He is now the #1 poster at the Pete's QB Site forums (with over 830 posts since January, 2005) and he's racked up over 1300 posts at QBasic News to boot.
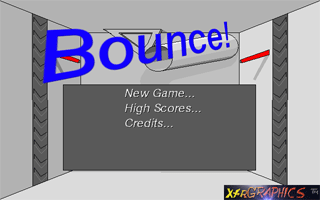

This past month, Rattrapmax6 has released a few FB graphics demos, coded the mini-game Bounce!, released version 2.5 of his ASCII Scrolling Map Maker, made a FreeBasic screen saver, designed the "Excape From Windows" Wetspot 2 world, created a 3D Helicopter demo, updated his x.t.r. GRAPHICS website, organized four 3D art challenges at the QBasic News forums, written two tutorials for QB Express and on top of it all, submitted another "Horse Humor Comic". It's unbelievable -- I have no idea how Rattrap has this much energy. There is nobody else in the QB Scene who has been nearly as active as Rattrap has lately. He may not be the absolute best programmer around, but he's certainly the most productive. One thing's for sure: Rattrapmax6 always keeps us on our toes, and definitely keeps things lively around here!
For all of this, Rattrapmax6 is QB Express's Programmer of the Month for August 2005!
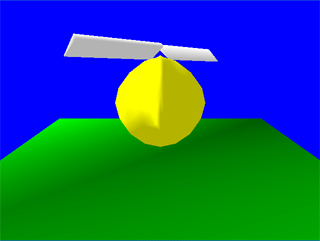

Comics
By Rattrapmax6
Rattrapmax6 is back this month with another QBasic Horse Humor comic!
IF TUT CHAPTER 7
THE UBERALMIGHTY OBJECTS MANAGER - OM
Na_th_an
Yeah, it's true. It's here: the Uberalmighty Objects Manager, the piece of BASIC code which will make 90% of the player's inputs work. The collection of SUBs and FUNCTIONs which will give true life to your IF Engine - and the almost-final chapter in this astonishingly long tutorial series, which was intended to have just three chapters - before I realized that there was much more things to tell you than I thought. Next chapter we'll give the complete (and, of course, revised) code for the engine and if there's space we'll explain how to build a game around it. But on this one we'll focus on the OM - The true heart of our engine. It would be nice to re-read chapter #3 again to have things fresh.
Take a glance at this piece of code: those are the subroutines we are gonna code (yeah, you guessed it right: this is OM.BI):
' Declares :: Objects manager

Declare Sub Obj.Load (fileName As String)

' Common actions:

Declare Sub Obj.Ex (lid As Integer, oid As Integer)
Declare Sub Obj.Get (lid As Integer, oid As Integer)
Declare Sub Obj.Drop (lid As Integer, oid As Integer)
Declare SUb Obj.PutIn (lid As Integer, oid As Integer, oid2 As Integer)
Declare Sub Obj.TakeFrom (lid As Integer, oid As Integer, oid2 As Integer)
Declare Sub Obj.Open (lid As Integer, oid As Integer)
Declare Sub Obj.Close (lid As Integer, oid As Integer)
Declare Sub Obj.TurnOn (lid As Integer, oid As Integer)
Declare Sub Obj.TurnOff (lid As Integer, oid As Integer)

' Very important auxiliary function:

Declare Sub Obj.Visible (lid As Integer, oid As Integer, olid As Integer)

' Needed by the Location Manager:

Declare Sub Obj.ClearFixedObjects ()
Declare Sub Obj.CreateFixedObject (name As String, desc As String)

' Needed by the Exceptions engine:

Declare Function Obj.GetFlag (whichFlag As Integer) As Integer
Declare Sub Obj.SetFlag (whichObj As Integer, newValue As Integer)
Declare Sub Obj.SetLoc (whichObj As Integer, newLocation As Integer)
Whoah! We have tons of lines to code, so we better start over ;)
A word wrapping function
This got mentioned and used in last chapter. In case you don't know how to write a function that takes a text and prints it on screen using word-wrapping, here's a very simple yet effective way to do it. You can stuff this function in some "util.bas" or "misc.bas" module, and export it in its .bi file.
Sub Misc.WordWrap (t As String) Static
	Dim wo As String
	Dim i As Integer
	Dim m As String * 1

    wo = ""
    t = t + " "

    For i = 1 To Len(t)
        m = Mid$(t, i, 1)
        if m = " " Then
            'if pos(0) + Len(wo) > 80 Then Print    ' QB version
            if pos() + Len(wo) > 80 Then Print      ' fB version
            Print wo; " ";
            wo = ""
        ElseIf m = "@" Then							' @ produces a newline char.
            'if pos(0) + Len(wo) > 80 Then Print    ' QB version
            if pos() + Len(wo) > 80 Then Print      ' fB version
            Print wo
            wo = ""
        Else
            wo = wo + m
        End if
    Next i

End Sub
Let's start "light". Let's load our objects from disk
Yeah, before going complex, let's define how our objects will be stored in a file, and let's write the subroutine which will load them into appropiate data structures. But, before, let's define those data structures:
CONST MAXOBJECTS = 100        ' Total number of objects + fixobjects.
CONST FIXOBJECTS = 90         ' Fixobjects will be stored from this pos.
CONST MAXWEIGHT = 32          ' Maximum weight the player can carry.

Type ObjectType
     name as String * 20        ' Object's name.
     adjs as String * 20        ' Adjectives used if any, hence you can tell "yellow key" or "red key"
                                ' and identify them as two different objects in the game.
     desc as String * 255       ' Object's description.
     flag as Integer            ' Object's flags.
     loc as Integer             ' Object's location.
     wh as Integer              ' Object's containing location (where appliable).
     weight as Integer			' Object's weight
     size as Integer			' Object's size
     capacity as Integer		' Object's capacity (where appliable).
End Type

Dim Shared O (MAXOBJECTS) As ObjectType
Let's describe what we have in this new type structure upon which our objects array "O" is built around:
- name: This will be our objects name - the word the player will use to refer to it.
- adjs: Adjectives used, if any. Normally blank, just used if you need more than one word to refer to the object. Remember how the parser worked: if you need extra words to refer to an object you have to define them as adjectives and stuff them all together in the object definition. For example, if you need a "big black boombox" in your game, you need "boombox" as a noun in your dictionary, "big" and "black" as adjectives, and define your object as name = "boombox", adjs = "bigblack".
- desc: The object's description, i.e. the text which will be thrown to the display when the user asks to examine this object.
- flag: Object's flag: if it is open, a container, etcetera. Refer to chapter 3 to refresh your mind.
- loc: Object's location, i.e. the initial position of our object in the game. This value refers to a "lid" number, i.e. a location id as those used in the location definitions.
- wh: Object's containing location, this is for containers. As we explained in chapter 3, if object A is put inside object B, what we do is set A's loc attribute to the value of B's wh attribute. That means that you have to use numbers which are not used to identify any locations. Be very careful with this or funny things may happen.
- weight: Object's weight. This is used to add extra IFs to the actions "Get" "Drop" "Put Into" etcetera, and works along the MAXWEIGHT constant, which defines the maximum weight the player can handle. You could use a variable instead a constant for this if you want your player to get stronger during the game or something like that. Use what you prefer.
- size: Object's size - more or less, defines the object's size. Nothing to be exact, more to define which will fit inside which.
- capacity: This is just for containters. This defines how many things (and which things) we can stuff inside a container. For example, a wallet with capacity = 10 will be able to store 10 coins of size 1, and nothing else. If you have less than 5 coins inside, you can stuff a pen of size 5 as well.
The weight/size/capacity stuff is something that I did not plan to add in the beginning -'cause this will bring some headaches-, but I think they are quite important things to have a proper engine. If we would not take any control over those variables, we'd have a game where you could stuff a piano inside a shoe box. And we don't want something like that, do we?
So let's load the objects :)
Sub Obj.Load (fileName As String)
	Dim f As Integer
	Dim objIdx As Integer
	Dim lineFromFile As String

    ' We just load a plain text file with the objects definitions one per line.
    ' Nothing very fancy.

    f = FreeFile

    Open fileName For Input As #f

    Do While (Not(Eof(f)))

		Line Input #f, objIdx
        Line Input #f, lineFromFile
        O(objIdx).name = ltrim$(rtrim$(lineFromFile))
        Line Input #f, lineFromFile
        O(objIdx).adjs = ltrim$(rtrim$(lineFromFile))
        Line Input #f, lineFromFile
        O(objIdx).desc = ltrim$(rtrim$(lineFromFile))
        Line Input #f, lineFromFile
        O(objIdx).flag = val(ltrim$(rtrim$(lineFromFile)))
        Line Input #f, lineFromFile
        O(objIdx).loc = val(ltrim$(rtrim$(lineFromFile)))
        Line Input #f, lineFromFile
        O(objIdx).wh = val(ltrim$(rtrim$(lineFromFile)))
		Line Input #f, lineFromFile
		O(objIdx).weight = val(ltrim$(rtrim$(lineFromFile)))
		Line Input #f, lineFromFile
		O(objIdx).size = val(ltrim$(rtrim$(lineFromFile)))
		Line Input #f, lineFromFile
		O(objIdx).capacity = val(ltrim$(rtrim$(lineFromFile)))

        Line Input #f, lineFromFile       ' We use a dummy line to separate objects in the file.

    Loop

    Close #f
End Sub
And done. You know, we didn't think on something very complex: text file, a value for line, and a line to separate objects in the file. I do this in this way 'cause I use a nice objects editor which has a nice windowed interface and outputs the data to a file in this format - mainly to calculate the "flags" attribute. You can do yours, or use mine [insert download here]. Note that we first read the objIdx from file. This objIdx must be an integer number between 0 and FIXOBJECTS, and defines in which array element we are gonna store the object we are just reading from the file, so it has to be unique as well. A sample file with just two objects would look like:
0
bag

A small leather bag with the typical leather ribbon to open/close it.
1
10
1000
5
5
10

1
coin
golden
A small golden coin, not very valuable.
0
1000
0
0
1
0
(Notice the trailing blank line - shitty loader limitation :D, now sort it out if you feel like it ;) ). This file defines objects #0 and #1. Our first object, Object #0 is called "bag", doesn't use adjectives in its name, has a description "A small leather bag with the typical leather ribbon to open/close it.", its flag equals "1" (container, closed) is located at location #10, it "contains" in location #1000, weights 5 units, takes 5 units of space but can contain up to 10 units of space.
Our second object, Object #1, is called "golden coin", has a description "A small golden coin, not very valuable.", its flag equals "0" (nothing special), it's located at location #1000 (i.e. it's located inside the bag), contains in location #0 (but won't be used as it isn't a container, so doesn't matter which number we use in this line), it weights 0 units (it would be stupid to try to get a coin and being replied "you can't carry more weight!"), it takes 1 unit of space (it takes 1/10 of the bag, then), and it's capacity is 0 (again, this won't be ever used as this object is not a container).
Maintaining this manually can be a hell, that's why I coded my simple proggie. You can run it whenever you want to make changes/additions to the objects file.
Defining what's visible and reachable
The very first check you have to do when attempting to perform an action over an object, is if that object is "reachable" from the place the player is located at. What does that mean? Very simple: the object is in the same location where the player is, or it is in the player's inventory, or the player is wearing it, or it is inside an open container which is "reachable" from where the player is. Note the recursive nature of this phrase.
So we have to code this recursive function which "looks" for an object. This function will be used in a lot of places (it has already been used in the exceptions interpreter: look for "Obj.Visible"). The function will return the correct "lid" where the object is, or -1 otherwise.
Sub Obj.Visible (lid As Integer, oid As Integer, olid As Integer)
	Dim i As Integer
	Dim j As Integer

    ' This SUB checks if the object #oid is visible from lid
    ' And returns where it is in olid or -1 if not visible.

    If O (oid).loc = lid Then               ' Object found in lid
        olid = lid
        Exit Sub
    ElseIf O (oid).loc = 0 Then             ' Object found in inventory.
        olid = 0
    	Exit Sub
    Else
    	' Look inside everything that's here.

        For j = 0 to MAXOBJECTS
        	If O (j).loc = lid Or O (j).loc = 0 Then
        		If (O (j).flag And 1) = 1 And (O (j).flag And 2) = 2) Then		' Object is container and it's open

					' Recursive call: We look from O (j).wh:

                    Obj.Visible O (j).wh, oid, olid

				If olid <> -1 Then Exit Sub		' Object found.
                End If
            End If
        Next j
    End If

    olid = -1

End Sub
You call Obj.Visible passing three parameters: first of all, the lid where we want to look from, second the object we want to look for, and then a variable to hold an exit value which will be the lid where the object has been found or -1 otherwise (i.e. it hasn't been found). If you know about trees (and I mean "tree" in the context of abstract data types, not vegetal trees) you should have recognized the width search scheme in the algo. Basicly we are in a "node" (location) and check all the "son nodes" (objects in that location).
Let's follow the algorithm with a simple example: You are at location #10, and you prompt the game to give you the examination of a match. In location #10 there is a wooden drawer which contains at 1000 and a box which contains at 1001, plus a chair. The drawer is empty, but the box contains a bag which contains at 1002 and a ball. The ball contains a coin and the match. The objects are defined to be: 1 - match, 2 - drawer, 3 - box, 4 - bag, 5 - ball, 6 - coin, 7 - chair.
So we want to look for the match, which is object 1, from lid = 10, so the actuall call is:
Obj.Visible 10, 1, olid
Inside the sub, O(1).loc is 1002 as the match is in the bag, so the program will flow accross the "Else" branch in the If. There will be a recursive call for every object which is located at 10 or 0 (the inventory) and is an open container. In our case, the wooden drawer, the chair and the box are at 10, but only the drawer and the box are containers (and we suppose they are open), so there will be two recursive calls. The first one happens with the drawer, which contains at 1000, so we have to look from lid = 1000:
Obj.Visible 1000, 1, olid
In this recursive call we enter again in the "Else" branch of the If, but as no objects are inside the drawer there's no more to check and the subroutine exits with olid = -1. That means that we'll keep executing the "For" loop thus making the second recursive call, the one for the box, which contains at 1001:
Obj.Visible 1001, 1, olid
Again, as the match is not directly inside the box (we said that the match is at 1002, i.e. inside the bag), we enter in the "Else" branch and look for all the objects which are at 1001, which are the bag and the ball. Only the bag is an open container, so there will be just one recursive call:
Obj.Visible 1002, 1, olid
This time the first If returns true: the match is at 1002. The subroutine is exitted with olid = 2, the For/Next is broken by the "Exit Sub", yet another one, and finally we exit with olid = 1002. Object found!. What we did is some kind of nice backtracking with cut of branches, just for you to learn impressive words. As a side note: always use impressive words. They make your little snippets look more pro. As long as you are applying those words correctly, otherwise you look like a n00b :P
Nice recursive action uh? Yeah, I know that recursive algorithms are slower and take more memory than their iterative counterparts. But now go and transform this into an iterative algo - you better not try. Plus, what for? In a normal game, I doubt you'd have more than 7 or 8 nested recursive callings, so fear not: your program won't crash nor will be slow for using this. Granted, you'll use this function quite a lot, in fact it gets called every now and then, but trust me: your game won't suffer of this recursivity.
Now that we have determined a way to check if an object is within reach, we can begin defining our common actions set of SUBs.
We need a couple more auxiliar functions which have to do with the weight of objects. The first of all calculates the weight of an object, taking in account that it may be a container, in which case the weight of the contained objects have to be added.
Function Obj.calculateObjWeight (oid As Integer)
	Dim i As Integer
	Dim accumulator As Integer

	' Guess: Another recursive function! Yahoo!

	' base case:
	If (O (oid).status And 1) <> 1 Then
		Obj.calculateObjWeight = O (oid).weight
		Exit Function
	Else

		' recursive case:
		accumulator = 0

		For i = 0 To FIXOBJECTS
			If O (i).loc = O (oid).wh Then
				accumulator = accumulator + Obj.calculateObjWeight (i)
			End If
		Next i

		Obj.calculateObjWeight = accumulator
		Exit Function

	End If
End Function
Yup, another recursive one. It's really easy to follow: It receives an object id number. If the object it refers to is not a container, we return its weight and we're done. But if it is a container, we have to add the weight of every object which is inside - and those objects inside may be containers which contain another objects. That's why we do recursive calls instead of just adding the O (i).weight values.
The first function to use that is this one, which will be also used in get and put into. It calculates the total weight of all the objects in the inventory. When you get an object, we have to check if the weight of that object added to the weight of the objects in your inventory does not surpass the maximum weight as defined in MAXWEIGHT.
Function Obj.calculateCarriedWeight ()
	Dim i As Integer
	Dim accumulator As Integer

	accumulator = 0

	For i = 0 To FIXOBJECTS
		If O (i). loc = 0 Then
			accumulator = accumulator + Obj.calculateObjWeight (i)
		End If
	Next i

	Obj.calculateCarriedWeight = accumulator
End Function
This one is even easier. We just loop accross all our objects and we add the calculated weight of every object which is in the inventory (loc = 0).
And, to finish with, a function which calculates the amount of space taken by the objects inside a container. This one won't be recursive (yay).
Function Obj.calculateRoomTaken (oid As Integer)
	Dim i As Integer
	Dim accumulator As Integer

	accumulator = 0

	For i = 0 To FIXOBJECTS
		If O (i).loc = O (oid).wh Then
			accumulator = accumulator + O (i).size
		End If
	Next i

	Obj.calculateRoomTaken = accumulator
End Function
Coding the common actions
1. Examine
We are gonna start with the easiest one: the response to "examine object" which should throw to screen the following information:
- Object's description
- IF it's a container, this must tell whether it's open or closed. If it's open, it must show a list of objects which are inside of it.
- IF it's a light source, this must tell whether it's turned on or off.
You'll notice a fixed scheme when we code the response to common actions. Our subroutines will always check if the object is reachable first, then do some extra checks (when needed - for example in "open" we make sure that the object is a container and that it is closed), then perform the action. This one is no exception:
Sub Obj.Ex (lid As Integer, oid As Integer)
	Dim olid As Integer
	Dim AnythingInside As Integer
	Dim found As String
	Dim i As Integer

    ' Check if object oid is visible
    Obj.Visible lid, oid, olid

    If olid = -1 Then
        Print "I can't see that over here." : Exit Sub
    Else
        ' Show description.
        Misc.WordWrap O (oid).desc

        ' Container?
        If (O (oid).flag And 1) = 1 Then
			' Open?
            If (O (oid).flag And 2) = 2 Then
                Misc.WordWrap " It's open"

                ' Show what's inside:

                AnythingInside = 0
                found = ""
                For i = 0 To FIXOBJECTS
                    If O (i).loc = O (oid).wh Then
                        AnythingIniside = -1
                        found = found + " the " + O (i).name + ","
                    End If
                Next i

                If Not AnythingInside Then
                    Misc.WordWrap "."
                Else
                    Misc.WordWrap ", you can see" + Left$(found, Len(found) - 1) + " inside."
                End If
            Else
                Misc.WordWrap " It's closed."
            End If
        End If

        ' Light source?
        If (O (oid).flag And 4) = 4 Then
            If (O (oid).flag And 8) = 8 Then
                Misc.WordWrap " It's turned on."
            Else
                Misc.WordWrap " It's turned off."
            End If
        End If
    End If

    Print

End Sub
Well - let's take a closer look. First of all, our subroutine takes two parameters: lid and oid, i.e. location id and object id, i.e. where we are at and which object to examine. Now the first thing we do is checking if the object is reachable with the suited call to Obj.Visible. If olid <> -1 then the object is reachable so it can be examined. So let's examine it.
Firt of all, and trivially, we print the description in O (oid).desc. Following that, we check if the object is a container. If it is, we check again the correct flag to see if it is open or closed. If it is open, we search among the available objects if any of them is inside the current one (i.e. their .loc attribute equals the value in our O (oid).wh), and we print what we find. Then we check if the object is a light source and print if it is on or off.
Study this function and make sure you understand how every action is performed. To summarize things a bit:
1.- Check if object is reachable; olid from Obj.Visible lid, oid, olid must be <> -1.
2.- Print description.
3.- Check if object is a container.
3.1.- Check if object is open.
3.1.1.- List all objects inside (O (i).loc = O (oid).wh, with i from 0 to FIXOBJECTS) if any.
4.- Check if object is a light source.
4.1.- Check if object is turned on or off.
2.- Get/Pick up
Remember the scheme: check if reachable, particular checks, action. Picking an object is a matter of placing it in location 0, which we defined to be our inventory:
Sub Obj.Get (lid As Integer, oid As Integer)
	Dim olid As Integer

    ' Check if object oid is visible
    Obj.Visible lid, oid, olid

    If olid = -1 Then
        Print "I can't see that over here." : Exit Sub
    Else
        If olid = 0 Then
            Print "You already have it." : Exit Sub
        Else
			If Obj.calculateObjWeight (oid) + Obj.calculateCarriedWeight > MAXWEIGHT Then
				Print "You are carrying too much weight. Drop something before." : Exit Sub
			Else
	            O(oid).loc = 0
    	        Print "You get the " + O(oid).name + "."
			End If
        End If
    End If

End Sub
Simple: first, as always, we check if the object is reachable. If it is (i.e. olid <> -1), we step to make more checks particular to this action: if we are going to take an object, first we must make sure that we don't have it already. If we don't (i.e. olid <> 0), then we perform the action of "taking it", i.e., we set its loc to "0", the special location we defined as our inventory, then show a message of aknowledgement.
3.- Drop/throw away
We'll be working in the same way, but we'll check and do the opposite thing. We have to check that the object is in the inventory and then place it in location lid.
Sub Obj.Drop (lid As Integer, oid As Integer) Static

    If O(oid).loc <> 0 Then
        Print "You don't have it."
    Else
        O(oid).loc = lid
        Print "You drop the " + O(oid).name + "."
    End if

End Sub
Note that we don't have to check if the object is visible - just that it is in the inventory, which is faster. If it is, we just set it's loc attribute to lid and we're done. Now the object is in the current location and removed from the inventory.
4.- Put in
This is just simmilar to "Get", but the object, instead of going to the inventory (loc #0), goes to the containing location of the second object, as long as this object is a container. So this time we also have to check if the second object is an open (bit #1 in the status byte set) container (bit #0 in the status byte set), if the first object fits and if you can carry its weight in case you are carrying the container:
Sub Obj.PutIn (lid As Integer, oid As Integer, oid2 As Integer)

	' This subroutine attempts to place oid inside oid2.

    ' Check if object oid2 is reachable
    Obj.Visible lid, oid2, olid2

	' Check if object oid is reachable
	Obj.Visible lid, oid, olid

    If olid = -1 or olid2 = -1 Then
        Print "I can't see that over here." : Exit Sub
    Else
        If (O (oid2).flag And 1) = 1 Then				' oid2 is a container.
            If (O (oid2).flag And 2) = 2 Then			' oid2 is open.
                If O (oid).loc <> O (oid2).wh Then		' oid is not already inside oid2
					If	(O (oid2).loc <> 0) Or _
						(O (oid).loc = 0 And _
						Obj.calculateObjWeight (oid) + Obj.calculateCarriedWeight <= MAXWEIGHT) Then

						If O (oid).size + Obj.calculateRoomTaken (oid2) <= O (oid2).capacity Then

	                    	O (oid).loc = O (oid2).wh			' put oid inside oid2

	                    	Print "You put the " + O (oid).name + "into the " + O (oid2).name + "."

						Else
							Print "It doesn't fit."
					Else
						Print "You are carrying too much weight. Drop something."
                Else
                    Print "It's already inside."
                End If
            Else
                Print "The " + O (oid2).name + " is closed."
            End If
        Else
            Print "You can't put anything inside the " + O (oid2).name + "."
        End if
    End If

End Sub
Let's examine this closely. First of all we look for both the objects. If any of them is not reachable, we throw a message and exit. If both of them are reachable, we start checking stuff. First of all, we check if the second object is a container (checking if bit #0 in its status flag is set). Then, we check if this second object is open (checking if bit #1 in its status flag is set). If this all happens, we do another extra check to make sure the first object is not already inside the second.
After that, yet another check: We only put obj into obj2 if obj2 is NOT in the inventory OR if it is in the inventory AND you can carry its weight - if you are not carrying the container, it doesn't matter how much the object you are puting into it weights, but if you are, this has to be taken in account. Imagine that you can carry 32 units, and that your inventory weights 30 and you are carrying an empty box among other things. You can't put a statue which weights 5 units (for example) inside the box if you are carrying the box, 'cause 30 + 5 = 35 > 32. But if you drop the box, nothing stops you from putting the statue inside.
We also have to check if obj fits inside obj2. We call to the auxiliary function to calculate the amount of room taken inside obj2. If that number plus the size of obj1 surpass the obj2's capacity, obj1 won't fit and the routine complains accordingly.
Then, if we passed all the barriers (phew!) we just do the assignation which moves the first object inside the second: set its .loc attribute to the .wh attribute of the second object. Note how each If throws a suitable error message: this gives your game more quality. There're tons of adventure games that throw a "You can't." whenever you try to do something. This way, at least the player is said "why" he or she can't do it.
5.- Take from
To take an object out from another one, we just do the needed checks (container is reachable, container is open, object is inside container) and then set the loc attribute of the object to extract to the same value as the loc attribute of the container. That way, if we take a match from a box of matches which is in our inventory, the match will be in our inventory. If the box of matches is in a game location, the match will be in that location. This is a design choice which you can change if you don't like it. For example, you could always attempt to set the extracted object's loc to 0 (inventory), but you'd have to check the weights in such case.
Sub Obj.TakeFrom (lid As Integer, oid As Integer, oid2 As Integer)
	Dim olid As Integer

    ' Check if object oid2 is reachable
    Obj.Visible lid, oid2, olid

    If olid = -1 Then
        Print "I can't see that over here." : Exit Sub
    Else
        If (O(oid2).flag And 1) = 1 Then			' object oid2 is container.
            If (O(oid2).flag And 2) = 2 Then		' object oid2 is open.
                If O(oid).loc = O(oid2).wh Then		' object oid is inside object oid2

                    O(oid).loc = O(oid2).loc		' take it out

                    Print "You take the " + O(oid).name + " from the " + O(oid2).name + "."

                Else
                    Print "It is not inside."
                End If
            Else
                Print "The " + O(oid2).name + " is closed."
            End If
        Else
            Print "You can't take anything from the " + O(oid2).name + "."
        End if
    End If

End Sub
6.- Open
This is the first action to change the object's status byte, concretely bit #1 which is the one who tells us wether a container is open (1) or closed (0), as long as bit #0 is set (object is a container).
Sub Obj.Open (lid As Integer, oid As Integer)
	Dim olid As Integer

    ' Check if object oid is reachable
    Obj.Visible lid, oid, olid

    If olid = -1 Then
        Print "I can't see that over here." : Exit Sub
    Else
        If (O (oid).flag And 1) = 1 Then
            If (O (oid).flag And 2) = 2 Then
                Print "It's already open."
            Else
                O (oid).flag = O (oid).flag Or 2				' Remember? Set bit!
                Print "You open the " + O (oid).name + "."
            End If
        Else
            Print "It can't be opened."
        End if
    End if

End Sub
7.- Close
As open's counterpart, this one looks almost the same:
Sub Obj.Close (lid As Integer, oid As Integer)
	Dim olid As Integer

    ' Check if object oid is reachable
    Obj.Visible lid, oid, olid

    If olid = -1 Then
        Print "I can't see that over here." : Exit Sub
    Else
        If (O (oid).flag And 1) = 1 Then
            If (O (oid).flag And 2) = 2 Then
                O (oid).flag = O (oid).flag And (Not 2)			' Remember? Reset bit!
                Print "You close the " + O (oid).name + "."
            Else
                Print "It's already closed."
            End If
        Else
            Print "It can't be opened."
        End if
    End if

End Sub
8.- Turn on
The next pair, turn on and turn off, are exactly the same as the two previous ones but checking bits 2 and 3 ("light source" and "on", respectively):
Sub Obj.TurnOn (lid As Integer, oid As Integer)
	Dim olid As Integer

    ' Check if object oid is visible
    Obj.Visible lid, oid, olid

    If olid = -1 Then
        Print "I can't see that over here." : Exit Sub
    Else
        If (O (oid).flag And 1) = 4 Then			' Bit 2 set: object is a light source
            If (O (oid).flag And 2) = 8 Then		' Bit 3 set: object is turned on
                Print "It's already turned on."
            Else
                O (oid).flag = O (oid).flag Or 8	' Set bit 3: turn the object on
                Print "You turn the " + O (oid).name + " on."
            End If
        Else
            Print "It can't be turned on."
        End if
    End if

End Sub
9.- Turn off
Sub Obj.TurnOff (lid As Integer, oid As Integer) Static
	Dim olid As Integer

    ' Check if object oid is visible
    Obj.Visible lid, oid, olid

    If olid = -1 Then
        Print "I can't see that over here." : Exit Sub
    Else
        If (O (oid).flag And 1) = 4 Then
            If (O (oid).flag And 2) = 8 Then
                O (oid).flag = O (oid).flag And (Not 8)
                Print "You turn the " + O (oid).name + " off."
            Else
                Print "It's already turned off."
            End If
        Else
            Print "It can't be turned off."
        End if
    End if

End Sub
You get the picture. If you are planning on adding extra bits to the status attribute with extra capabilities, you know how it works. It's all a matter of checking, then setting. Nothing very fancy. I suggest you to try to add weapons to the engine. It could be a great excercise to make sure you've gotten it all.
And we are done!
Well, yeah, we are done. We have seen every aspect related with a good, full-fledged IF engine. Now we have to put everything together, but that will happen in the next chapter. We'll start explaining how to mix everything together, and then I'll post a big section with the whole engine complete and revised. Until then... Enjoy the mag!
Read Na_th_an's past I.F. Games Tutorials: Chapter 1, 2, 3, 4, 5, and 6
Enemy Artificial Intelligence
Written by Wallace
Part of the reason that many Qbasic games are not that impressive is because the enemies are usually really dumb. I'm going to talk hypocritically for a while here, because in the past my games have all had really dumb single action AI. Now that I have learned how to create complicated AI I will share that with everyone. Hopefully now we will see some more advanced tactics from enemies than walk forwards and shoot. For each type of character you should probably expect to write at least fifty lines of code. Don't worry, the computer will blow right through this, it won't slow anything down.
There are three main parts to AI, scripted, triggered, and reactionary. Scripted is the easiest to understand how it works. A specific sprite is given a direction to walk and an amount to walk, then a new script is given to it. This is good for making cut scenes and events in a game that a normal AI construct wouldn't do. Say you want to have a dogfight going on above you, but you want the planes to fall out of the sky in a specific order, you have to script this, for AI is too unpredictable and random.
Triggered is a type of AI that many programmers aren't incredibly familiar with. It will cause an AI to do something if something else happens. This is not random, it always happens. For instance if you walk by a certain point it will trigger a boss to appear, which will in turn trigger one of you allies to shout "Oh crap!" This is actually one of the easiest things to code for, because there is no randomness at all.
IF playerx > 10 AND playerx < 11 AND playery > 23 AND playery < 24 THEN
	createnewsprite boss1, 13, 27
	newwav "crap.wav"
Reactionary is what you will mainly see in a game. Giving a character a set of instructions and whatever situation it is in it will do a specific one. This should be randomized a bit too. A character shouldn't ALWAYS fire its weapon if it has a clear shot. It shouldn't ALWAYS run towards you. It seems that a lot of AI in games use ESP. All of the character's know where all of the other ones are. This is unrealistic. Use line of sight, it actually isn't that hard. It uses that same technology as a ray caster, figure out what angle the player is from the enemy, then send out a ray from the enemy to the player, looking for walls or anything else that may restrict an enemies view. Here is an example, the red dot is an enemy and the green dot is the player. The enemy sends out a single ray and the blue path shows everything in it's line of sight. Uh oh, the enemy can't see the player, therefore he should simply stay put or pace back and forth or something, don't work about how dumb it looks, if the enemy can't see the player then odds are that the player can't see the enemy. However there is something that you need to watch out for, you should give the enemy ESP after the player has reached a certain point with a triggered AI, this way you can't simply walk past an enemy quickly and have it miss you.

Using this principle you can also increase or decrease the intelligence of the enemy. A really dumb enemy will loose track of you and get confused if it can't see you, where a smarter enemy would know where you last where and go check it out.
Your creatures should react to sound in a similar fashion to sight, however we all know that we can hear through walls, especially if it is a gunshot or something, so have the ray caster count how many walls it goes through, if the ray goes through two walls it probably is out of hearing range.
There are a bunch of factors which should come into the decision of the AI however: It's health, the distance to enemy, it's weapon, your weapon, other enemies, player allies.
Lets say that you give your enemy four options: Rush the player, run from the player, shoot, do evasive but aggressive maneuvers.
Lets look at some scenarios:
- You have a rocket launcher, you are mid range from the sprite, and there are allies around
- You have a pistol, mid range from the sprite, there are a bunch of enemies around
- You have a shotgun, close range, AI's health is low, all other enemies have been killed
Q: What should the enemy do? A: evasive maneuvers, attack, and run
Now you are saying how would I get a computer to do that. First lets look at the weapons, there should be a way to size up your weapon with its weapon, have a type of ranking system at three ranges, long, mid, and short. You can then figure out who has superior firepower for the situation.
The health should be obvious, but will depend on the enemy, if it is a proud warrior it will think dying in combat to be honourable and charge you, if it is a coward it will run away and try to get help.
Distance should also depend on the creature, if you sneak up on an enemy and surprise it at close quarters it may run away from you or attempt to engage you, possible with even hand to hand techniques like a melee, or a kick. A big strong enemy might try to knock you on your ass, but a weaker one will tend to shoot or run and hide.
You should probably give the AI at least a little bit of memory, that way it can run towards where you were, run away from where explosives were going off, or attack something that just pissed it off. There was one level in DOOM 2 where you had to fight two bosses at once, a Cyberdemon and the Spider boss. Fighting them was impossible, you would either die or run out of ammo, but if you lines them up their bullets would hit each other and begin to fight with each other. AI's should have a temper, especially if they are animal like. If there are two of them and one gets killed the other one should get mad and go after you.
Pack hunting: one of the hardest things to accomplish. If you have a bunch of enemies looking for you and one of them finds you it is normally okay because none of the others are coming, but now you can allow the enemy to roar or something so that anything within a preset distance can hear and now go after you, if they are robotic they can alert all the other robots with a radio signal, now every robot in the level knows where you are. This adds a great deal of realness and challenge to the game. Each enemy should also know about how many other enemies are left out of their group. If there are a lot of enemies around odds are that a creature would fight a bit more aggressively, but when the numbers start to dwindle they would probably start playing defense.
If anybody has any questions about how to implement these tips feel free to give me an email or stop by my sight and visit my forum: www.freewebs.com/wallacesoftware I will be glad to help out.
Check out Wallace Software, or download a copy of this tutorial: EnemyAI.doc
A Course in FreeBasic: Chapter 1
Written by Rattrapmax6
Welcome to FreeBasic!
FreeBasic is the next level for the Basic language.
This few month old language is better than QBasic while
keeping 99% of basic's statements. FreeBasic takes Basic
to 32 bit, therefor shedding of the few 16bit statements.
All the while, its free to access and use, and gains a few
new statements that make it easier to use than
QBasic.
FreeBasic is a commandline compiler, thus to write
and compile you only need NotePad, and some knowledge
of using the comandline. To do this: Write a basic code,
save it a .BAS, open your commandline, type in the
location of your FreeBasic compiler (FBC.exe), then
when it runs, type in the location of you .BAS file.
Another trick is to use a .BAT. For example, open
Notepad and type:
C:\FreeBasic\FBC.exe C:\FreeBasic\Program.bas
Then save this as .BAT, and run it. NOTE: Locations
might be different!
If that doesn't sound like you type of thing, don't
worry!! Just like QBasic, IDEs are available to run it.
Swing over to SourceForge
FB-IDE. And get the FBIDE + FBC package. With
this, you simply write the code in the ide, press F5, and it
does the rest! But, if the commandline sounds like your
type of thing, then get the plane FBC here. I suggest
the IDE for beginners.
No more waiting,..
Before this gets boring, lets try some coding. We'll
go over PRINT, INPUT, CLS, SLEEP, and REMs. Here's
a FreeBasic code:
'This is a FreeBasic
code!
PRINT "Hello, world!"
SLEEP 1000

CLS
PRINT "I'm a computer!"
SLEEP
Now, the first line does nothing. It is skipped because it
was REMed by a '. The word "REM" can also
be used instead of the '. These are better know as
comments, and are very helpful when reading over your
code. Think of them as lil name tags if you
like.
The next line, this is used to display text on the screen.
After PRINT, any thing between the " "s or inserted
behind it as a variable/constant(We'll get to those later) is
printed to the screen. NOTE: PRINT displays text on
your monitor screen, it doesn't actually print anything
from your printer.
SLEEP? You ask. Yep, just as it sounds, this statement
puts your program on snooze for a period of time, or until
a key is pressed. In this line of code, SLEEP is given a
value equal to 1 second (1000 = 1second, 2000 =
2seconds, ect). Play with this setting if you like, if you set
it to high, a keypress will awake your code once more.. so,
you won't have to wait for hours. ;)
Moving on, CLS, this stands for: CLear
Screen. This wipes clean every thing on the
screen. Once this is done, your back to your original black
screen, ready for new stuff to be put on it!
Since you know what the next line is, I'll explain the last
one. This is a undefined SLEEP, most important in this
code. FreeBasic programs run and then close when they
are done. So in order to see the last stage, we need to
place this type of SLEEP. With out a time limit on how
long it can nap, it will continue to sleep until a key is
pressed. Thus, the code is held up from closing, and we
get to see: I'm a computer! : on the screen.
Okay.. Lets add on to our last code and try some INPUTs!
'This is a FreeBasic
code!
PRINT "Hello, world!"
SLEEP 1000
CLS
PRINT "I'm a computer!"

'NEW! INPUT
INPUT "What are you"; strng$
'NEW! Multiple
prints
PRINT "Cool, you're a "; strng$; "!!!"

SLEEP
Focusing on the new lines of code (Ones with 'NEW
above them), we'll examine this code. Before you can
understand INPUT, you need a lil background in
Variables and Constants. Variables are user defined
names assigned with values, these values are allowed to
change (Days, Years, ect). Constants are user defined
names assigned values that don't change (Pi, YourName,
ect).
Okay, now that is clear, The first new line is the INPUT
statement. The included text after is printed to the screen
just as it would with PRINT. After the ; is a
Constant, given the program is asking you "what you are"
which is always the same. If it asked your age, that would
a Variable since next year it would be different. Also, the
type of constant used is called a string, notice the
$ at the end of it. This is for words, and any
numbers inputted would be considered words and not
actual numbers. (Variable/Constant types will be
discussed in detail later)
You might have noticed I left out a ? in the displayed text.
This is because the use of ; after it with the INPUT
statement. This automatically puts a ? mark. If you ever
come to a point where you don't want a ? mark at the end,
replace the ; with a , .
Wow, this next line looks like the first, except it uses
PRINT. With PRINT ; allows you to print
multiple things to the screen. Notice that its given text to
display, then after the ; , it will display the value
of the constant that was assigned by the input statement.
Then after the next ; it displays the next set of
given text. Lets say you put Human in the INPUT, the
output screen should look like:
I'm a computer!
What are you? Human
Cool, you're a Human!!!
Debugging... When all goes wrong..
Well, thet�s is for chapter one and coding.. But, lets go
over some debugging. Odds are, your going to have to do
it, we are human, we make mistakes. Even just a simple
typo can lead to disaster for your code. Using the above
example, I'll simulate a few bugs, describe how to find
them, ect...
'This is a FreeBasic
code!
PRINT "Hello, world!"
SLEEP 1000
CLS
PRINT "I'm a computer!"

'NEW! INPUT
INPT "What are
you";
strng$
'NEW! Multiple
prints
PRINT "Cool, you're a "; strng$; "!!!"

SLEEP
Here is a simple mistake, and easy to find if your using a
IDE with good error reporting. FB IDE will tell
you:
Line| File            | Error | Message
 7  | C:\FreeBasic\.. | 10    | Expected '=' found 'What are you'
    |                 |       | INPT "What are you"; strg$
    |                 |       | ^
This makes it easy to locate that the error is on line 7, and
that the problem is a typo.. For this code, a spelling is
about all that can go wrong, except if you leave out a line
of code:
'This is a FreeBasic
code!

PRINT "Hello, world!"
SLEEP 1000
CLS
PRINT "I'm a computer!"
'NEW! Multiple
prints
PRINT "Cool, you're a "; strng$; "!!!"

SLEEP
Output:
I'm a computer!
Cool, you're a !!!
In that case, watch your program run. When it stops doing
what you want, go to the line of code before that bug, and
see if any lines of code are missing afterward. As for the
constant, you might mix the spelling:
'This is a FreeBasic
code!
PRINT "Hello, world!"

SLEEP 1000
CLS
PRINT "I'm a computer!"
'NEW! INPUT
INPUT "What are you"; strng$

'NEW! Multible
prints
PRINT "Cool, you're a "; stg$; "!!!"
SLEEP
This is marked by a output screen like this when you run
your code:
I'm a computer!
What are you? Human
Cool, you're a !!!
Compared to the working code, this is not what you want.
And naturally, this type of bug is a mismatched Constant
or Variable.. Simply go back and check for misspells and
typos..
Well.. that's that for this chapter.. Play with this some, and
when chapter 2 is up, you'll be ready for some more codes
and debugging tips & tricks.. If INPUTs, Variables, &
Constants stump you in this tutorial, never fear! The next
tutorial will explain there use in more detail! Hope you
enjoy, and until next time, happy coding!!!
-Kevin (x.t.r.GRAPHICS) aka: Rattrapmax6
Download a copy of this tutorial: fbtc1.html
A* Implementation in FB: Part One
Written by Torahteen
So I'm sitting at the computer, reading a QB Express issue, when I begin to think about how awesome it would be to make a tutorial or article for the coolest QB/FB magazine around (you're welcome Pete ;)). But I don't know anything to write about, and I'm not a good programmer (but I try). But wait, I do know something. A*! I've gotten pretty good at implementing this into FB, so I decided I'd share what I know.
So what the heck is A* (pronounced a-star)? A* is a pathfinding algorithm (although some would love to argue this fact with me). Pathfinding algorithm?! English please? Ok, ok. Sorry. A* is a way for the computer to find a path from one point to another, with obstacles in the way. "Oooh, now I get it." "So why would I want this" you ask? Well, A* can be used in many different games. For instance, you can use it to help an NPC (None Player Character) find its way around objects.
Ok, so now that we have a use for it, how does it work? Well, that's half of what this tutorial is all about. The other half will be spent implementing this in to FB.
Well... To start, let's begin with the simplest form of obstacle, a wall. Below is a graphic to show our current problem.
(Note: I drew these based on pictures made by Patrick Lester in his tutorial. His tutorial is what got me into A* in the first place.)

The green square is our starting square, the red one is the target square, and the blue squares represent a wall. When you are calculating your path, you must keep track of two lists. The Open list, and the Closed list. The Open list is a list of squares that should be looked at, and the Closed list is a list of squares that have already been looked at. This will all fall into place later. When you start searching for your path, the first things to do are:
- Add the starting square and the 8 adjacent squares to the Open list, ignoring un-passable squares (walls or whatever you decide to implement)
- Calculate F, G, and H scores for each of the squares
- Make the starting square the parent square for each of the adjacent squares.
What are these F, G, and H scores you ask? Well... First of all, F is the sum of G and H:
F = G + H
G, is the movement cost to go from the current square (at this point, the starting square) to the square you are looking at. For instance, I use a movement cost of 10 to move to a normal "Ground" square. However, I use a value of 20 to move to a hill square, and 50 to move to a water square (Water is hard or even dangerous to attempt to cross). By using movement costs, you can have the computer try to choose a path around hills or water. You'll get it, trust me.
H is the distance from the current square to the target square. Actually, since you really can't tell the distance without knowing the path (which you are trying to figure out), you have to make a guess. For most problems, getting the Manhattan Distance is sufficient. The Manhattan Distance is found by using the following formula:
H = D * (ABS(TargetX - SquareX) + ABS(TargetY - SquareY))
Ah! Math! It hurts! Don't worry, it's not that hard. D is the minimum Cost to move from one square to another. In this case, it is 10. The Target and Square coordinates, are just that. The Target Square's X and Y (8,5 in this example) and the Square you are looking at's X and Y. So, for example, let's determine the F, G, and H scores of the square to the upper Left of the starting square. Refer to the diagram below.

First of all, the G score is 10, as will it always be in this example because there is only ground and wall. The H Score, is 10 times the distance from the square we are checking, to the target square. As you can see above, the target square is a total of 7 units away from the square we are checking. That gives us an H score of 70. The F score is the sum of those two numbers, so our F score is 80. See how easy that is? After assigning those two numbers to that square, we go onto the other 7 adjacent squares.
So Now we have 8 squares with F scores and everything. You need to do one last thing to them. Make the current square (the starting square right now) their parent square. Basically, just record the X and Y value of the starting square so you know what the parent square of those squares is. Don't worry, you'll understand why later. Now, you go through the Open list of squares (remember we added those 8 squares to it when we started) and choose the square with the lowest F score. If you did the above correctly, it will be the square just to the right of the starting square. Then, you do what you did above, checking each of the 8 adjacent squares. This time, 4 of the squares are on the Open list already, and one is on the closed list. Well, you ignore the closed list square, since you've already checked it. But what about the squares already on the Open List? Don't ignore them! Instead, check to see if this way to the square is better. You see, by making the starting square the parent square of the squares around it, you are saying that is the best route to get to that square (sorry, that was confusing). But, if this is a better route, then you'll want to change that squares parent to this square.
So how do you check that? Simple. You use the G scores. Take a look at the following equation:
NG = MovementCost + CurSquareG
If NG (a temporary G score) is less then the G score of the square you are checking, then this is the better way to go. Make the parent of that square your current square. If you don't get this, just use it. It will make sense eventually, I assure you.
Keep on repeating this process until you get to the target square. It's that simple! Here is some Pseudo-Code to help you out: (Taken directly from Patrick Lester's tutorial)
- Add the starting square to the open list.
- Repeat the following:
- Look for the lowest F score square on the open list. This is the current square.
- Switch it to the closed list.
- For each of the 8 squares adjacent to this current square:
- If it is un-passable or is on the closed list, ignore it. Otherwise, continue on...
- If it isn't on the open list, add it. Calculate the F, G, and H scores, then make the current square the parent of this square.
- If it is on the open list already, check to see if this path to that square is better, using the G cost as the measure (remember the equation above). A lower G cost means that this is the better path. If so, change the parent of this square to the current square, and recalculate the F, G, and H scores.
- Stop when you add the target square to the open list.
- Save the path. Working backwards from the target square, go from each square to its parent square until you reach the starting square. That is your path.
After you've done all this, the path should look something like this.
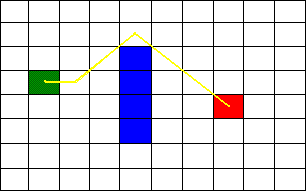
Well, that's it for this tutorial. I hope it wasn't too confusing for you. I know I'm not the best artist and I'm definetly not the best author. Next month, I'll show you how to implement this into FB code. Until next time.
Download a copy of this tutorial: Astar_Tut.html
QUICKBASIC/QBASIC TUTORIAL RE: DATE AND TIME
Written by Edward F. Moneo
TABLE OF CONTENTS:
- DATE AND TIME
- WEEKS IN A YEAR
- LEAP YEAR
- CONVERTING A DATE TO NUMBER OF DAYS FROM YEAR ZERO
A. DATE AND TIME:
QB has several functions and statements for referencing date and time.
Only the following two functions will be discussed here:
DATE$
A function which returns a 10 character string of mm-dd-yyyy,
where mm is the month (01-12), dd is the day (01-31),
and yyyy is the year (1980-2099).
TIME$
A function which returns an eight character string of hh:mm:ss,
where hh is the hour (00-23), mm is minutes (00-59),
and ss is seconds (00-59).
BEWARE OF MIDNIGHT (DATE$, TIME$):
It is possible that your program is operating at midnight.
1) If you are 1 second before midnight when obtaining the date,
you should decide whether you want your program to use yesterday's old
date or today's new date. The following code assumes you want to use
the new date:
'get today's date
z$=DATE$
if left$(TIME$,2)="00" then z$=DATE$  'make sure date didn't just roll over
tyyyy$=right$(z$,4)
tmm$  =left$(z$,2)
tdd$  =mid$(z$,4,2)
We first get the date. Then we check if the hour is 00 indicating that
it's just past midnight. If so, we get the date again to make certain
that we have the new date.
By the way, when using military time (00:00 to 23:59),
there is no such thing as 12:00 midnight, there is only 12:00 noon.
Midnight is actually 00:00.
2.) If your program needs to obtain both the date and the time,
be careful because the DATE$ and TIME$ are two separate functions,
and it is possible that the DATE$ could end up as yesterday just before
midnight, and the TIME$ is of today, the new day. The following code will
make sure that the date and time correspond to the same day:
'get today's date and time
dt$=DATE$
tm$=TIME$
if left$(tm$,2)="00" then dt$=DATE$
B. WEEKS IN A YEAR:
Most people say that a year has 52 weeks. Mathematically (365/7) it comes to
a little over 52 weeks. But in reality, looking at a calendar, most years
cover 53 weeks. The first and 53rd weeks usually have only a few days.
However, if the year is a leap year and begins on a Saturday, then that year
spans 54 weeks! The starting Saturday constitutes the first week, and
December 31st, which falls on a Sunday, constitutes the 54th week. This
occurs every 28 years, the last being 1972 and 2000, and the next 2028.
So, what to do with this information? If for any reason you have to set up
arrays, tables or files based on weeks or week number, just set it up to
handle 54 weeks, and you can then ignore the problem.
C. LEAP YEAR:
To determine if a year is leap year, is actually a simple matter.
The rule is as follows:
If the year is evenly divisible by 4, and not divisible by 100,
or if the year is evenly divisible by 400,
then it's a leap year.
Note: Be aware that there were no leap years identified before 1582 when the Julian calendar was converted to the Gregorian calendar.
Sample usage of ISLEAPYEAR function below:
Assume we looked up the maximum number of days per month in a table.
Now, if the month is February and the year is a leap year, we want to add 1 to the maximum days per month.
IF MM=2 AND ISLEAPYEAR(YYYY) THEN MAXDAYS=MAXDAYS+1
The following is the function:
Note: It returns -1 when true (leap year), or 0 if false.
FUNCTION IsLeapYear (Z) STATIC
   IsLeapYear = (Z MOD 4 = 0 AND Z MOD 100 <> 0) OR (Z MOD 400 = 0)
END FUNCTION
D. CONVERTING A DATE TO NUMBER OF DAYS FROM YEAR ZERO:
Why do we need this? If you want to compute the number of days
between two dates, then you need this. You also need this if
you want to know the day of the week for a particular date.
Note: Be aware that the algorithm below does not take into consideration the conversion from the Julian calendar to the Gregorian calendar which occurred in 1582.
The following are some subroutines to do these computations.
You may convert them to functions or SUBS as you wish.
DIM DFACTOR      AS SINGLE   'Number of days given date is from day zero.
DIM WEEK.DAY     AS INTEGER  'Day of week value: 1=Sunday....7=Saturday.
DIM ZYY          AS INTEGER  'Value of the 4 digit year.
DIM ZMM          AS INTEGER  'Value of the 2 digit month.
DIM ZDD          AS INTEGER  'Value of the 2 digit day.

COMPUTE.FACTOR:
  DFACTOR=365!*ZYY+ZDD+31*(ZMM-1)  'NOTE: WON'T WORK WITHOUT ! AFTER 365.
  IF ZMM<3 THEN
     DFACTOR=DFACTOR+INT((ZYY-1)/4)-INT(3/4*(INT((ZYY-1)/100)+1))
  ELSE
     DFACTOR=DFACTOR-INT(.4*ZMM+2.3)+INT(ZYY/4)-INT(3/4*(INT(ZYY/100)+1))
  END IF
RETURN

COMPUTE.WEEKDAY:
  '* Compute the day of the week:
  WEEK.DAY=DFACTOR-INT(DFACTOR/7)*7    'Modulo 7.
  IF WEEK.DAY=0 THEN WEEK.DAY=7        'WEEK.DAY=1=Sunday.
RETURN
Download a copy of this tutorial: TUTDATE.TXT
Evolutionary Programming
Written by Torahteen
Here I am again. I think I did a bit better on my last article. I hope that you all agree (though you by no means have to). This time, I'm comin' at you with "Evolutionary Programming". Enjoy!
What is Evolutionary Programming?
Evolutionary Programming (EP) is programming meant to simulate and predict evolutionary solutions, using problems that are usually based on real-world situations. It is a simulation based on the way genes are maintained through the process of evolution. There are numerous ways that EP has been implemented, none of which can be considered absolutely correct (though some may be considered more correct than others). But they all come from the basic fact that those that are more adapted to thier environment thrive.
Applications of EP
EP can be used in many different applications in life. EP is used in the study of evolutionary science in Biology. By creating and using different algorithms, scientists can come up with more precise information of how and why creatures evolve the way they have, and attempt to predict the way they will evolve.
EP can also be used in many aspects of AI in gaming. Although not yet used, EP could be used to simulate civilizations in future games. Think about a game that allowed you to build your own civilation by helping it along, all the while it evolved from generation to generation? I don't know about you, but that seems like a pretty cool game to me (hmm... Maybe I should try that one out).
How does it work?
EP uses Genetic Algorithms to create a "survival of the fittest" situation. Every "being" has a certain number of "chromosomes" that determine its ability to survive in the current situation. These chromosomes are usually stored in a binary string (1011 1001 0001 1010). Every "generation", the chromosomes are combined to form a new generations chromosomes. New beings are given these chromosomes. Then, every beings chromosomes are analyzed and the being is given a fitness value. The fitness values are analyzed and a percentage of the beings are removed (those with the lowest fitness scores). The process is then repeated. Every few generations (a random decision), a mutation takes place, toggling one of the chromosomes. Depending on whether or not the new chromome increases the fitness value, the new chromosome will either thrive or perish.
Terminology
- Being: The objects that are being used to hold the chromosome values
- Chromosome: A bit value that defines an attribute (strong, smart, intuitive, etc.)
- Generation: A unit of time that spans one combination of chromosomes
- Mutation: The process of toggling a random chromosome bit value
Conclusion
There are many uses for EP. Although EP is a fairly new branch of AI, it does have some literature. I suggest searching for "Evolutionary Programming" on Google or the like and reading some of the articles you'll find. AI Depot has some nice articles on the subject, along with a lot of tutorials and articles on many other AI related fields.
That's it for this article. Somewhat short, but it gets to the point. To follow next month will be the start of a series on Implementing EP. Until next time!
- Torahteen
Download a copy of this tutorial: EP.html
Cliff Tile Tutorial
Written by Josiah Tobin
(NOTE: This is not a beginner's tutorial. I am assuming the reader has at least intermediate skill and knowledge in pixel art)
Nearing the end of the 2D console RPG era, there were a number of games whose graphics simply defied explanation in their detail; RPGs such as Chrono Trigger, Seiken Densetsu 3, Final Fantasy VI (III in the U.S) and Bahamut Lagoon. Many of these games still continue to puzzle independant pixel artists today, and they all have one thing in common: They're all Squaresoft games.
Not to say that Squaresoft was the only company making beautifully detailed games at the time; I could go on and on about equally extravagant 2D graphics in a number of games by much smaller and lesser-known 3rd party developers. But for the sake of this tutorial, and a reason I'll get to in just a moment, I'll use the previously mentioned games as an example.
One thing that's always baffled me about many of Squaresoft's later 2D RPGS is the cliffs. Looking something like a combination of a beautiful painting and actual pixel art, to me they've always stood out as probably (and this is just a guess) being one of the most painstaking set of tiles the graphic artists at Square have done. I might even go as far as speculating that perhaps there was a specific team of particularly disobediant yet extremely talented pixel artists working for the company, who had an annoying habit of causing trouble around the office and were punished for this by being locked up in the basement for a month to work on 'the cliffs'.
Anyhow, enough stalling-- this tutorial focuses on actually learning to pixel Squaresoft-style cliff tiles, ala Chrono Trigger. I'm using this game as a basis because it is, to me, one of Square's best looking games.
Basically what I'm going to do it show a step-by-step progression of some of my Chrono Trigger-based cliffs, and note the procedure and shortcuts for each. So, let's begin...
I'm using 16 by 16 pixel tiles in this example, simply because it's my favorite size of tile to work with, and it's relatively standard. But, just one repeated 16*16 tile pasted around the screen won't do at all; so, first of all, create a new 64 by 64 pixel image, and fill it with a dark-ish brown (you can use the colors I use if you really want to, but by all means make your cliffs purple or green if you feel like it) like so:

Okay, simple enough. Next, start making simple, rough, crescent shapes in a slightly brighter shade. I like to add a little bit more yellow to the shade in addition to it being brighter.

It's pretty easy. You can even copy and paste some if you want, though I like to do it all by hand to give it a 'rougher' look. Just scribble the shapes on, doesn't have to be perfect. Keep going, until...

Whoa! Seems like enough. Start adding another shade now, brighter still:

I actually used a solid grey shade for this step. Add the brighter color inside the crescents, roughly. They don't have to be in all of them, but it should fill most of them. Keep going until it looks like this, roughly:

Keep in mind you're not trying to match mine completely, here, just the basic concept. This next step can be a bit tedious (okay, so the whole process is, somewhat)-- Fill in most of the gaps of the darkest shade with the (currently) second-lightest shade.

Don't fill them completely! Just 'beef it up' a bit. I used smaller crescent shapes here, but it doesn't really matter too much what shape you use. Alright... the next bit is a bit of a pain, both to do and describe. Basically what we're doing here is actually making it look more like a cliff and less like a texture for intestines or feces.
Basically what needs to be done is the 'joining' of the clumps of crescent shapes. Make them into blockier, rock-like clumps, and if you need to, paint in between them here and there with the darkest shade so it doesn't become a solid mess of random shades. It's hard to describe with just words, really. This image might help:

As you can see I've also added a lighter shade (optional) and made some subtle vertical shapes with the darkest shade that will later become faint 'flaws' and cracks in the rock. This isn't needed, but it does really help with the look of things. Once you manage to get past that bit, it's all downhill from there. Add a new darkest shade-- I used a darker shade of grey-- and use it to add some definition to the flaws and cracks I mentioned earlier. If you didn't add any, just sprinkle the shade about in the darker places of the image-- make sure it doesn't bleed into the brighter colors.
It should look something like this:

Well, the cliff face is practically done by this point. I chopped off the top and bottom in a jagged pattern for the edges, and messed with the colors to get a shade I liked better. (completely optional)
It looked like this when I was done with it:

Now, since we're using 16*16 tiles, you now have 16 of THEM in that 64*64 cliff face. I use the whole thing as one big tile (or rather group of tiles). At this point you may want to play with it a bit and make sure it tiles nicely (that is, horizontally). This is pretty important if you want it to look good. What I do is place three of the tiles right next to eachother horizontally, and make a selection that encompasses the middle one and about half of the one on either side, roughly. Doesn't have to be exact. Then I either touch the sides up by hand, or copy and paste tiny bits from either side to cover up the 'seams'. Trust me, it's easier than it sounds-- just repeat it until it tiles well enough.
Okay... We're not done yet. That is, if you want to make some fancy corner tiles too. This bit is actually pretty easy. We're just going to modify the cliff face tile here... Okay, select half of the 64*64 chunk of cliff you made earlier, (that'd be a 32*64 chunk) and plop it into a new image.

A larger canvas is reccomended for this step, as when we're done it's gonna be 32*96. Okay... There are several ways to do this. Naturally, I like to do it by hand, but you can also use a skew function in whatever program you're using if it's available. Basically, what we want to do is skew the chunk of rock vertically (and only vertically) until it forms a tileable diagonal wall. The way I do it by hand is select each vertical line of pixels for the whole image individually, and move them up one pixel. Repeat for each line. Takes awhile, but it's very accurate and it works. If you're using a skew tool, and if there's an option for it, turn OFF anti-aliasing, seeing as this is pixel art and we don't want the program to mess with it.
Here's how it should look when you're done, if my explanation went over your head:

So, you can tile that diagonally and have it line up fairly well-- but we don't have a full corner for it yet. Plus, there's the issue of lighting. But first, set that diagonal wall aside, (we'll use it later) and copy it into a new image. This part's easy... just carve up the left side a bit until it looks something like this:

Just a half-circle shape scooped out of the upper half, and the lower corner smoothed off a bit. But then, we still need to fix the lighting... If you're using an upper-right light source like I do, this is the side we're gonna darken. If you're using an upper-left light source, you'll darken the set of tiles for the other side-- Since I'm so lazy I just flipped the tiles I had to from the diagonal wall and corner for the right side. Anyway. there are some exceptions, but most programs have some sort of darken/lighten feature, even if it's bloody primitive and crude, like mine. If not... well, you can ditch lighting entirely, or darken the pixels by hand. I used to do it that way. Ouch.
Anyway: select most the image except the upper bit-- that is, the sort of lip that we created when we 'carved' it up in the last step.
If that's too confusing, take a look at this image.
This is the part you shouldn't darken:

You may want to darken it gradually, so it gets darker at the bottom and left side. In fact this is probably a good idea. This image is just to give you an idea of what I mean:

Okay, so now we're getting somewhere. The image so far should be 32*96 pixels. Select the right half of the image (exactly, that is-- the right 16 pixels) and cut it out. This bit should tile as your new diagonal cliff tile. The remaining bit serves as a kind of end cap for the cliff. Now, remember the diagonal wall you set aside earlier? Take that, flip it horizontally, and repeat the 'carving' step (this time on the right side) but don't darken it.
By this point you SHOULD have the basics of a cliff tileset. Here's a quick mockup to show how mine looked when they were all pieced together:
The top and side tiles that border the grass are pretty damn easy to make. You can even just use straight lines, several pixels thick, then add lumps and variations to them afterwards.
If you're happy with the tiles, and don't want to add anyting, then you don't really need to read any further. However, if you want to get a neat 'cliff bridge' effect as seen in Chrono Trigger-- read on. Here's an example of what I mean:
That's WAY easier than it looks, trust me. Here's a VERY simple example of what I did:
First, I made this simple mockup with the tiles I already had...
Then, I erased most of it as follows:
And again: (trust me, these are the only extra tiles you'll need)

...And finally touched it up a bit and smoothed things over.

Using the 'bridge' tiles is pretty easy as well. Just tack them on to the side of the cliff top like so:
Well, that about does it... I'm not entirely sure how difficult to follow that was, but being my first tutorial on the subject I think I'll leave it at that.
Check out more of Josiah Tobin's sprite work in the Lynn's Legacy Preview in this month's Gallery!
Graphical User Interface - Design Concepts
Written by Stéphane Richard (Mystikshadows)
INTRODUCTION:
This article is now about telling you how your GUI projects should look like or how they should
operate. This article is all about the little details that you'd need to consider in order to
help make sure your GUI will be used so to speak. It will cover such things as why you should make
your form elements be a given size, and other such design concepts. How the GUI looks as far as
visual features is up to you. Where you decided to put things is also up to you. This article will
cover a few guidelines that will help make your GUIs easier to use for the putential user.
At the end of this document, I will have given you a full range of design concepts and considerations
so that when you do design the visual aspect and behaviors of your GUIs that people will want to use
them and really like what you've done with your GUI project. As you know many commercial and personal
GUI Projects have been created and are still being created today. This means that users have a wide
range of choices available to them. My Mission is to help make sure your GUI stands out from other
GUIs out there enough for people to look at it and want to atleast give it a try.
SCREEN CONSIDERATIONS:
Before any visual design can begin, it's important to consider the screen resolution and color depth
you'll be offering your users. Of course this depends on what the main goal of your GUI project is. Is
it to offer a base environment for all other programs to abide by? Is it a GUIs specifically design
for a game or a series of games? Is it a GUI that needs the most amount of colors which superseeds how
big a screen resolution can be? Right before you do anything else, you should ask yourself these questions
because it will greatly influence the whole design of your GUI.
When you think about it in advance, it's just a better way to prepare yourself to begin designing your GUI.
IF you know the resolution you'll need, you'll be able to plan the rest of the GUI intelligently based on
the screen resolution and color depth you decided on. Other things that can influence this kind of decision
is the language you use, the screen resolution available on your specific system, third party libraries you
may use and what they support and the likes. All in all though These are things you probably already know since
they were probably a set of criteria you picked the language and library (if any) for.
COLOR COMBINATION CONSIDERATIONS:
Any color is great by itself, this is a known fact. I don't think I have a favorite color per se. However, this
is about when you take two (or more) colors and use them together. If some color combinations are hard enough to look
at on a painting, you can be sure they will be even worse on a computer screen. I'm not saying you should stick to
one color or one color palette to be sure of yourselves. there are plenty of colors to choose from and plenty of color
combinations that do make sense together.
The bottom line is this. First if this a GUI for a game or for a program that you know won't be used all day and every
day, you can probably experiment a bit more with color combinations. However if your GUI is for something the users will
use all the time, considerations should be in place to select colors that are more erstful to the eyes when you look at
them for a long time. Go by common sense, if the colors are hard on your eyes, they'll be just as hard on everybody else's
eyes. It's a good idea to open a paint program and seperate the canvas in say 3 or 4 sections to try colors together a bit
and see how they fit. Once you choose a "winning" combination. Use it consistently.
CONTROL SIZE AND SPACING CONSIDERATIONS:
As you can imagine, the selected screen resolution has everything to do with this section. The main reason to give a control
(button, textbox, lable, scrollbar or others) a given size is so that it can easily be seen and easily be used as well. Not everyone
Thinks about both of these considerations. If your controls are too small, people will have a harder time aiming atthem with the
mouse pointer which will make a GUI mich harder to use. This is also why the selected screen resolution is so important. What seems
small on an 1024x768 screen resolution might be just right at 800x600. However, they might be too big on a 640x480 resolution. Knowing
the resolution you'll use will help determine sizes so that both considerations can be used intelligently.
Many companies have had many meetings and developed standards in control size and spacing, this alone should help illustrate just how
important control sizes and spacing actually really is as far as GUI usability goes. It's not the only factor as you'll see later in
this document, but it's definitaly an important part of it. For example, here is a link to the Microsoft Visual Design Guide which explains
how they go about sizing the different windows controls you see and use in the programs you use every day. This guide was developed for
the sole purpose to help make sure that any applications developed for the Windows Operating System be as usable as they possibly could
be. Even though in your GUI, controls might look different and be in different locations, this guide might be a good read nonetheless which
is why I provided it. Take a look at it, you just might like what it talks about.
USER INTERACTION CONSIDERATIONS:
Exactly what is User Interaction? The best way to describe this concept is to say that User Interaction is how the application gets input from
the user AND how the application talks back to the user so to speak. Let's take a look at both of these in more details shall we?
- User Input: (What you expect from the user)
Most GUIs provide a set of controls presented to the user when some kind if input is expected from them. Some common controls are
textboxes, checkboxes, radio buttons, selection lists, command buttons and the likes. It's not enough to know they exist and throw
them together on a window to say that the screen is functionally correct. You need to think about things a bit. The bottom line is
users need to be comfortable with using the many screens provided by your GUI or by applications that uses your GUI. Alot of common
sense and a bit of layout skills is all you need. Try to keep a screen specific to a single subject. For example if you have an
option screen to change different aspects of your GUI. Keep them in functional groups. Colors should be on a different screen. Other
visual options should be on different screens (or tabs on a single form). Just that goes a long way in keeping your GUI easy to use. It
is also important to consider implementing your GUI for both mouse and keyboard operations. Different users come from different computing
backgrounds. Some users might be more proficient with your GUI if they can do everything from the keyboard. Other users will prefer to use
the mouse. It's good to consider this throughout your GUI development.
Another important aspect is to keep everything consistent. if the F2 key serves to open a new file, it should server to open a new document in
everything you develop for your GUI. If you have a file menu for file operations, it should be present in all programs that perform some file
manipulation. This will greatly reduce the learning curve for new users and we all know users like to be in control of what's happening as soon
as possible. When expecting input from the user, it should be very clear what is expected of the user and where on the screen the expected value
will be entered. Likewise if you can minimize human error (such as a selection list when a fixed set of values is needed instead of making the user
enter the value manually) is always a good idea especially when the expected value is an important one. You just have to sit down and think about
what the quickest way to get what need is and also what's the best way for the user to give you that information.
- User Feedback: (What you gve back to the user)
I define User Feedback as how well the user knows what's going at all time while he or she uses an application or a GUI. There truely is such a thing
as exagerated feedback. However you need to think about when the user should be warned or told what is going on or what is about to happen. User
confirmation is a good first start especially on operations that could modify or delete a file. Making sure the users know what they are about to do
and making sure they have a chance to cancel the operation is a vital part of user feedback. Also, have you ever clicked a button and were under the
impression that nothing was happening and tried pressing the button again? How do you feel when that happens? Lost, like you have no idea what the program
is doing? Of course you did. And if you don't like that feeling, you can imagine that the users of your GUI won't like it either. Here are a few tricks
to help give the user the right kind of feedback so that he's never in this state of confusion.
- If a lenghty process can be seperated in clear defined steps, a good idea is to list those steps with check boxes and once one of those step is completed you just
check the box for the step. Users will see this happen and know that what they decided to do is indeed being executed.
- If it can't be broken up into steps but you know it can take a good long time, perhaps a progress bar is a better approach. Progress Bars indicate progress
by filling up a rectangular area proportional to the percentage of work that has been done. This is a good visual indicator that shows the user how much is done
and how much is left to be done.
- If the process will take atleast a bit of time but not too long, then changing the cursor image while the process is being executed may be enough. The important thing
is to indicate, somehow, that the system is currently busy executing a task. It could be a simple BUSY written on the taskbar (or the menu) or wherever you want it to
be shown on your GUI.
MULTIMEDIA CONSIDERATIONS:
NOt too long ago, this section would have applied mostly to GUIs designed for games. However, today, with
all the advancing technologies users like (and almost expect) all the bells and whistles that a GUI may have
to offer. 3D animations, Music, sounds are all part of what makes a GUI cool by today's expectations. And
I fall in this Category. I like the little animations when you copy files to a different location. I like the
sounds that you hear when you close windows or get error messages. It's just all fun to see and hear.
It's one thing to want your GUI to do all this stuff. However, coding for it can be a pain. If you want to
include such features in your GUI, you're more than welcome to. It will help users get to like your GUI I'm sure
since Today sounds, music and 3D are all hot topics. Just remember that you are coding a GUI, not a game. Typically
one of the main goals of a GUI is to be functional, not entertaining. So again common sense is a good tool to deciding
how much of these features you'll want your GUIs to have. If you are coding a GUI for a game then you can let yourself
loose and do what you want. But if it's a GUI only, you might want to use these features moderately.
Of course, if your GUI incorporates libraries that allows you or others to include all these features in their own project
that will definitaly encourage users who are programmers to create things for your GUI. So although not recommend as part
of the GUI's design and usage, it's recommended as part of the GUI's capabilities.
SYSTEM RESOURCES CONSIDERATIONS:
Keeping in mind that today, RAM, Harddisk space and other resources are less and less costly, It's still no reason to waist space
and use up all the RAM for your GUI. Today, when you create a GUI, you can start thinking about bigger features. But there is such
a thing as bloating your GUI. Bloating a software means to make it bigger than it needs to be which makes it run slower than it
needs to run to perform a given task. When talking about pictures used in toolbars for example, if you have buttons that are 32 by 32
they will logically take up more space (and resources) than if you can keep your images to 20 by 20 pixels instead. Sometimes just
doing an overall in reducing graphics sizes is enough to do a great bit twards keeping your GUI resource efficient.
Another aspect of GUI efficiency is at the code level. Depending on the language you use to create your GUI, they usually offer a
faster way to do the same thing. You can find, on the web, on the web, a whole bunch of tips and tricks to help keep your application's
executable size smaller and make it execute itself faster. Code optimization techniques is all you have to look for. I've seen some cases
where a simple different way to formulate an IF statement would make a loop executed even up to 4 times faster. Really depends which way you do
things. So Coding is yet a very important aspect of your GUI design without a doubt.
GENERAL DESIGN NOTES AND CONSIDERATIONS:
You might remember my mentionning the importance of consistency. This is very important for keyboard functionality of course, but it's also important where the mouse is concerned. If
you click on something with the mouse button everything that same item pops up, it should expect the same kind of clicking. For example, if you have a save button on a form. If you only
need to click it once, then you should make sure that all your forms that have a save button only need one click to do their job all over your GUI. Again this is so that the user can
form his or her own habits when using your GUI. Hence reduce the learning curve.
Another very important aspect of consistency is, of course, in the Visual Design of your GUI, forms and controls. You're most definitaly free to choose how your buttons will look and feel. But again,
for the sake of easy learning and easy usability. It's a good idea to use the same visual buttons and make sure they look the same in all GUI components your build. Some use color to help identify functions
like green for save, red to delete, yellow to cancel, etc etc... Some use shapes for the same purpose, triangle to save, square to delete, etc etc... the style of the GUI is really up to you. But if you
can make sure that whatever you decide to create is consistent (as in looks the same and acts the same) throughout your GUI, you'll definitaly help your GUI be as usable as it can be. And users definitally
like that.
Here's another aspect of GUI Design that I think is important to consider. Some of you might have heard about the concept of Common Dialogs and some of your might have not heard of it. Think of it this way,
ultimately, alot, if not all the programs you'd likely to create for your GUI will do some very common functionalities. Fir example, Opening a file, saving a file, selecting colors, printing a document or a picture
in someway and if you have many fonts available for your GUI a font selection tool would come most handy to your users. It is, to me, a good idea to create a basic set of dialogs that will accomodate for these very
comon functionalities and provide a way for people that program applications or games for your GUI to use them in their applications. this will not only help in consistency of the visual aspect of your GUI, but also
for the consistency of coding for your GUI. Windows among others has it's set of common dialogs that can be used by any application that is built for it. To me, it's also a big reason for it's success and I don't believe
it should be overlooked to quickly.
IN CONCLUSION:
All in all GUI design is all about personal taste really. Since you are coding it, you're likely to want to create it to your own personal taste and you'll want it to work the way you choose. That's allright really. In many
cases, your way of doing things are likely to be functional and usable to some other users as well. This article, like I said earlier isn't about changing your way of creating your GUI and it's certain not to force you to
abide by any standards per se. This whole document is a list of things that I believe will help you make a GUI that the most possible amount of potential users will like to see available. Typically if you take the time to
consider everything I mentionned here, there's alot of common sense here. How things look is to your taste Visually speaking and it will also make your GUI unique. But considering the aspects mentionned here when designing
your GUI will show the effort that you put into your GUI to make it easy to use and learn. Users being humans, will like the fact that no matter what your GUI looks like, they can get used to it fast enough if the design
is consistent and if special considerations towards the user are in place.
As always I'm always opened to suggestions about this. I tried to be clear and to the point. However it's very possible that some parts are obscure to your. If that's the case, my email is in my signature at the bottom, feel
free to let me know how you liked it and if there's any parts of it that you'd like to know more about. I'm always open to helping people out and making sure that what I try to teach is learnt and learnt well. So feel free
to leave me comments and suggestions. Until next time, happy coding.
MystikShadows
Stéphane Richard
srichard@adaworld.com
Download a copy of this tutorial.
FreeBasic Screensaver Tutorial
Written by Rattrapmax6
Introduction:
Allot of you like me wanted to know how to code a
screen saver. Allot of you might have made simple screen
savers that only worked as a exe. It way sound very hard
to pull off a screen saver, and if you look at some of the
tutorials for C++, it looks scary! But, there is a really
simple way to start.
Since this is so simple, allot of this tutorial will be on
the concepts of screen savers, how they are meant to
work, how to pull this off, and then the code to compile
with so it will take to the screen saver setup in the display
settings.
Screen Saver Concepts:
Screen savers main design are to keep the screen in
motion so a still image isn't burnt unto the screen.
Mistakes might be to think that bright colours defeat the
purpose of a screen saver. The answer to that will be no,
the colours can be as intense as you can stand, as long as
the screen is in motion, the screen saver is working.
Also, today most monitors are designed to prevent
screen burns leaving screen savers to be more as what you
use wallpaper (Either desktop or the actual stuff) for,
decoration. So if you want a good screen saver, you want
something that is liked or draws attention to itself. With
this lil bit of knowledge out the way, lets move on to how
screen savers work.
How They Work:
After the computer has been idle for the same amount
of time set in the display properties, windows starts the
screen saver application. When the screen saver is
running, it waits for user input through either Mouse or
the Keyboard. All the while, it also is rendering images
unto the monitor to keep it in motion. Pretty simple heh?
Now lets see how this works as code:
Coding a Simple Screen Saver:
Okay! Lets start by putting the key concepts of a
screen saver together. Will make are loop and give it user
inputs:
'---|Code|-----------------------------------------------------
SCREENRES 320, 200, 32,,1 'Set to 320x200 32bit colour Fullscreen

'Main LOOP
DO
    GETMOUSE OMX, OMY,, MB 'Enable Mouse (Old Cords)


    GETMOUSE MX, MY,, MB 'Enable Mouse (New Cords)
    IF OMX <> MX THEN END ' Check for mouse movement X

    IF OMY <> MY THEN END ' Check for mouse movement Y
    IF MB > 0 THEN END     ' Check for click w/o motion of mouse

LOOP UNTIL INKEY$ <> "" 'End on keypress
'--------------------------------------------------------------
This code starts by setting the screen mode, and creating a
loop. Inside the loop is a code to call the mouse for its
cords at the start of the loop, then at the end of the loop.
The IF..THENs see if there is a difference between the
two calls. They also see if the mouse was clicked. Hey, the
mouse can be clicked w/o moving it, unlikely, but better
ready for it than not.
Now, we need something to save the screen. In this
tut it will be something simple, I wont get into
complicated graphic commands, or impressive 3D motion
with OpenGL. But if later on after learning the concepts
of screen savers, you are more than welcome to make a
dazzling screen saver on your own! For now, will make a
circle bounce around alternating color and smearing it as
it goes. These are simple but cool to make!
Lets set up the stats for the circle:
'---|Code|-----------------------------------------------------
SCREENRES 320, 200, 32,,1 'Set to 320x200 32bit colour Fullscreen

X = 160: Y = 100: Radi = 10 'NEW, Circle cords and Radius..

R = 255: G = 255: B = 255 'NEW, R, G, B Values we'll alternate..

XV = 2: YV = 2 'NEW, Set X, Y velocities..

'Main LOOP

DO
    GETMOUSE OMX, OMY,, MB 'Enable Mouse (Old Cords)

    CIRCLE (X, Y), Radi, RGB(R, G, B) 'NEW Display Circle..


    GETMOUSE MX, MY,, MB 'Enable Mouse (New Cords)
    IF OMX <> MX THEN END ' Check for mouse movement X

    IF OMY <> MY THEN END ' Check for mouse movement Y
    IF MB > 0 THEN END     ' Check for click w/o motion of mouse

LOOP UNTIL INKEY$ <> "" 'End on keypress
'--------------------------------------------------------------
The first new thing we added were the X, Y cords and the
Radius setting. This used with Circle will start it in the
center of the screen. Next we set the RGB values we want
to alternate to white (255, 255, 255). The third new thing
we added want be used yet, these will move the circle
when added to X and Y. Inside the LOOP you will find
the Circle statement with all the values we set above.
When you run this code, it will display a circle in the
center of the screen.
Now we need to set the barriers the circle will bounce
off of. Then use IF.. THENs to enable there use with the
circle.. We'll also add in the code to move it to make sure
the barriers are right, and hide the mouse:
'---|Code|-----------------------------------------------------
SCREENRES 320, 200, 32,,1 'Set to 320x200 32bit colour Fullscreen

X = 160: Y = 100: Radi = 10 'Circle cords and Radius..

R = 255: G = 255: B = 255 'R, G, B Values we'll alternate..

XV = 2: YV = 2 'Set X, Y velocities..

MINX = 10: MAXX = 310 'NEW Set X's limits

MINY = 10: MAXY = 180 'NEW Set Y's limits

'Main LOOP
DO

    GETMOUSE OMX, OMY,, MB 'Enable Mouse (Old Cords)

    SETMOUSE ,,0 'NEW, Hide Mouse!


    CIRCLE (X, Y), Radi, RGB(R, G, B) 'Display Circle..


    'NEW
    'Check if circle hit limits
    ' IF so, set random velocity to repel with..
    IF X < MINX THEN XV = INT(RND * 5) + 1

    IF X > MAXX THEN XV = -INT(RND * 5) + 1

    IF Y < MINY THEN YV = INT(RND * 5) + 1

    IF Y > MAXY THEN YV = -INT(RND * 5) + 1


    'NEW
    'Move Circle
    X += XV
    Y += YV

    SLEEP 100 'Delay the loop


    GETMOUSE MX, MY,, MB 'Enable Mouse (New Cords)
    IF OMX <> MX THEN END ' Check for mouse movement X

    IF OMY <> MY THEN END ' Check for mouse movement Y
    IF MB > 0 THEN END     ' Check for click w/o motion of mouse


LOOP UNTIL INKEY$ <> "" 'End on keypress
'--------------------------------------------------------------
Okay, we set are limits. If you notice they're off from the
actual screen cords. This is to make up for the circles
radius. Some times they can be calculated, other times
you'll have to debug to get it right. But for the lower
limits, add the radius. And the higher limits you subtract
the radius.
The next new line hides the mouse so it won't mess
up the rendering of the screen saver. Moving on, we come
to the IF.. THENs for the barriers. When X and Y pass
over the set limits it reverts them with a random velocity.
This adds for a more interesting effect.
For the last few lines, X += XV and Y += YV moves
the circle around, and SLEEP 100 allows us to see the
circle instead of a high-speed blob. Take note that with
this mouse kill routine, sleep needs to be between the
GETMOUSE statements. Other wise it won't turn off to
the mouse.
Now, if you let this run, it will just make the screen
white and thus stop moving. This isn't what we want. In
this last bit of code in this section, I'll add a random
colour code....
'---|Code|-----------------------------------------------------
SCREENRES 320, 200, 32,,1 'Set to 320x200 32bit colour Fullscreen

X = 160: Y = 100: Radi = 10 'Circle cords and Radius..

R = 255: G = 255: B = 255 'R, G, B Values we'll alternate..

XV = 2: YV = 2 'Set X, Y velocities..

MINX = 10: MAXX = 310 ' Set X's limits

MINY = 10: MAXY = 180 ' Set Y's limits

'Main LOOP
DO

    GETMOUSE OMX, OMY,, MB 'Enable Mouse (Old Cords)
    SETMOUSE ,,0 ' Hide Mouse!


    'Random colours
    R = INT(RND * 255) + 1

    G = INT(RND * 255) + 1

    B = INT(RND * 255) + 1


    CIRCLE (X, Y), Radi, RGB(R, G, B) 'Display Circle..


    'Check if circle hit limits
    ' IF so, set random velocity to repel with..
    IF X < MINX THEN XV = INT(RND * 5) + 1

    IF X > MAXX THEN XV = -INT(RND * 5) + 1

    IF Y < MINY THEN YV = INT(RND * 5) + 1

    IF Y > MAXY THEN YV = -INT(RND * 5) + 1


    'Move Circle
    X += XV
    Y += YV

    SLEEP 100


    GETMOUSE MX, MY,, MB 'Enable Mouse (New Cords)
    IF OMX <> MX THEN END ' Check for mouse movement X

    IF OMY <> MY THEN END ' Check for mouse movement Y
    IF MB > 0 THEN END     ' Check for click w/o motion of mouse


LOOP UNTIL INKEY$ <> "" 'End on keypress
'--------------------------------------------------------------
Making it a .SCR!!!!!!
This is where I said a screen savers are really easy to
make. This next little bit of code is all you need to turn the
above simple screen saver into a real working .SCR
application. Basically a .SCR is a .EXE. The only thing
different about it needs to accept parameters that will be
passed by the display properties. Look at this simple piece
of code:
'-----[Code]--------------------------
IF LEFT$( COMMAND$, 2 ) = "/c" THEN END

IF LEFT$( COMMAND$, 2 ) = "/p" THEN END

'-------------------------------------
Simple aye? To explain this, the first line that looks for
"/c" in the command line, is to prevent the screen saver
from running when you press settings. This is good to
know because if you ever want settings, you can turn this
into a code block for settings! The next line filters out the
display from running the code when you select the screen
saver. Its meant to find a preview to run in the little
monitor on the GUI, but its best to leave this as is.
Now, this code needs to be at the very top of the
code, before any other statements are called. Here is
what it should look like all together:
'---|Code|-----------------------------------------------------
IF LEFT$( COMMAND$, 2 ) = "/c" THEN END

IF LEFT$( COMMAND$, 2 ) = "/p" THEN END


SCREENRES 320, 200, 32,,1 'Set to 320x200 32bit colour Fullscreen

X = 160: Y = 100: Radi = 10 'Circle cords and Radius..

R = 255: G = 255: B = 255 'R, G, B Values we'll alternate..

XV = 2: YV = 2 'Set X, Y velocities..

MINX = 10: MAXX = 310 ' Set X's limits

MINY = 10: MAXY = 180 ' Set Y's limits

'Main LOOP
DO

    GETMOUSE OMX, OMY,, MB 'Enable Mouse (Old Cords)
    SETMOUSE ,,0 ' Hide Mouse!


    'Random colours
    R = INT(RND * 255) + 1

    G = INT(RND * 255) + 1

    B = INT(RND * 255) + 1


    CIRCLE (X, Y), Radi, RGB(R, G, B) 'Display Circle..


    'Check if circle hit limits
    ' IF so, set random velocity to repel with..
    IF X < MINX THEN XV = INT(RND * 5) + 1

    IF X > MAXX THEN XV = -INT(RND * 5) + 1

    IF Y < MINY THEN YV = INT(RND * 5) + 1

    IF Y > MAXY THEN YV = -INT(RND * 5) + 1


    'Move Circle
    X += XV
    Y += YV

    SLEEP 100


    GETMOUSE MX, MY,, MB 'Enable Mouse (New Cords)
    IF OMX <> MX THEN END ' Check for mouse movement X

    IF OMY <> MY THEN END ' Check for mouse movement Y
    IF MB > 0 THEN END     ' Check for click w/o motion of mouse


LOOP UNTIL INKEY$ <> "" 'End on keypress
'--------------------------------------------------------------
Now, all is left to do is compile. It's better to compile with
-s gui to prevent the DOS-box from popping up before the
screen saver displays. After you compile, you need change
the .EXE to .SCR. To do this you may need to go to:
Start> Setting> File Options : On the view setting, make
sure the "Hide file extensions on known files" is not
checked. This will allow you to change the file extensions
in Windows Explorer. Once you've done that, all you need
to do is move the .SCR to the windows directory. Then
with the display properties, select your screen saver!
Congrats! You've just made your first real screen
saver!
Special Thanks!:
dumbledore: For showing me how this was
done...
MystikShadows: Suggesting I write this...
VonGodric: The FB Code formatter
(Anyone else I forgot here)
Download a copy of this tutorial: SVRTUT.zip
Database Design - A Complete Study
Part 2 - From Theory to Practice
Written by Stéphane Richard (MystikShadows)
INTRODUCTION:
Welcome to this second installement of the Database Design series of articles. As we stand today, we've covered
most of all the theory relevant to database design. You are now equipped with the knownledge of terms you're very
likely to hear in your programmer's carreer and you should know what those terms mean and a bit of how to use them
as well. The best part of this theory is definitaly the Database Normalization section and this is what this second
installement will mostly be about.
Indeed, in this installement well describe a typical situation you're likely to face and bring it forward by extracting
the information you need from the situation right down to defining the tables and the needed relationships, as per the
database normalization theories defined in the first installement of this series. At the end of this installement, you
should be able to do the same for any and all database design related situations you'll encounter in your career and in your personal
projects as well. So let's get right to it shall we?
THE SITUATION:
In most cases, database design revolves around a company and it's operation. It could be in the goal to automate a specific manual process or
to go around billing, accounting or purchasing. The reason why it revolves around that is because in many cases, a business has very specific
needs in those areas and often, the commercially available products just don't quite answer the real needs of the companies. Therefore, we will
be creating a billing, customer, inventory and purchasing system for the situation.
Now, what would be the first thing to come to mind when you receive this task? This depends on many things actually the first of which is how the
problem is described to you. You can receive a complete sentence telling you something like: "I want you to make a billing system wich affects the
inventory of the business and something to allow me to purchase items.". you could also receive a complete 500 page book on what exactly the company
wants that details absolutely everything you'd need (in a perfect world maybe). The truth of the matter is most companies that would call you or
your firm to get a software made don't always know what to ask for or how to ask for what they want. Not eeryone is gifted when it comes to explaining
their needs and that's just part of the challenge.
DOMAIN SPECIFIC KNOWLEDGE:
If you remember from the first installement, domain specific knowledge is good to have when you're designing a database for a specific need. And the
reason why it's good (read important) to have domain specific knowledge is that in many cases, the company will expect you to know what they want. Don't
worry though if you don't have the knowledge you can always learn it pretty quickly in most cases. So let's start by stating the domain specific knowledge
for this particular situation.
When you talk about a billing system, usually, you're talking about invoicing. Who do you invoice? Customers, what are they buying? your products, where
does the company get their products? From their suppliers (or they made them themselves in which case they have suppliers for the raw materials). Where do they put those products?
in their warehouse (which means they have an inventory to keep). Is it just me or do these questions and answers seem somewhat simplistic to you? Well, this first
set of questions is pretty much all you need to determine your primary entities (the first set of tables you know you'll need to have). I think it's clearly
noticable that there are five distinct elements in this set of questions. You can see that you'll need: Customer management, Invoice Management, Inventory Management,
Supplier Management and Purchase Order Management. Let's take each of these and talk about them a bit, see what we can come up with.
- Customer Management:
Customer Management usually involves more than just customers and their information. Sure you'll want to know their name, address, telephone number(s), etc etc...But
Customer Management also could imply you want their history (what they bought) their payment history (how well they paid for what they bought) too. It depends on the
needs of the company really. But for this situation let's assume that they want it all. There's another concept we'll add here because like the others it can definitaly
be asked for. The concept of Accounts Receivables will affect the tables you define your tables and which table you'll need to define. Although ultimately, Accounts
receivables can be managed 100% from a software point of view, many companies like to keep this kind of track record information just to help them make sure that all
the invoices they make eventually get paid. Accounts receivable have 6 major cycles each of 30 days 3 Receivable statuses and 3 collection statuses This means that after
180 days (roughly 6 months) that account is considered lost so to speak. The age of the account will be important here
- Invoice Management:
Invoicing generally requires two tables The invoice header which will have such things as the invoice number, the date the invoice was made, to whom and invoice total and taxes. And
the invoice detail which gives one line per item purchased. This table details each item that is being sold and should appear on the invoice. If you look at a typical invoice you have
had you can distinguish these two elements fairly easily. As far as Invoices go, these tables are all you need. However you'll see that they will relate to other tables in order to
perform their designated functionality. Payment Methods are also important to know. Which payment method is allowed depends on the company itself so it's a good idea to keep the payment
methods configurable in some way.
- Inventory Management:
In a very broad sense of the word, inventory management implies that you'll be managing the products that you sell and buy. Hence you can conclude that inventory will be affected by
what you sell to your customers and by what you buy from your suppliers. It involves a list of product and specific information about products. Some may like to break down their inventory
by categories of products to help in managing itself a bit. In essence that's all that's needed but
throughout the years inventory has been refined quite a bit. Inventory also plays the role of controling and making sure no products are lost that can't be accounted for. In bigger systems
they even have different means of controling inventory depending on the type of customer they deal with. They would control inventory by the item for regular people coming in and buying one or two
of a given product and control inventory by the case when they sell to companies. This is why Inventory Management quickly became known as Inventory Control (because now you need to be able to know
how many items you bought, how many you sold, how many should be in stock and how many actually is in stock (if these last two aren't the same, then something went wrong in the inventory (maybe internal
theft or something) and a good inventory control system can help give many indications as what could have happened to the missing products
- Supplier Management:
Suppliers are of course the companies that you buy your products from. Hence You'll want their information much as you would want information about the customers. Like Accounts receivables help
in making sure the company's invoices get paid by the customers, Accounts Payable is a good tool to make sure the company pays it's bill on time. And a history of what you purchased from your supplier
is a great way to know which of your suppliers you use the most and how much business you've given them. You might notice some companies care a bit less about supplier management much for the same
reason as any of us hate to pay our bills. it's often regarded as something they have to do, not something they want to do.
- Purchase Order Management:
Invoices are the means by which Items are removed from the inventory of the company. Likewise Purchase Orders are the means by which Items are added to your inventory. You buy items from your suppliers
to repplenish your inventory and have items ready and available for your customers to be able to by them without havjng to wait for them. However sometimes this is hard to achieve and a system of split
purchasing and back order operations is always good to have implemented.
EXTRACTING THE DATABASE RELATED INFORMATION:
So what exactly can we extract from all that's been mentionned above about domain specific knowledge? Well we know we have 5 major players in our design (mentionned above) and we know that each player will need
more than one table to perform it's designated task. Let's list the table we'll need here and explain their role briefly. This is where we'll start to name our tables so the clearer the name the better because
when we create our queries and scripts these names will play a big role. What I'll do here is create the table structures (in non SQL terms, just to give you an idea of what fields could be needed in this situation
and give you a few notes about each table. This should make it clear enough what role the tables play and how we'll later create the database definition for these tables (in the next installement).
Customers Management:
As mentionned, the Customers table definition will need tables for the customer information, List of ways to contact the customer, a history table to keep track of what invoices and how much money the invoices
represents as well as an accounts receivable table to organize the way the invoice will be processed. Here's the table definitions for the customers.
|
Customers
|
|
Field Name
|
Type
|
Length
|
|
CustomerID
|
Numeric
|
4
|
|
CustomerName
|
Character
|
50
|
|
IsCompany
|
Boolean
|
1
|
|
CustomerSince
|
Date
|
8
|
|
Address1
|
Character
|
60
|
|
Address2
|
Character
|
60
|
|
City
|
Character
|
40
|
|
State
|
Character
|
25
|
|
ZipCode
|
Character
|
8
|
|
|
This table is where the customer management system begins. This central table is where all other
tables that perform some kind of customer management function will need to relate to.
All field names and lengths I have chosen here are there simply as a sample of what you'd be likely to
find in many existing database systems. For the sake of different project types they might change. The naming
convention here is simply to have clear names.
|
|
|
CustomerNumbers
|
|
Field Name
|
Type
|
Length
|
|
CustomerID
|
Numeric
|
4
|
|
ContactDescription
|
Character
|
30
|
|
PhoneNumber
|
Character
|
14
|
|
ExtensionNumber
|
Character
|
6
|
|
|
This table will hold all possible means to contact a given customer. Some typical data
that can be found here are Business, (222) 222-2222, Home, (333) 333-3333, etc etc. Note
that this means that there will typically be more than one row of data per customer.
|
|
|
CustomerHistory
|
|
Field Name
|
Type
|
Length
|
|
HistoryID
|
Numeric
|
4
|
|
CustomerID
|
Numeric
|
4
|
|
InvoiceNumber
|
Numeric
|
4
|
|
InvoiceDate
|
Date
|
8
|
|
InvoiceTotal
|
Numeric
|
8
|
|
Balance
|
Numeric
|
8
|
|
|
This table will allow the users to quickly see what the customer bought as well as if all the invoices
have been paid. Note here too that there could be more than one record for each customer as each invoice
made to that customer will have a record added to this table.
|
|
|
CustomerPaymentHistory
|
|
Field Name
|
Type
|
Length
|
|
HistoryID
|
Numeric
|
4
|
|
PaymentID
|
Numeric
|
4
|
|
PaymentDate
|
Date
|
8
|
|
PaymentAmount
|
Numeric
|
8
|
|
BalanceDue
|
Numeric
|
8
|
|
PaidInFull
|
Boolean
|
1
|
|
|
This table is added to help trace, in detail, what happened throughout the life of a given invoice made to a
given customer. Note that more than one payment could potentially be made to an invoice which means that more than
one record could be found here for a given history number.
|
|
|
AccountsReceivable
|
|
Field Name
|
Type
|
Length
|
|
CustomerID
|
Numeric
|
4
|
|
InvoiceNumber
|
Numeric
|
4
|
|
InvoiceDate
|
Date
|
8
|
|
BalanceDue
|
Numeric
|
8
|
|
CurrentCycle
|
Numeric
|
4
|
|
ReceivableOneDateEnd
|
Date
|
8
|
|
ReceivableTwoDateEnd
|
Date
|
8
|
|
ReceivableThreeDateEnd
|
Date
|
8
|
|
CollectableOneDateEnd
|
Date
|
8
|
|
CollectableTwoDateEnd
|
Date
|
8
|
|
CollectableThreeDateEnd
|
Date
|
8
|
|
AccountPaid
|
Boolean
|
1
|
|
|
This Table is where Accounts receivables come to play. Typically, the day you create an invoice that won't be paid right then and there, a
record will be added here. All the Accounts Receivable cycle dates in this table can be evaluated and save. This will allow for an automatic
scheduling of the account for processing when the given cycles reach their ending dates. Only one record here will be present for a given
invoice so the relationship here would be one to one.
Typically, the Cycle Date Ends would be, 30, 60, 90 for the ReceivableDateEnds and 120, 150, 180 for the Collectable Date Ends.
|
Invoice Management:
Like we said earlier, invoices only need 2 tables. However you'll notice that in the table definitions above for the customers, many of the tables have
an InvoiceNumber for a field, they will all related back to the invoice to reveal some very detailed information about the invoice and what's been happening
to it in it's lifetime. So let's define these invoice tables:
|
InvoiceHeader
|
|
Field Name
|
Type
|
Length
|
|
InvoiceID
|
Numeric
|
4
|
|
InvoiceDate
|
Date
|
8
|
|
CustomerID
|
Numeric
|
4
|
|
InvoiceTotal
|
Numeric
|
8
|
|
SalesTaxRate
|
Numeric
|
8
|
|
SalesTaxAmount
|
Numeric
|
8
|
|
GrandTotal
|
Numeric
|
8
|
|
IsPaid
|
Boolean
|
1
|
|
|
Here is the Header table for the invoicing system. As you can see, this represent esential information
you would be likely to find on an invoice. Note here as well that an invoice needs to be made to a customer
which means that it needs the CustomerID field to be filled. Needless to say that a customer can have more
than one invoice which is yet another relationship to consider.
|
|
InvoiceDetails
|
|
Field Name
|
Type
|
Length
|
|
InvoiceID
|
Numeric
|
4
|
|
DetailID
|
Numeric
|
4
|
|
ItemNumber
|
Numeric
|
4
|
|
Quantity
|
Numeric
|
4
|
|
LineTotal
|
Numeric
|
8
|
|
IsTaxable
|
Boolean
|
1
|
|
|
This table holds the details of each invoice. essentially there is one record per each different Item sold as part of this invoice.
Note that no product description is specified here because it can be retreived from the the Inventory table. This is one of the
normalization forms in action right there. It helps avoid the repetition of information in more than one table wherever possible.
|
Inventory Management:
And now we're at the part where products are maintained, otherwise known as Inventory Management And Control. The main product table needs
to have sufficient information about a product to be able to do everything we need to do with the inventory. In order to truly manage the inventory
and everything that relates to it, you'll see here that we will need a few tables to go with the main product table. Let's defined them:
|
Products
|
|
Field Name
|
Type
|
Length
|
|
ProductID
|
Numeric
|
4
|
|
SupplierID
|
Numeric
|
4
|
|
CategoryID
|
Numeric
|
4
|
|
BrandName
|
Character
|
30
|
|
ModelNumber
|
Character
|
20
|
|
Description
|
Character
|
50
|
|
CurrentPriceBought
|
Numeric
|
8
|
|
CurrentPriceSold
|
Numeric
|
8
|
|
QuantityInStock
|
Numeric
|
4
|
|
MinimumInStock
|
Numeric
|
4
|
|
MaximumInStock
|
Numeric
|
4
|
|
IsTaxable
|
Boolean
|
1
|
|
IsActive
|
Boolean
|
1
|
|
|
The Products Table holds information about a product currently present in the company's inventory including
where the product was bought (supplier). With this information it's possible to manage the inventory very well.
Some other inventory system manage products by unit (depending on the needs) but in this case we'll manage quantities.
Not that more than one product can be present that was bought from the same supplier (can you say relationship?).
Note also that Minimum and Maximum quantities are there to help tell is if we're running out of a product or if we'd
be in overstock if we bought more.
|
|
Categories
|
|
Field Name
|
Type
|
Length
|
|
CategoryID
|
Numeric
|
4
|
|
CategoryDescription
|
Character
|
40
|
|
ParentCategoryID
|
Numeric
|
4
|
|
|
This is a small table that servers to categorize the products. The ParentCategoryID serves to create
a hierarchy of categories should the need be. A quick and useful trick in big inventories. More than
one product can be in a category.
|
|
PriceHistory
|
|
Field Name
|
Type
|
Length
|
|
ProductID
|
Numeric
|
4
|
|
PriceID
|
Numeric
|
4
|
|
PriceDate
|
Date
|
8
|
|
PriceBought
|
Numeric
|
8
|
|
PriceSold
|
Numeric
|
8
|
|
|
Another small table to help control the pricing reality of a product. Useful for tracebacks and
when establishing special prices. There can be more than one price history per product.
|
Special Note:
In some inventory systems, quantities and items are not directly taken in and out of the inventory per se. They
work with a principle of a transactional table where Items bought and items sold are recorded in a secondary table
so that inventory is not touched until such a day where the products actually leave the warehouse or are officially
received into the warehouse. A Transaction table would then be defined to accomodate for this functionality.
Supplier Management:
Suppliers are, for the sake of discussion, just like customers. Likewise Accounts payable work pretty much the same
way as accounts receivables would but in revers since in this case you're paying your own bills rather than wait on
customers to pay their bills to you. You like it when your customers pay their bills on time and it's not far
fetched to believe that your suppliers like it when you pay your bills on time too for obvious reasons. Having an
Accounts Payable system in place automates the bill paying part for you and can prove a great tool for consistent
and good business relations. As such let's define the Supplier Magament Tables. You'll see that they are alot like
the customer management tables and rightfully so:
|
Suppliers
|
|
Field Name
|
Type
|
Length
|
|
SupplierID
|
Numeric
|
4
|
|
SupplierName
|
Character
|
50
|
|
SupplierSince
|
Date
|
8
|
|
Address1
|
Character
|
60
|
|
Address2
|
Character
|
60
|
|
City
|
Character
|
40
|
|
State
|
Character
|
25
|
|
ZipCode
|
Character
|
8
|
|
PhoneNumber
|
Character
|
14
|
|
FaxNumber
|
Character
|
14
|
|
EMailAddress
|
Character
|
70
|
|
Website
|
Character
|
70
|
|
|
The Supplier Information shown here is typical of what you would need to know about a supplier. Note that
here, the phone number related information are stored in this table instead of a seperate table because
you don't usually need to track down a supplier, you just need enough information to create your purchase
orders.
Note that more than one product can usually be obtained from a supplier. Likewise note that if need be, more
than one Purchase Order could be made to a given Supplier for different reasons.
|
|
|
SupplierHistory
|
|
Field Name
|
Type
|
Length
|
|
HistoryID
|
Numeric
|
4
|
|
SupplierID
|
Numeric
|
4
|
|
PurchaseOrderNumber
|
Numeric
|
4
|
|
PurchaseOrderDate
|
Date
|
8
|
|
PurchaseOrderTotal
|
Numeric
|
8
|
|
BalanceDue
|
Numeric
|
8
|
|
|
This table will allow the users to quickly see what was bought from the supplier on a given purchase order. Along with if the purchase order was
paid or not. Note that more than one supplier history can exist for each supplier.
|
|
|
SupplierPaymentHistory
|
|
Field Name
|
Type
|
Length
|
|
HistoryID
|
Numeric
|
4
|
|
PaymentID
|
Numeric
|
4
|
|
PaymentDate
|
Date
|
8
|
|
ReferenceNumber
|
Numeric
|
4
|
|
PaymentAmount
|
Numeric
|
8
|
|
BalanceDue
|
Numeric
|
8
|
|
PaidInFull
|
Boolean
|
1
|
|
|
This table is added to help trace, in detail, when a payment was made to a supplier regarding which purchase order. The reference
number here can be the cheque number used, or whatever other means of identifying the payment accurately for easy traceback if needed.
Note that more than one payment can be made to a Supplier History for a given purchase order.
|
|
|
AccountsPayable
|
|
Field Name
|
Type
|
Length
|
|
SupplierID
|
Numeric
|
4
|
|
PurchaseOrderNumber
|
Numeric
|
4
|
|
PurchaseOrderDate
|
Date
|
8
|
|
BalanceDue
|
Numeric
|
8
|
|
CurrentCycle
|
Numeric
|
4
|
|
ReceivableOneDateEnd
|
Date
|
8
|
|
ReceivableTwoDateEnd
|
Date
|
8
|
|
ReceivableThreeDateEnd
|
Date
|
8
|
|
CollectableOneDateEnd
|
Date
|
8
|
|
CollectableTwoDateEnd
|
Date
|
8
|
|
CollectableThreeDateEnd
|
Date
|
8
|
|
AccountPaid
|
Boolean
|
1
|
|
|
The accounts payable table here doesn't quite server the same purpose. A company has no need to collect itself if the bill isn't paid in time. It's up to the supplier to do that. The role this table plays is to make sure
that your supplier doesn't need to try to collect the account. Think of it as an agenda where you decide when to be notified that a payment should be made and just a helper tool for the company to maintain good relations with
it's suppliers.
One accounts payable per purchase order is all that's needed. The cycles typically are the same as accounts Payable to indicate how quickly purchase orders are paid or "should" be paid.
|
Purchase Order Management:
Purchase orders are to suppliers what invoices are to customers. What this means is that the structures are quite similar to the invoice tables. THese are kept in different tables
however because suppliers are not customers. You can however base your definitions on the invoicing tables. You'll need a purchase order header table and details (for all the products
that you'll be buying from your supplier on that particular purchase order. When you receive your order, it will usually come with a packing slip that states exactly what you have received. You can
use that to confirm products and quantities against your purchase order to make sure that you received everything that you ordered: Let's then define the Puchase Order tables as per our discussion:
|
PurchaseOrderHeader
|
|
Field Name
|
Type
|
Length
|
|
PurchaseOrderID
|
Numeric
|
4
|
|
PurchaseOrderDate
|
Date
|
8
|
|
SupplierID
|
Numeric
|
4
|
|
PurchaseOrderTotal
|
Numeric
|
8
|
|
SalesTaxRate
|
Numeric
|
8
|
|
SalesTaxAmount
|
Numeric
|
8
|
|
GrandTotal
|
Numeric
|
8
|
|
IsPaid
|
Boolean
|
1
|
|
|
Like the invoice header table this is all the relevant information you need to
know about a purchase order. Like invoices, Many tables will relate to this one to give a precise
history of what happened with a given purchase order.
|
|
PurchaseOrderDetails
|
|
Field Name
|
Type
|
Length
|
|
PurchaseOrderID
|
Numeric
|
4
|
|
DetailID
|
Numeric
|
4
|
|
ItemNumber
|
Numeric
|
4
|
|
Quantity
|
Numeric
|
4
|
|
LineTotal
|
Numeric
|
8
|
|
IsTaxable
|
Boolean
|
1
|
|
|
And that's it, these fields are all that's needed. With these fields you can defined what you are buying and how much of it. Of course
more than one detail line can and will exist for each purchase order.
|
NOTES AND CONSIDERATIONS:
As you can see here, from 5 fairly small paragraphs we defined in the "Domain Specific Knownledge" section we've been able to define no less
than 16 specific tables. The art of creating a database definition from simple paragraphs like these is where the domain specific knowledge really
comes in handy. Of course, there's a couple more tables that could be defined here to give more functionality to the whole system. We could add
PaymentType to the purchase orders and the invoices to help determine the sales / payment types ratios and such. there's plenty more little accessories
tables that could be defined just to help bring things together even more than they are now. But that would overcomplicate this document with no particular
purpose. It's just important to know that these 16 tables will typically always be what you need and
with the proper relationships estables you'll be able to get some very useful information about the company and how it's running itself.
For example, starting from the products you can get a list of who and when the product was sold (hence if the product is popular enough to keep it in the
inventory). If you add the dates these products were bought into the equation you can see if there are seasons (times of year) where it's best to make sure
you have that product handy to make sure you can supply the demand. These (and many other) database tricks can really help a business know what's going on
as well as what is likely to happen. This can greatly help a business be prepared for anything that could happen.
If you don't know what fields to include in the tables or which tables you'd need you can refer back to this document. But another well known method is to
sit down with the company and ask the questions you need. No company will not cooperate when it comes to making sure their software does what they need it
to do. You just need to ask all the questions you have to make sure that you can provide the best possible solution. Good communication is the key here.
AND TO CONCLUDE THIS SECOND INSTALLMENT:
And there you have it, the second installement is now completed. There was alot of grounds to cover here so I definitaly hope that I was clear enough. If not, you know
what you can do, email me and I can details things alot more than this. The important thing to grasp here is that there is alot of detail and effort to put in a database
design. You need to think about what you are designing and what that design needs to allow in terms of information and what will be done with that information. If you
stop to think about it you can see that a bit of common sense often helps in determining the information and what to do with it.
In the next installement, I'll teach you SQL itself. We'll learn SQL as it is implemented in the MySQL database system. We'll take the tables we defined here and
see how we can create them and how we'd be using SQL to create the tables, add, update and delete records from the table as well as some querying to allow us to find
the information we want to display back to the user. With this we'll cover all the SQL you'll need to know to take care of a whole database system of tables. It will be
another big one but I'll do my best to be concise and to the point. So until the next installement, happy reading and coding.
MystikShadows
Stéphane Richard
srichard@adaworld.com
Download a copy of this tutorial: databasedesignparttwo.html
Final Word
So that's it for another issue of the WILDLY SUCCESSFUL, CRITICALLY ACCLAIMED issue of QB EXPRESS MAGAZINE!!!!
(ahem)
But anyway, I sure hope you enjoyed it!
Now to business: This issue happens to be the last issue that I'll be able to put together over the summer (when I have, essentially, infinite time). College classes start again next Wednesday, and after that, my free time will go from "a lot" to "almost none at all". I've once again committed myself to way more clubs and groups and classes than I can possibly handle (including producing my own cartoon show), so the pressure's on. It's really important that YOU contribute stuff to the next issue. I'm especially hoping for some help with the QB/FB News Briefs section. All you have to do is write up a short summary of anything "newsworthy" you see in the Qmunity, and send it on in. It would help immensely. Also, make sure you check out the QB Express Article Requests Thread. Whether you'd like to write an article, or you just want to request a topic to be covered in an upcoming issue, we want your feedback!
I suppose that's all for now. Next month's deadline: September 15th!
Until next time...END.
-Pete
Copyright © Pete Berg and contributors, 2005. All rights reserverd.
This design is based loosely on St.ndard Bea.er by Altherac.